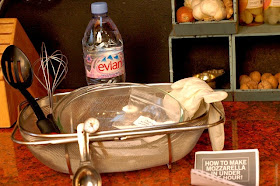
Since this is my very first time, I am hardly one to give tips or a recipe. I can say that mozzarella is pretty easy to make, even if it takes longer than 1 hour to do it. There are just a few steps and very few ingredients. Even if you screw it up like I did, you end up with something pretty darn yummy. So here are some pictures of the process. Once I've had a couple more tries, I'll try to post something slightly more informative...
Here are the assembled tools. Note the Evian. Nothing but the best for my first cheese.
Here are my assembled helpers.
Dissolving the rennet and citric acid in water.
Stirring it up. This was pretty much all the boys were able to do, unfortunately. The stretching is the most fun, but it's so darn hot and you have to work fast!
Pouring the milk from the bottle into the pot.
Realizing the first pot is too small...
Pouring the milk from the pot into a bigger pot...
Then I dropped the thermometer into the pot.

You can see on my hand what the beginning curdling process looks like. Just a few more degrees after this, it was time to add the rennet.
This is after the addition of the rennet and subsequent heating.
And this is what the curds look like just as you are about to let it rest. I know. Mouth watering.
Surveying the progress during the resting period...
It's not a pretty process...
(Note the sexy lighting umbrella... The joys of living in the pit of darkness that is the Pacific Northwest in the winter time...)
Draining the whey away.
First knead.
The point of all the kneading is to squeeze out all the whey. I am familiar with this process from butter making, though with butter, you do it under water and it's called "washing."
You heat the cheese in the microwave for a minute and knead it again to get more whey out. Then you heat it for 30 more seconds and do it again. Gotta get that whey!
Then you add yer salt and commence ta stretchin'. This is where I screwed up. I should probably have stopped at this point in the stretching process, but not knowing any better, I did it a few times too many.
Also, since I let my little one add (read "dump") the salt in, I was trying to knead it into the rest of the cheese. I ended up with over kneaded bits mixed with under salted bits. This is just my lack of experience, but I think will be easily remedied next time.
Because I didn't want to eat it hot, I gave it an ice bath per the directions.
And Huston, we have cheese!
Review:
If I had read the dang instructions better it would have been a better experience. But even still, it was easy and fun and the cheese turned out extremely edible. I actually have everything I need to make this except the rennet already in my cupboard. Don't ask me why I bought the citric acid, I have no idea. So once this kit runs out, I can foresee myself making this for years to come.


You are a cheese making machine! It actually looks really good, Brooke--I'm so impressed. That last pic of the stretching of the cheese looks soooooo good. Makes my mouth water. And those are some pretty cute little helpers :)
ReplyDeleteI know, right? =) They're good helpers, too!
ReplyDelete1) I **LOVE** your "D'oh" face picture. :D
ReplyDelete2) Now I wanna make cheese. Except Thing 2 is lactose intolerant and will be pretty pissed off.
Pump 'em full of lactaid and get cheesy! =)
ReplyDeleteI BETTER see a Brooke creation for my V-day Contest!!
ReplyDeletehttp://forkandbeans.wordpress.com/2012/01/06/3048/
(see the video at the bottom for instructions)
YOU WILL DO INCREDIBLY! xo And did I mention that you can win money??
I love this post! I have made that face many a times, attempting something new in the kitchen. You captured an essential part of the cook's life!
ReplyDeleteHaha! Thanks, Eileen! I'm glad I'm not the only one! =)
ReplyDeleteYour cheese looks terrific, and I love all your photos! Thank you for documenting your experience so well...I've only made ricotta and have mozzarella on my list to try. You are inspiring me!
ReplyDeleteThanks, Hannah! Let me know how it goes!
DeleteWhat a fun and clever blogger you are! :)
ReplyDeleteCheese, Gromit! A spot of Wensleydale next, perhaps?
Thanks, Cindermouse! We love Wensleydale, but we prefer moon cheese around here... =)
Delete