Last year I did a post on canning using traditional metal canning lids. I mentioned then that there were some reusable lids on the market and I wanted to try them. My main reason for canning tomatoes is that the regular metal cans in the market have BPA sprayed all over the inside and acidic foods are supposed to be the worst for releasing the toxins. I haven't been able to find any jarred tomatoes anywhere I normally shop, so I thought it'd be easier and less expensive to can my own. I canned 20 pounds two years ago, 40 last year, and am shooting for 80 this year. I... uh... use a lot of tomatoes... Imagine my chagrin at finding out that the metal canning lids also have BPA coatings as well! That clinched it for me to try the new lids. I have canned pickles, jam, and now tomatoes with Tattler Reusable Canning lids and they are extremely easy to use. I haven't had them long enough to speak to longevity and food spoilage but strictly from a canning standpoint they are nearly as easy to use as the metal ones and I feel glad I'm producing a safer product for my family. Plus, they're made in the USA, and who doesn't love that?

(I have very patriotic tomatoes)
When it comes to canning recipes, I don't think it gets easier than tomatoes. Peel them, add lemon juice, put a lid on it. Pretty simple... The Tattler lids are safe for both pressure and boiler canning, but tomatoes only require boiling.

These are "sauce" quality tomatoes. I get them from one of my favorite Farmer's Market vendors, Garden Treasures. Being sauce quality, they may have bruises or cracks, odd shapes, or may even have a touch of mold. (Especially when you do like I do and let them sit on the kitchen floor over night...derp) Since they're not display quality, you can often get them for less. They still taste great, but usually they're nothing to write home about looks-wise...

After washing the tomatoes, cut out the core, sever any imperfections, and slice an X in the bottom of the tomato.

Pop them in the oven under a broiler.


Meanwhile, begin heating your canner on the stove. Submerge the jars, lids, and rubber rings and bring them almost to a boil.

When the tomatoes reach this stage, they're ready.

Once they have cooled a little, you can peel the skins off easily.

You can pack them whole or make sauce, but I prefer to chop them quickly and pack them "raw" though they have cooked a bit from the broiling.

Add a tablespoon of lemon juice to the bottom of each pint jar. Two for a quart.

Pack the tomatoes. You can either use boiling water or juice to fill it in. The tomatoes produce so much juice, I prefer to use it.

If you're going to use the juice, you need to process the tomatoes for longer. (Hot water- Pint 40 minutes, Quart 45 minutes. Tomato juice-85 minutes for both quart and pint.)

Run a knife down the side of the jar to release any bubbles. Check head space. This jar is too full and I pulled a couple of pieces out.

Clean off the edge of the jar.
*****
Up until now, all these steps are what you use to do any canning. Here is where the difference comes in.
*****
Up until now, all these steps are what you use to do any canning. Here is where the difference comes in.

Put the rubber gasket on the edge of the jar.

Put the lid on the jar.

Or you can put the gasket on the lid and then put the lid on the jar.

Then put the metal ring on. This is the most important step. Unlike metal lids, you cannot put the ring on too tightly when using the Tattler lids. I put them on just until it grabs tightly, but not until it's fully tightened. Tattler calls it "fingertip tight" in the instructions. Another way to try it is to tighten it up completely and then loosen it about a quarter inch. These lids need some space to vent while processing.

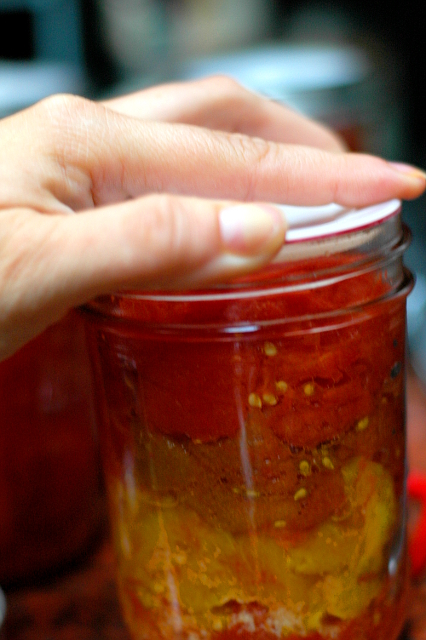
Once they've come to room temp, check the seal by removing the metal ring and trying to pry the top off with your fingers. It will just come right off if it hasn't sealed. If this happens, check the jar for cracks and rubber gasket for debris, put the lid back on and process again for the prescribed time. This happened to me with the jam and pickles on a couple of jars, but all of these tomatoes sealed! Store with the metal rings on or off. I like to leave them so I know where they are to keep the lids on when I open jam or pickles for refrigerator storage.
I'm not gunna lie. The first time I tried to open one of these, I spilled a hefty amount of tomatoes on the counter. You are supposed to pry the top off with a butter knife, but you have to be careful and not pinch the rubber gasket because if they rip you can't use them. It was a sexy thing to do, I know. They do sell an opener but I'm going to try it again a few times before I add another gadget to my bulging utensil drawer.
I'm not gunna lie. The first time I tried to open one of these, I spilled a hefty amount of tomatoes on the counter. You are supposed to pry the top off with a butter knife, but you have to be careful and not pinch the rubber gasket because if they rip you can't use them. It was a sexy thing to do, I know. They do sell an opener but I'm going to try it again a few times before I add another gadget to my bulging utensil drawer.


The only thing I don't absolutely love about these lids is that it's hard to make them stack totally straight. This is a little dramatic for photography purposes, but they really don't stack very "firmly." Other than that, these lids are a breeze. They come in standard and wide-mouth sizes. They do not come with the metal rings, but if you're like me, you got rings when you bought your jars. Otherwise, they are readily available at grocery stores and even hardware stores!
For those of you who missed my Canning Primer last year or who would like a little refresher on the tools and the types of canners, here's a link!
PS, Tattler has not paid me for this endorsement. They don't know me from Adam.
For those of you who missed my Canning Primer last year or who would like a little refresher on the tools and the types of canners, here's a link!
PS, Tattler has not paid me for this endorsement. They don't know me from Adam.

Wow, thank you for your step-by-step guide! Your photos are so helpful, too. And now you have a pantry full of tomato goodness! Woohoo!
ReplyDeleteHave you tried canning yet since last year? You can find Tattler lids at McLendon's around here, btw.
DeleteNo, haven't tried it yet - still doing the small batch fridge jams and pickles. My problem is space...don't know where I'll keep the jars! I have an extra fridge in the garage so have plenty of space for the quick jamming/pickling or freezing. I have a closet I'm thinking of clearing out and putting shelves in so that may be the answer!
DeleteMy kitchen space is pretty limited, too. Fortunately, the tops of my cabinets have enough head space to put a good quantity of jars. I keep a couple in the pantry, then pull down more as needed! =)
DeleteYour photos are so beautiful, wish I had those tomatoes sitting in my pantry :)
ReplyDeleteThanks, Sarah! I'll trade you one for a jar of applesauce!
Delete