Showing posts with label breads. Show all posts

Friday, November 7, 2014

Fork & Beans Give Away!!

 Gluten-free vegan cornbread

     My friend, Cara Reed, at Fork & Beans is well known to my regular readers as the genius who converts my Christmas cookies every year for those who can't have gluten.  I am so happy to announce that her first cookbook Decadent Gluten-Free Vegan Baking is out and rocking!  Besides all her fantastic recipes, this book contains lots of tips for egg substitutions, two gluten-free flour recipes, lots of sauce and toppings, too!  Oh.  And gluten-free and vegan Girl Scout Cookie replicas.  You heard me.  Lucky, lucky you!  She has allowed me to share one of the recipes from her book and give one of you a free copy!  Since we're getting into soup season around here, I thought I'd share a cornbread perfect for pairing with soup, chili, or just a tall glass of (dairy free) milk.  Gluten-free Thanksgiving stuffing, anyone?  Cara also suggests adding jalapeƱos, canned chilies, or vegan cheese to mix it up a bit.

Gluten-free vegan cornbread

Stone-Ground Cornbread

Makes 8 slices

DRY
1 c/165 g Cara’sAll-Purpose Blend (page 166)
1¼ c/153 g stone-ground yellow cornmeal
½ c/100 g granulated sugar
3 tsp/11 g baking powder
½ tsp salt

WET
3 tsp/9.5 g Ener-G Egg Replacer plus 6 Tbsp/90 ml water, whisk until frothy (I used Cara's chia seed substitution on p. 172)
1 c/120 ml nondairy milk
4 Tbsp/56 g vegan butter (I used Earth Balance Coconut Spread that I melted in the microwave.)

Preheat oven to 400°F/ 200°C and grease an 8–inch/20-cm round pan.

Combine the dry ingredients in a medium bowl. Make a well in the center and pour the wet ingredients into the well. Mix until just combined. Pour batter into the greased pan and bake for 20 to 25 minutes until the top is lightly browned.

Drown in nondairy butter.

Review:

My whole family liked this!  Even my youngest who doesn't like cornbread.  It's sweeter than what we normally make, being Southern and all, but the flavor and texture are nice and my husband said, "It doesn't taste gluten-free at all!"  My eldest said, "It's sweeter and butterier than normal."   Considering there's no butter in it, I'd say that was a pretty good endorsement!

Decadent Gluten-Free Vegan Baking: Delicious Gluten-, Egg-, and Dairy-Free Treats and Sweets Give Away
Who wants to win this?!  I know it's you.  Whether you're making the switch to gluten-free, cooking for gluten-free friends or relatives, or maybe you want to give this as a Christmas gift.  Now's your chance to win!  Just leave me a comment below or on facebook and you will be entered.  Last day for entries is November 20th by 5pm PST and the winner will be announced November 21.

Sunday, April 6, 2014

Hawaii Homeschool and a Little Bread

Apologies in advance.  This is a little heavy on the homeschool, but there is a delicious treat in the end...


     We're on our way to Hawai'i again soon.  Don't hate me because I'm beautiful.  Hate me because I'm going to Hawai'i without you again.  But don't worry, I've got a way for you to have a little taste of Hawai'i's bounty in your own kitchen.  I have been avoiding sugar for about a month because I read a bunch of Internet junk about probiotics and gut flora and sugar monsters.  It's been a pretty fun experiment, actually.  So I endeavored to make a cake that 1) featured Hawaiian food, 2) didn't fail like my Internet-famous last experiment, and 3) didn't have any sugar in it.  What resulted was a great bread, not really a cake, but totally snarfable with a little butter.  Honey optional.


     But first, for all my homeschool Mamas out there, I revamped our Hawaiian unit because I found such great resources about Kauai, the island we're visiting this year. 

     I based our studies around a workbook I found on Amazon called Holoholo i Kauai.  There are lots of pages with interesting facts, but I found two of the pages required you to know the fables of how certain geographical features came to be, and I didn't know how the stories went!  There are many different tales apparently about each feature, but they all have similar basis.  One story is about how NouNou mountain came to be.  It looks like a giant lying on his back.  I found this nicely illustrated version on Amazon: The Sleeping Giant.  I also found several stories online, which lined up a little better with what went with the workbook version.  The other story in the workbook is about the Spouting Horn blowhole.  Teller of Tales, Stories from Kauai was a great resource for this study with three stories, one about the blowhole and two about the Menehune (another page in the workbook).  Again, the story in the workbook doesn't quite line up with the story from the book so I supplemented with online material.  I used the discrepancies to illustrate oral tradition and storytelling embellishment but we talked about how the stories had many similarities, too.

Two-week Kauai Study Unit for 5-8 year olds

Day 1: Read Legend of the Sleeping Giant, HawaiiWeb and GoHawaii and do p. 2 of Holoholo i Kauai
Day 2: Learn Hawaiian State Symbols and do Holoholo p. 3
Day 3: Read Yesterday's Rain, Holoholo page 4
Day 4: Watch Crash Course in World History #27 on You Tube and do p. 12
Day 5: Study Wailua River and do p. 19
Day 6: Read Teller of Tales, Stories from Kauai stories The Ale Koko Fishpond p 248 and The Ditch the Menehunes built p 97 and do p 13
Day 7: Learn about Wimea Canyon and do p. 16
Day 8: Hawiian Word Book pg 28-29 do pg 9 and 14
Day 9: Read Teller of Tales, Stories from Kauai p 208 HawaiiWeb and GoHawaii and do p. 10
Day 10: Review landmarks discussed and show on a map.  Holoholo means an aimless walk for pleasure.  Walk your fingers around the map to all the places you have learned about!

Supplementals:
Amazon Videos about Kauai (Free for Prime Members)
Passport to Adventure: Kauai Hawaii's Garden
Travel with Kids Hawaii: The Island of Kauai

Music:
Putamayo Kids Hawai'ian Playground

We also watched Jurassic Park and Raiders of the Lost Ark since large portions of them were filmed on Kauai, but I must say, Raiders is a little much for my two.

There is so, so, so much more to see and learn about Kauai!  I've got lots more landmarks listed on my Kauai Pinterest Board.  I hope we can see at least half of them!

If you want to see my other units on Maui, and the Big Island, they are not as detailed, but available for all to see.  Don't forget to check out your library to see how many of these resources you can find there!


And now... finally... the Bread...


Kauaian Coffee Bread
3 C flour
1 T baking powder
1 t baking soda
1/2 tsp salt
3/4 C sour cream or plain yogurt
3 eggs, separated
5 T melted and cooled coconut oil + more for greasing
2 pureed bananas (1 C)1/2 C cooled Kauai coffee (available at Trader Joe's)
1 C minced dried pineapple (no sugar)
1/2 C chopped macadamia nuts
1 T lemon zest (optional)
1/4 C coconut chips (no sugar)


     Preheat oven to 350°.  Grease two loaf pans with coconut oil and dust lightly with flour.  In a large bowl, whisk together flour, baking powder, baking soda, and salt.  Stir in oil, egg yolks, sour cream or yogurt, bananas and coffee.  Stir in nuts, pineapple, and zest. Whip the egg whites until stiff peaks form.  Slowly fold egg whites into batter.  Divide evenly between the pans and sprinkle the tops with coconut chips.  Bake for 45 minutes or until a toothpick removes cleanly.  If the chips get too brown, cover with some foil.  Let cool briefly, then run a knife around the bread and turn out onto a cooling rack.


Notes:
You can also make this batter into muffins.  I think each half would make 10-12, so you aught to get about 24 total.  Bake for 15 minutes.
Review:
My kids actually love this.  It's kinda crazy.  It's not super sweet so I didn't think they'd go for it.  My youngest won't touch a regular muffin with a 10 foot pole (go figure, right?) and he begged me for these.

Thursday, February 13, 2014

Love Muffins...


     I never buy strawberries this time of year.  They're gross, flavorless, and grown in another country.  However, the other day I was at a store and saw a beautiful display of berries.  They smelled so good.  They called to me in their foreign accents.  They promised sweet kisses and healthy indulgence.  When I got them home and washed them off what they actually delivered was a tender mixture of almost bad and not quite ripe.  I'm not sure how that's even possible.  One of my kids said they tasted like oranges the other said they tasted like nothing, but the overall impression was that they had lied to me the way most off-season produce does: Enormous, Cosmic Promises, itty-bitty return on investment.

     Fortunately, I know what to do with lying fruit: give it a little sugar.  These muffins are a great addition to breakfast for your sugar on Valentine's day, too!


Strawberry Orange Muffins

3-4 C cubed strawberries
1/2 C sugar
1/2 tsp cinnamon
1 C white flour
1/2 C wheat flour
1 1/2 tsp baking powder
1/2 C sugar
1 egg
1/4 C oil
zest of one orange

Coat the cubed strawberries with the sugar and cinnamon and let sit for 1-8 hours.  Preheat oven to 350° and line about 16 cupcake tins with paper liners.  Combine flours, baking powder and sugar.  Add egg, oil, strawberry mixture (including any liquid that has released) and zest.  Stir till well combined.  Portion out into cups and bake for about 18 minutes or until a toothpick comes out clean.


Review:
These are so simple to make, you can whip them up for your Valentine in no time.  The orange really accents the strawberry well.  I like them warm or cold and so does my family!

Thursday, December 5, 2013

12 Days of Christmas Treats Day 4: Panettone

     My husband and I, like many people, aren't the biggest fans of fruitcake.  A few years ago, we bought a panettone at Costco one Christmas.  It was the yummiest white bread we ever had with a tiny bit of dried fruit.  The heavenliest, softest, perfectest fruit cake ever invented for infinity.  Cut a piece off, put it in the toaster and slap a little butter on it.  Best breakfast in the entire world.  It never even occurred to me to make my own until I saw panettone papers in a specialty shop.  The angels above opened their heavenly throats and warbled a melodious tune.  Or maybe that was me singing to myself in the baking row.  Only the security cameras can tell for sure.  I found this delicious recipe for panettone on King Arthur Flour.  I modified the fruit amounts somewhat and have adjusted the cooking time to make some mini panettones for sharing!  This recipe uses a biga, which is a quick, overnight starter culture, it helps develop the flavor of a good dough.  Trust me, the extra time is worth it.


Mini Panettone
Yield: 8

Biga (Overnight Starter)
3/4 cup King Arthur Unbleached All-Purpose Flour
1/16 teaspoon yeast (just a pinch)
1/3 cup water

Dough
all of the biga 

2 1/4 cups King Arthur Unbleached All-Purpose Flour
1/4 cup warm water
2 large eggs
1/4 cup unsalted butter, softened
1 1/4 teaspoons salt
1/4 tsp vanilla extract
1/8 tsp orange extract
1/8 tsp lemon extract
2 1/4 teaspoons active dry yeast OR 1 tablespoon instant yeast
1/3 cup sugar
1/2 cup golden raisins
1/4 cup chopped dried apricots
1/4 cup dried currants
1/4 cup chopped dried pineapple
1 tablespoon orange zest
1 tablespoon lemon zest
The Biga: Combine the biga ingredients in a medium-sized mixing bowl, cover, and allow them to rest overnight (8 to 12 hours).

Dough: Combine all of the dough ingredients except the fruit, and mix and knead them together—by hand, mixer or bread machine—till you've made a soft, smooth dough. Allow the dough to rise, covered, for 1 to 1 1/2 hours, or until it's puffy (though not necessarily doubled in bulk). Gently deflate the dough, and knead in the fruits and zest.

Divide dough into 8 mini panettone cups.  Place cups on a baking sheet and cover with a sheet of plastic wrap.  Let the dough rise till it's just crested over the rims of the cups.  (It took mine three hours, but it could take much less time if your house is warmer than mine...)

Bake the bread in a preheated 400°F oven for 5 minutes; reduce the oven heat to 375°F and bake an additional 5 minutes; then reduce the heat to 350°F and bake for 10-15 minutes, tenting with aluminum foil if the crust appears to be browning too quickly. Remove the panettone from the oven and cool completely.  You'll know they're done when you thump the bottom and it sounds hollow.


Review:
This is great with mulled orange juice or a cup of coffee.  My kids aren't big fans, so this might be a more adult recipe.  I don't know about you, but I'm OK with that.

Monday, December 2, 2013

12 Days of Christmas Treats Returns!! Day 1: Crackers?!


Hi Guys!!!

     Welcome back to the 12 Days of Christmas! This year, I'm branching out of just cookies, and giving you some more savory treats for your cookie tray. There will still be cookies, so don't worry, but today I thought I'd start with a cracker. About time a blog called “Crackers on the Couch” included a cracker recipe, wouldn't you say? I'll be using these crackers a few times during this series, so make a bunch and keep them in an airtight container. (If they get a little soggy, you can crisp them in the oven at 400° for about 4 minutes.) This recipe came from Crackers and Dips: More than 50 Homemade Snacks by Ivy Manning. Bear with me, this looks like a crazy complicated recipe, but it's actually really simple.

Homemade Ritz Crackers

Recipe:
Yield: 50 crackers
4 Tbs chilled unsalted butter
2 C unbleached all-purpose flour, plus more for rolling
2 tsp baking powder
2 tsp sugar
1 tsp fine sea salt
2 tsp barley malt syrup* or dark corn syrup
1 Tbs vegetable oil
½ C water
1 egg beaten with 1 Tbs water
1 tsp kosher salt

*You can find barley malt syrup (a.k.a. barley malt extract) at beer making supply shops. You may have to buy a bunch of it, but it really does help add to the authentic flavor of these.  You can also find it on Amazon from several sellers.

Cut the butter into ¼ inch chunks and place in the freezer while combining the dry ingredients. In a food processor or large bowl, combine the flour, baking powder, sugar, and sea salt and pulse or whisk to combine. Add the butter and pulse or cut the butter into the flour using a pastry cutter or your fingers until the butter is in tiny pieces and the mixture looks like coarse cornmeal, about 15 one-second pulses.

In a small bowl, whisk together the barley malt syrup, vegetable oil, and ½ C of the water, stirring to dissolve the malt extract. Gradually add the water mixture to the food processor or bowl, pulsing or mixing with a wooden spoon to combine. Gather up the dough into a ball, flatten into a disk, cover in plastic wrap, and chill for at least 1 hour and up to 2 days.

Preheat the oven to 400° F. Line two baking sheets with silicone baking mats or parchment paper. Roll the dough out on a lightly floured surface until it is 1/16 inches thick, picking up the dough occasionally and rotating it to make sure it's not sticking to the work surface. Using a round scalloped cookie cutter, cut the dough into 2 ½ inch rounds; reserve the scraps.

Fill one baking sheet with crackers, spacing them about ½ inch apart. Brush the crackers lightly with the beaten egg and then prick the crackers several times with a fork (a spoke pattern adds visual appeal). Sprinkle the crackers sparingly with some of the kosher salt and bake for 4 minutes; rotate the pan from back to front. Reduce the oven temperature to 375° F and continue to bake until the crackers are light golden brown and firm to the touch, about 8 minutes. Transfer to a cooling rack.

Return the oven temp to 400° F and repeat the process with the remaining dough and scraps, baking the crackers one baking sheet at a time.

Review:
These are a nice cracker! They taste very much like Ritz crackers, but without all the extra garbage associated with a store-bought snack.  Hope you guys are as excited as I am for this years 12 Days of Christmas Treats!

Friday, April 12, 2013

Snacks on a Plane...

     In getting ready for our trips, one of the biggest bags I pack is the snack bag.  It started when the boys were little and couldn't make it for 10 minutes without eating something.  Now that they are older, of course, they can't go 5 minutes...  Because meal service isn't until the flight is in the air good and proper, it surely helps to have some goodies for the boys to occupy themselves with. 

     One thing I pack every single time is hummus.  It doesn't need refrigeration, it's yummy, it doesn't smell too much, it's vegetarian, and relatively healthy and filling.  The carrot sticks and pita bread triangles, make it a quick meal with no utensils necessary.  Find my go to recipe here.  This trip, I'm also packing freeze dried bananas and rice cakes for a quick crunchy diversion.  Pirate's Booty is an absolute must for us every flight.  It's virtually the only time I buy it and the boys look forward to it every time.  That nifty green and orange container there is full of homemade yogurt.  You Moms out there all know how many cool things come in pouches now, and I found these awesome refillable ones by Boogin Head on zulily a few months ago.  I use them for applesauce, pear sauce, yogurt, hummus, even egg salad!  And last but not least, my friend Lauren turned me on to these beautiful chocolates from Trader Joe's which contain nothing but dark chocolate, honey, and peppermint oil.  Hello, darling, let me lick you...

     Another thing I do before every flight is make muffins with whatever fruit I've got leftover in the fridge.  This time, I didn't have really any fruit spoiling, but I had a large bag of mushrooms starting to look pretty pitiful in there so I decided to try a savory muffin instead.  These things are something else, folks!

Savory Mushroom and Olive Muffins
Yields 11 muffins
1 C Whole Wheat flour
1 C Unbleached White flour
1 tsp. Baking soda
1/2 tsp Salt
1/2 C Skim milk
3 Medium eggs (or 2 large)
1/4 C Vegetable oil
1 C Diced mushrooms
1/4 C diced onion
1/2 tsp Finely chopped rosemary
4 tsp Chopped olives
3 Garlic cloves, pressed

Line a muffin tin with paper cups.  Preheat oven to 400 degrees F.  Whisk together dry ingredients, then add eggs, oil, and milk.  Stir until combined, then add remaining ingredients and stir until well incorporated. Use an ice cream scoop to transfer batter to liners. Bake for 10-15 minutes or until a cake tester comes out clean.

Review:
I never thought in a million years the boys would like these.  My youngest won't touch muffins with a ten foot pole, usually.  They loved them!!  My husband wished there was a little more salt, but I say that's nothing a little butter can't fix.  Still, if you're going to be on an airplane where butter isn't readily available, perhaps doubling the salt wouldn't be a bad idea.

Thursday, March 7, 2013

Who Will Help Me Make the Bread?

     Ahhh... The Little Red Hen.  The age-old tale of hard work, determination, and comeuppance.   And wheat multiplication of Biblical proportions.  But it's a shame the other animals wouldn't help that sassy little hen.  They missed out on an authentic farm to table experience! 


     My youngest helped me today, not because my eldest said "Not I," however.  Poor guy was sleeping off a fever.


     I used my Mom's bread recipe to make rolls.  I substituted honey for the sugar and it was great!


Iron Man takes baking very seriously. 


     I made the recipe as usual, subbed honey for the 1/2 C brown sugar and after the punch down, I divided the dough into 16 pieces.  For the second rise, I put them in a deep dish pizza pan.  It's OK if they touch a little bit.  I cooked them for 10 minutes at 375° and then about 45 at 350°.

     These are especially good with Chicken Soup with Rice!

Wednesday, April 4, 2012

It's Passover Time Again...

Aaaaannnd... I'm still not Jewish.  But I have a special place in my heart for the Jewish people and traditions, especially Passover.  The Seder meal is one of the most beautiful things I've ever been involved in.  So much tradition and symbolism...  It's lovely.  *sigh...* 


Matzoh bread is extraordinarily simple to make ingredient-wise, for obvious reasons.  If you want to make them super duper kosher find directions at ehow.

I got this recipe online years ago, but it apparently originally came from this book.


Homemade Matzoh
2 C all-purpose flour
1 C whole wheat flour
Spring Water

Preheat oven to 450°.  Line 2 large baking sheets with parchment paper.  Mix the flours together.  Add water till you have a soft kneadable dough.  Knead about 5 minutes.  Let rest 2 minutes.  Break off an egg-sized portion of dough.  Stretch as thinly as possible before rolling into oval slabs that are as thin as possible.  Prick each slab with a fork.  Place on baking sheet and as spoon as sheet is filled, placed in oven, and bake until crisp and buckled, about 3 minutes.  Cool and eat.

Wednesday, March 21, 2012

Finally, Some Followthrough Around Here!

     Ohhhh.... Long about September of last year I promised I'd share a gluten-free cornbread with you guys.  I reckon it's about time I posted it, huh?


     I like Bob's Red Mill Gluten-Free mix because it's a non-intimidating way for gluten gluttons, like myself to ease into the gluten-free world for friends without having to fiddle around with math and science.  I imagine gluten-free bakers as wild-haired chemists in lab coats gleefully chortling over beakers filled with guar gum and buckwheat flour.  They look pretty cool, actually...  Mostly, my wild-haired self chortles over butter and various forms of garlic.  Not much chemistry there...

     The flour mix works better for some things than others.  It can have a strong, bitter taste sometimes.  But in a recipe like this, where there are equal parts flour and cornmeal, it does a fantastic job of filling out the muffins while at the same time, not being over-powering...  It's pretty much a straight substitution of my regular cornbread recipe (good gosh, I just realized how many versions of cornbread I have on this blog... maybe I also chortle a little over cornmeal...) but I'll go ahead and post it here anyway.  I baked these in muffin form so they would cook faster, but they are not sweet like most cornbread.  I am from the South where the tea is sweet and the cornbread is not.  They held their shape very well as muffins, I'm not sure how this recipe would perform as an actual full-size cornbread.

Gluten-Free Cornbread
1 C + 3 Tbs yellow corn meal
1 C Bob's Red Mill Gluten-Free flour mix
1 Tbs granulated sugar
1 Tbs baking powder
1 tsp salt
1 C milk
1/3 C vegetable oil
1 large egg, lightly beaten

Preheat oven to 400°.  Line a muffin tin with liners.  Combine corn meal, flour, sugar, baking powder and salt in medium bowl.  Combine milk, vegetable oil and egg in bowl; mix well.  Add milk mixture to flour mixture; stir till just blended.  Pour into prepared baking pan.  Bake for 10-15 minutes or until wooden pick inserted in center comes out clean.

Review:
Absolutely everyone at our dinner party loved this!  No one with gluten issues will feel deprived eating this.  If you do want sweeter cornbread, increase the sugar to 1/4 C and omit the extra 3 Tbs cornmeal.  Just don't tell me you did it, OK?  It might cry a little...

Monday, January 30, 2012

On Valentine's Day Have Cake for Breakfast!


     When Cara over at Fork and Beans announced her vegan gluten-free baking competition, I thought,  "Oh... that's nice..."  Then she requested I enter and behold, I was terrified.  (I love you Cara, seriously, I do, but baking is hard, vegan baking is harder, gluten-free baking is even harder and the "make up your own recipe" thing just totally broke my mind for like a week...)  I suggested heart shaped ice as my recipe.  At one point (while my first trial was baking in the oven) I was still seriously considering it as an option...


     While I was trying to come up with an idea, I ruled out a simple sautĆ© dish right away because, well (besides the fact that it's not baking) it hardly counts as gluten-free unless it would normally have gluten in it, right?  But for a recipe to be truly mine, it needed to be something using local in-season ingredients and it needed to be relatively healthy.  I didn't want to use any chemicals which unfortunately seem to play a large part in commercial gluten-free products.   Xanthan gum in particular is a big one on my "That Just Ain't Natural" list that seems to be in even organic and all natural gluten-free products.

     I live in Washington State.  Things that are local, in-season, and bakeable are precisely: apples (from storage) and Winter squash (from storage).  Ayup.  No sweet little red strawberries, forget about a gorgeous pink raspberry, and watermelon is right out.  So I thought, "Well, what about a butternut squash cake with vegan cream cheese frosting sweetened with maple syrup?"  And that, my friends is what I endeavored to create.  At one point I found a very similar sounding recipe on Gluten-Free Goddess, but hers called for a lot of ingredients I didn't have and it also had eggs in it.  I referenced it a little for ratios, but ultimately came up with a very different recipe.

     The whole "cake" thing didn't really work out.  It ended up as an awesome breakfast bread that we Can't.  Stop.  Eating.  Besides the butternut squash, the hazelnuts are local to us and Bob's Red Mill is technically considered local too I guess, coming from Oregon, though it feels a little like cheating...

Vegan and Gluten-Free Butternut Squash Bread
1/2 C coconut oil (still solid)
1 C Sucanat
1/2 C silken tofu purƩe
2 T cornstarch combined with 2 T water
1/4 C blackstrap molasses
1 1/4 C butternut squash purƩe
2 C Bob's Red Mill All Purpose GF Baking Flour
2 tsp baking powder
1/4 tsp salt
1 t cinnamon
1/2 C chopped hazelnuts
Optional:  You can substitute 1/4 butternut squash with 1/4 C banana purĆ©e.  It makes it taste like banana bread.  My hubby prefers it this way.

If you don't just happen to have a bunch of butternut squash purĆ©e laying around, cut one in half, roast each piece, cut side down, at 450° for about an hour.  Then peel when cool and purĆ©e.  I did this step a few days ahead.  You can also microwave butternut squash in a similar fashion in about 10-15 minutes.  If you make the squash the same day you bake your bread you can also purĆ©e the tofu and banana while the squash is cooking.  The blender worked great for the tofu while I managed to get a great banana purĆ©e from my mini food processor.

Once you have your purĆ©es, pre-heat oven to 350°.  Grease a loaf pan with coconut oil and dust with BRM flour.  Set aside.   In a large mixing bowl, combine coconut oil and Sucanat using the high speed of your mixer until very well combined.  Add the banana purĆ©e (if using), tofu purĆ©e and cornstarch mixture and mix everything well.  Mix in molasses and squash purĆ©e.   Once you have all the wet ingredients mixed with the sugar, begin combining the dry ingredients in a small bowl.  This will give the Sucanat a little time to dissolve. Slowly begin adding flour mixture to the wet mixture about 1/4 at a time.  Add hazelnuts, and mix until just combined.  Pour batter into prepared pan and bake for 60 minutes or until a cake tester comes out clean.


     The result is a warm and comforting moist bread that is perfect just out of the oven for breakfast with a little butter (or whatever substitute you like).  As it cools, it's not as good, but that's nothing a few seconds in the microwave can't cure...  But since this is a Valentine's Day Contest, why not kick it into pretty pink dessert mode with a little pink frosting?

Frosting
2 C powdered sugar
1/2 C Tofutti cream cheese
2 T pure maple syrup
4-5 drops natural food coloring

Combine all ingredients in a small mixing bowl and beat til combined.

I feel the same way about Tofutti cream cheese as I do about mascarpone cheese: It should never be eaten by any human ever unless it's full of confectioner's sugar and resting on top of a cake.  Then it's happiness on a fork.  The natural food coloring I use has beets in it, which gives the frosting a slightly fruity flavor.  I like it. Technically, the powdered sugar I used isn't vegan.  If you're being really careful,  The Vegan Chef has a recipe for DIY vegan powered sugar.

 Isn't that just pretty like a Valentine Princess?

     I hope you all have a lovely Valentine's Day no matter how you start it out.  February 6th is the deadline so there's still time to enter the contest!  It really is much less complicated than it seems!  And three winners receive $75 gift cards to their favorite store!


Monday, November 7, 2011

Give Us This Day Our Whole Wheat Bread...


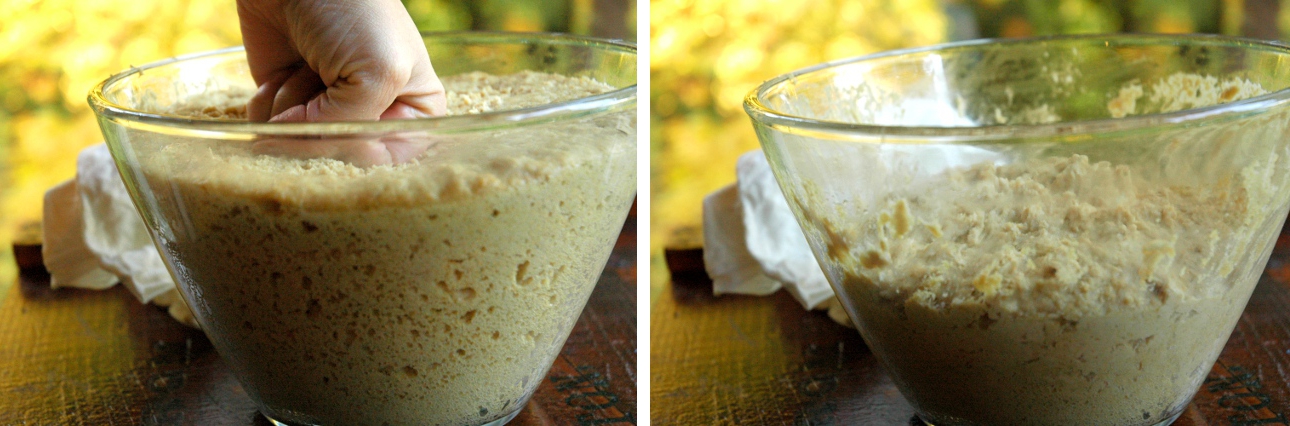
     I love my bread machine.  Like, love it, love it.  It makes me pizza dough.  It makes me garlic bread.  It's even been known to deliver unto me a banana bread or two.  But no matter how hard it works, it will never be able to make my Mom's bread.  It takes real elbow grease and determination to make this lovely stuff.  You just can't compare the final outcome.  Because this recipe takes so long between all the rising and the punching and the baking, I'm giving it to you today.  The bread freezes great, so make it, freeze it, and thaw it out the night before Thanksgiving.  (It also makes two loaves so you can snarf one as soon as it comes out of the oven!)

     This is my Mom's recipe.  She invented it so there are a few quirky little things in there she did more out of superstition than anything else.  For example, to proof her yeast, she used sugar and flour.  You really only need one or the other.  But she wanted to make absolutely certain that hers would rise!  I do it her way because she taught me, and I'm a sucker for tradition, superfluous as it may be...  Also, at the time she gave me this recipe, she was enamoured with PAM Cooking Spray.  You'll see it referenced several times.  When I make it, I use a good olive oil in a pump sprayer, brush melted butter over it, or just omit the step all together, like I did today.  This recipe is peppered with instructions as Mom was dictating and explaining at the same time over the phone.  I removed some and put them in a glossary section at the end so the recipe wouldn't take forever to read for those of you who actually know how to bake bread.

Grammie's Whole Wheat Bread
2 packs active dry yeast (to find the freshest possible, sometimes you have to flip through to the back of the display)
1/2 C water (boil and let cool)
1 tsp white sugar
1 tsp white flour

Put water, sugar, and flour in a bowl.  Stir till dissolved.  Put finger into mixture and count to 5.  When almost burns at 5, add yeast and stir (temp will be between 100°-110° for those of you who are sticklers for science).  Will foam if working.  Foam about 10 minutes in a draft-free spot.  Don't stir any more.

Scald 2 C milk (Milk starts to steam, but before it boils)
1/2 C brown sugar
3 Tbs margerine (I use butter)
3 tsp salt
Add milk to margerine, sugar, and salt.  Mix.  Cool milk mixture to same temp as yeast.  (Stick your finger in it if you want or use the thermometer again.)
3 C whole wheat flour
1 C bread flour (all purpose OK)
Add to milk mixture.  Mix very well.  Will be pretty thick.  Add yeast.  Mix.  Add one or more "optional" ingredients (listed below). 


Mix in 2 more Cups of bread flour.  Knead on floured surface for at least 10 minutes (The more you knead, the better it will be).  When sticky, add flour.  Grease bowl or pan.  Put top of bread in bottom of greased bowl and flip over to grease the dough.  Let rise 1 1/2 hours or until dough has doubled in size.


Punch bread down.


Knead for 2 minutes.  Shape into 2 balls.  Let rest (put bowl over balls for 15 minutes).  Put dough balls onto a greased cookie sheet and spray with PAM (you can also put dough into loaf pans if you like).


 Let rise for another 1 1/2 hours.


Preheat oven to 375°.  Bake at 375° for 10-15 minutes to kill yeast.  Bake another 30 minutes at 350°.  Don't let your oven go below 325°.

Optional ingredients:
1/2-1C wheat germ (toasted honey kind)
1 Tbs nutritional yeast
2 eggs
1/2 C yogurt
wheat berries

Mom also gave me instructions for a quicker method that only involved one rise instead of two.  She called it the "One Punch Way" which is kind of a misnomer since there is no punching with this method, but who'm I to argue?

The One Punch Way:
From first knead.  Divide into 2 balls.  Shape it.  Let rest 15 minutes.  Put on greased sheet.  Spray with PAM.  Then rise 1 1/2 hours.  Preheat and bake.  The difference will be the texture. 


Bread Making Terms (As explained by my Mom and expanded a bit by me):

Proof: To make sure your yeast is fresh, and to dissolve it before adding it to your dough, you proof it by mixing it into warm water with a little sugar or flour.  The yeast eats the sugar and that's what causes the bubbles.  

Rise: Rising means the yeast is working to make the dough puffy.  To make bread rise properly it needs to be out of any breeze, in a warm environment.  You can put your dough in a warm oven, the microwave, or leave it covered on the counter as long as it can stay around 80° degrees.  I am lucky enough to have a warming drawer in my oven with a "proof" setting.  Additionally, to keep moisture in, Mom always covered hers with a clean, warm, damp towel.  Other bakers may tell you to use cling wrap. 

Punch: Literally, punch it down with your fists or push it with your hands.  This will cause a little more gluten to form.  Making the dough rise twice, changes the consitency of the dough, giving it more chew and density.

Other notes:
  • Mom always kept her yeast in the egg compartment of the fridge.  I do too.  It doesn't necessarily have to go in the egg compartment, but it will keep longer in the fridge.  Keep an eye on it though, the older it gets, the less likely it is to rise.  
  • If you do keep your yeast in the fridge, you'll get the best rise if you let it warm to room temperature before trying to proof it.
  • Finally, if you don't already know this, you should never lick your fingers with raw yeast on them.  In other words, don't eat raw bread dough.  You'll get a stomach ache like you wouldn't believe.
Review:
Is there any smell more wonderful than the smell of bread baking in the oven?  I submit that there is not!  This bread is worth the effort, quirky Mom weirdness and all.  Just a tiny bit sweet, it's great for sandwiches or with a meal.  Or try it warm with a little butter and honey.  It'll knock your socks off!

Friday, November 4, 2011

Thanksgiving... It's coming...

     This time of year, Halloween, Thanksgiving, Christmas, it's the time of year most of us Americans snuggle down, bury ourselves in tradition, and hibernate until Spring.  Carving pumpkins, eating candy, carving turkeys, eating pie, carving hams, eating cookies... (Lots of knives and sweets involved, I just realized...)  This is what these few months are all about.

     For me, there are few meals that can compare to the Thanksgiving meal.  It's the only meal of the year that I eat stuffing, much to my husband's disappointment.  It's the only meal of the year that involves cranberries.  Mmmm... cranberries...  And third, it's the only meal of the year that involves cranberries, stuffing, and mashed potatoes all together on one fork.  My fork.  Happiness.

     But I'll tell you something that is not traditional in my house.  I don't like pumpkin pie.  Like, at all.  I do not like it with a fox.  I do not like it in a box.  I do not like it cold or hot.  I do not like it, I do NOT!  I may be deported for this.  But before you get all totally annoyed and offended, I do like to use pumpkin in other dishes.  Like this one:


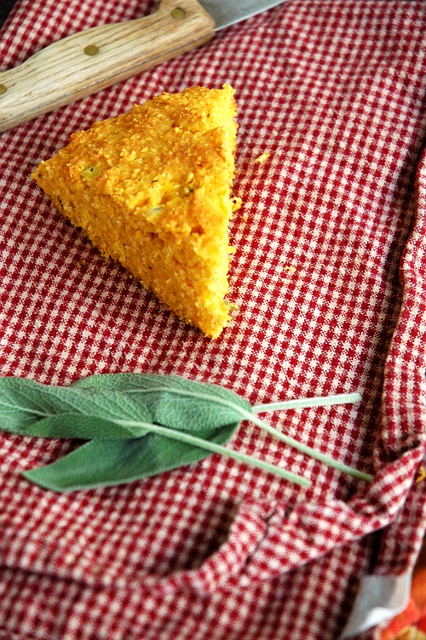
Pumpkin Sage Cornbread.  Oooooh yeah... I got the idea for this a few years ago out of a magazine that is currently floating around somewhere in my house.  I made it two years ago, and promptly lost the darn thing.  I looked for it all year last year and again this year and still can't find it, so I just gave up and made it up.  And you know what?  I like my version better!  Hah!  Take that random disappearing magazine!  One secret to this cornbread is the type of pumpkin you use.


This is a Long Island Cheese Pumpkin.  I had never seen one until this year and bought it as a decoration for our party because it was so beautiful.  When I was developing the cornbread recipe, the first time I tried to use a sugar-type pie pumpkin.  The result was a little underwhelming.  I couldn't taste the pumpkin!  But this little stunner packs a ton of flavor into her beautiful exterior.


Look at all those flavor pockets!  =)  It's super easy to cut and cleans like a dream, too.

So, the first thing you need to do to make this cornbread is to roast the pumpkin.  Select a good, medium sized pumpkin, about the size of a soccer ball.  This recipe only uses about half, but not to worry, I've got big plans for the rest of it!


Slice the pumpkin along the rib lines and arrange on baking sheets (Mine took up two sheets).  Roast, uncovered for 30 minutes at 425° or until a knife pierces the flesh easily all the way through.  Allow to cool, and remove skins.

Peel enough to make 1 C of pumpkin puree. 5-6 ribs.

Then make it!

Pumpkin Sage Cornbread

3/4 C Bob's Red Mill cornmeal
1/4 C Bob's Red Mill corn grits
1 C all purpose flour
1/2 tsp salt
4 tsp baking powder
1 egg
1 C pumpkin puree
1/4 C vegetable oil
1/4 c pumpkin chunks
1 Tbs finely chopped fresh sage

Combine all ingredients except pumpkin chunks and sage and stir well.  Add pumpkin and sage and stir in gently.  I bake mine in a cast iron pan that's been pre-heated in the oven.  You can use a regular greased metal or glass pan, too.  Bake at 425° until the top is slightly browned and a cake tester comes out clean, about 20-25 minutes.

Review:
Sage?  Yes.  Pumpkin?  Yes!  Really steeenkin' yummy?  Yeeeees!  For Thanksgiving, make this the day of, it's beautiful warm with a little butter.

Now, if you want, you can serve this just as it is at Thanksgiving.  It is very, very, very, very good.  But if you want to get all crazy and homemade this year, you can do what I'm doing.  It's going in to Pumpkin Sage Cornbread Stuffing.  You heard me.

To convert your beautiful, delicious, cornbread into stuffing, make this two days ahead.  Allow it to cool completely.  Then:

Pumpkin and Sage Cornbread Stuffing

1 Tbs butter
2 Stalks celery, sliced
1 Onion, chopped
1 Clove garlic, chopped
1 C Walnuts
4 Stems fresh thyme, soft stems chopped, leaves removed off tough stems
1 Cornbread, crumbled, allowed to dry overnight
1 C Mushroom stock
Salt and Pepper

Saute celery, onion, and garlic in butter until vegetables are soft.  At the very end, toss in the walnuts and the thyme and stir until thyme is wilted.  Combine the crumbled cornbread with the onion mixture, then add mushroom stock and salt and pepper to taste.  Place in a casserole and bake at 350° for 20-30 minutes. 

See that funny little tool in the background there?  It's an antique food chopper.  And it worked like a charm for making the crumbles.  If you don't have one, you can just crumble it with your fingers...

Review:
This is a great one to make the night before.  It stores in the fridge beautifully and is a dream to reheat.  (A few minutes at 350° until it's warm throughout).

This is just the beginning, folks.  I can't wait to show you all that we'll be having this year!


Your Best Recipes Button
This recipe will be featured on November's YBR Roundup!

Tuesday, October 11, 2011

Accidentally Vegan Banana-Nut Muffins


When we travel, we're usually leaving in the middle of the night or first thing in the morning.  No matter what, nerves and time constraints usually make it difficult for us (OK, for me) to eat a solid meal before we get to the airport.  Besides having a nosh, I love this recipe for cleaning out my fridge.  There's always a bit of fruit or an errant veggie or two hanging around in my fridge plotting to go bad while we're on vacation.  It's super easy to grate a zucchini, a couple of carrots, an apple, a half eaten salmon (you know, whatever you have lying around) into this thing.  I picked this specific recipe because when I found it online I only had a couple of bananas handy.  Most of the online recipes called for 3 or 4, but this one only needed two.  I have added up to 5 bananas to it and it has only served to make it more moist and yummy, but it's really handy for when I've only got a couple that are going the way of the dodo.

I'm not going to lie.  I made this recipe months ago.  It's been languishing in my "to post folder" forever while I busied myself concocting various and sundry recipes using garlic scapes and Chinese Okra.  It's time these humble, yet satisfying muffins made an appearance!  Since I was using these as a "clean out the fridge dump special," I had assumed some items I normally have yet, when I opened the fridge door not only did I not have any eggs, I was out of milk, too!  Fortunately, I had bought some almond milk that week for my son who has cow milk issues.  (I usually buy him goat milk, which would have been fine, but no quite so appetizing.)  I added an extra banana to sub for the egg.  Here is the original recipe, followed by what I did.

Really Easy Banana Nut Bread
2 Bananas
1 Egg, beaten
1 C Sugar
1/4 C Melted butter or margarine
1 1/2 C Flour
1 1/2 tsp Baking powder
(Optional) walnuts or chocolate chips
Mash bananas.  Add beaten egg, sugar, and melted butter.  Stir in dry ingredients until moist.  Place in greased and floured loaf pan.  Bake at 350° for 1 hour.  Slice and serve warm.  (To double, decrease a little sugar.)


Accidentally Vegan Banana-Nut Muffins:
3 Bananas
1 C Sucanat
1/4 C Vegetable oil
1 1/2 C Whole wheat flour
1 1/2 tsp Baking powder
1/4 C Pecans
1 T Almond milk
1/2 C Oatmeal
1/2 Half apple peeled, chopped or grated
Dash cinnamon

Mix and bake following the original directions.  To make muffins, divide the batter into a lined cupcake tin and reduce cooking time to about 15-20 minutes (another reason I love muffins for travel, they cook so quickly!)  Yields about a dozen.


Review:
Could have used another banana for moisture maybe, but pretty great over all.  All my boys loved them and we had a great vacation.  I'm sure it's because we got a good, yummy start!

Thursday, September 15, 2011

Summer is Almost Over...


But before it disappears altogether, I'd like to introduce you to a little tropical awesomeness.  If you've ever been to Po'ipu or Waikiki, HI, you have probably heard of the world famous Puka Dog.  If you've ever eaten one, you know you want to eat another one (or five).  And well, unless you live in Hawai'i it's not easy.  If you haven't eaten one (or five), you can make this reasonable facsimile at home to whet your appetite.

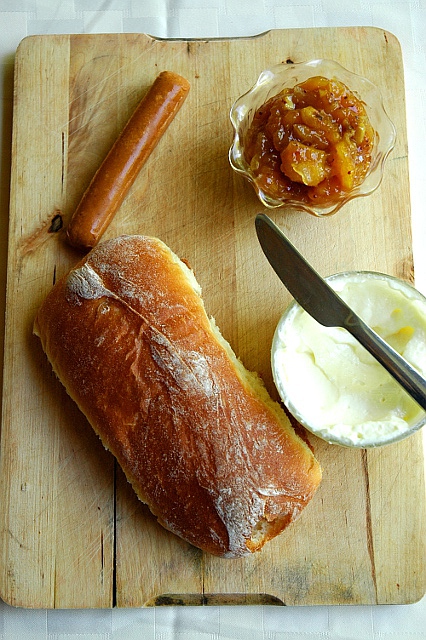
"Puka" means "hole" in Hawaiian so a Puka Dog is a bun with a hole poked in it, filled with special garlic sauce, your choice of fruit relish, and either a vegetarian hot dog or polish sausage.  The one I tried (and then decided to make) is mango chutney and aioli.  Make this, marvel at the wise Hawiians who know exactly how to treat a hot dog properly, then resolve to visit as soon as possible to have one of these for your very own!  Or you know, have five, I won't judge...

I got the recipe for the Hawaiian sweet bread from allrecipes.  The recipe for the chutney, which I altered slightly, came from simplyrecipes.  The aioli is a very simple mayo that I added a ton of garlic to.  Let me just say, you may never eat another condiment again.  Holy cats.

This looks like a lot of work.  But once you've got the chutney and aioli made, they're good for several weeks in the fridge so you can use them again and again.  And you will want to.  Oh my yes.  You will want to...

Start with the bread as it needs time to stir up and also to rise.

Bread Machine Hawaiian Sweet Bread
    * 1 cup warm water
    * 1/4 teaspoon vanilla extract
    * 1/4 teaspoon lemon extract
    * 2 eggs
    * 4 tablespoons margarine
    * 5 tablespoons white sugar
    * 3 cups all-purpose flour
    * 3/4 teaspoon salt
    * 2 tablespoons dry milk powder
    * 2 tablespoons dry potato flakes
    * 1 tablespoon active dry yeast


Add ingredients to your bread machine as the manufacturer's directions suggest.  Set your machine to the dough setting.  When your machine is done working its magic, divide dough into 8 sections and roll into "bun" shaped loaves.  Set in a warm, draft-free spot to rise about an hour and a half until not quite doubled.  Bake at 350° for about 30 minutes, or until bread is nicely browned and when you thump the crust, it sounds hollow.

Notes:
Next time I'm adding 3-5 more Tbs sugar.  As is, this is very good,  nay, exceptionally good bread, but not quite as sweet as Hawaiian sweet bread.  Also, I haven't tried it, but I imagine that this would freeze pretty well so if you wanted to make this well in advance, you could.


I did the chutney next as it required some cooking.

Mango Chutney
    * 2/3 cups sugar
    * 1/3 cup distilled white vinegar
    * 2 large mangoes peeled and cut in 3/4-inch pieces
    * 1/2 medium onion, chopped
    * 1/4 cup golden raisins
    *  1 tsp minced fresh ginger
    * 1 garlic clove, minced
    * 1 teaspoon mustard seeds, whole
    * pinch teaspoon red chili pepper flakes (hot)

Combine sugar and vinegar in a pot.  Bring to a boil, stirring until sugar dissolves.  Add remaining ingredients and simmer uncovered until syrupy and slightly thickened, 30 to 45 minutes. Stir occasionally during cooking.  Keep refrigerated in airtight container.

Tip:
For an interesting way to use up chutney, try it on pancakes!  I used my basic pancake recipe, substituted coconut oil for the oil, added coconut oil to the cooking pan for extra measure, and tossed in a banana and 1/4 C hazelnuts.  Macadamia nuts would be a great way to embellish, also.  You won't be disappointed!

Garlic Mayo (Aioli)
    * 1 cup vegetable oil
    * 1 egg
    * 1 tablespoon lemon juice
    * scant 1/2 teaspoon salt
    * 6 garlic cloves pulverized into a paste

  
Ever since my friend Monte told me how, I've used an immersion blender to make my mayo.  Put the egg, lemon juice, salt, and garlic paste into whatever vessel you're using to make the mayo in.  I recommend something with tall sides like a glass.   Buzz it a tad with the blender to combine.  Pour the oil on top of that.  Insert your blender again.  Starting at the bottom, turn the blender on, and slowly draw it up through the oil.  Watch the mayo appear before your very eyes.  If you have a little oil left at the top, just run the blender up and down through the mixture a few times to incorporate. Store in an airtight container in the fridge. 

Assembly:
Take your beautiful, beautiful bun:


 Poke your beautiful, beautiful puka:

 
This is an apple corer, but you can use a knife.

Slather the inside with your beautiful, beautiful chutney and aioli:

 You may say, "My goodness!  Isn't that a lot of bread?!"
And the answers is, "Yes, yes it is."
But the real question is, "Does it matter?"
And the answer is, "No, no it does not!"

Insert your veggie dog/polish sausage/100% all beef frank.


You may also say, "My goodness!  What happened to that poor hot dog?"
To which I reply, "Sorry, it's a microwaved veggie dog.  Not the best for photography, but it tastes great anyway." 

Review:
I think I'll call these "Haole Holes."  They're not quite the same as the real thing, but oh so tropical and oh so delicious!  These dogs go to 11!
Related Posts Plugin for WordPress, Blogger...