Showing posts with label dessert. Show all posts

Wednesday, March 25, 2015

A Very 80's Easter

     When I was a kid, my Mom made lemon cupcakes with coconut sprinkled frosting in little baskets to take to school at Easter.  My Great Aunt made cakes shaped like bunnies with lemon cake and coconut sprinkled frosting to feast on at the huge family Easter luncheons she used to throw.  When I was pregnant with my first son and craving lemon everything, I had to have lemon cake with coconut sprinkled frosting (generously supplied by my friend Susan, who I am convinced is the reason I survived my first pregnancy without killing somebody in a lemon craving induced stupor).  What I'm saying is that lemon cake with coconut sprinkled frosting and me go waaaay back.

     Unfortunately, the kind of cake and coconut I ate growing up is not how I eat anymore.  I haven't bought a Duncan Crockerbury box in a decade at least.  I don't use sweetened coconut or green food coloring (with one exception).  But I really, really wanted to make those little cupcake baskets with my boys that my Mom made all those years ago. 

Naturally colored Easter cupcakes lemon and coconut with matcha for green

So I did.

     I found Trader Joe's jelly beans, flavored and colored with fruit juice, modified an America's Test Kitchen recipe to taste exactly like the ol' boxed cake lemon flavor, and colored the coconut with matcha powder.  The result was pretty much exactly like what I remember from childhood.  Except the jelly beans.  I'm particular about jelly beans.  Beware the dark purple TJ's jelly beans.  They are not grape.  TJ's, if you're going to throw licorice about all willy nilly, you gotta warn folks.  Allz I'm sayin'.

Easter cupcakes with natural colors and flavorings

A beautifully decorated little basket with a not grape jelly bean on it.  And two others.  Who might be in cahoots.

To make the baskets Mom used to use construction paper, but I found a sweet little set of scrapbooking papers at Target.  Cut strips about 3/4 inch wide and 9 inches long and tape or staple them to an empty cupcake wrapper.  These are great for holding other candies or nuts, too!

How to color coconut for Easter grass with matcha powder

     To make the coconut, I found Bob's Red Mill unsweetened shredded coconut, and got some matcha powder at my local natural foods store.  I heated 1 tsp coconut oil in the microwave until it melted, then stirred in 4 Tbs coconut until just moistened.  Then I stirred in 1/2 tsp matcha powder.  It was a nice mossy/grassy color without changing the flavor too much.  Keep in mind, eating it plain, you will be able to taste the tea, but once you add the flavor of the frosting, you can't taste it any more.

  Since the Bob's Red Mill coconut doesn't have as strong a "coconut" flavor as the moistened sugar-coated stuff, I added 1 Tbs coconut oil (in solid form) to my butter cream frosting.  I used two sticks of softened butter, 1 Tbs coconut oil, 4 cups of organic confectioner's sugar, and about a Tbs of milk. Cream everything together with a mixer until frosting is smooth and fluffy. You may want to adjust the sugar and milk levels of your own depending on how fluffy you like your frosting.

Lemon Cake
Yields: 24 cupcakes

1/2 C whole milk, room temp
4 large eggs, room temp
2 tsp lemon extract (I used Nielsen Massey)
1/4 tsp vanilla beans
1 3/4 C cake flour
1 1/2 C sugar
2 tsp baking powder
3/4 tsp salt
16 Tbs (2 sticks) unsalted butter, cut into 16 pieces and softened
Zest of 1 lemon

Heat oven to 350°F.  Line muffin tins with 24 liners.  In a medium sized bowl, whisk the milk and eggs together.  In the bowl of your mixer, whisk the flour, sugar, baking powder, salt, vanilla beans, and zest together.  On low speed, mix the butter pieces in one at a time until the mixture resembles moist crumbs.  Beat in all but 1/2 C of the milk mixture, then increase the mixer speed to medium and beat the batter until smooth, light, and fluffy, 1 to 3 minutes.  Reduce the mixer speed to low and slowly beat in the remaining 1/2 C milk mixture and the lemon extract until the batter looks slightly curdled, about 15 seconds.  Give the batter a final stir with a rubber scraper and portion into cupcake liners till they are 3/4 full.  Tap the pans on the counter to release bubbles and settle the batter.  Bake until a toothpick comes out clean, about 10-15 minutes, rotating the pans 1/2 way through baking time.  Remove cupcakes from tins and cool on a wire rack.

Review:
The boys have been begging me for these all day.  I love these.  I may never share them.  You're just lucky I shared the recipe with you.  In fact, I take it back.  You can't have it.  Happy Easter, ya cake thieves.

Monday, December 15, 2014

The Great Food Blogger Cookie Swap 2014...

Simple Animal Crackers Recipe

Last year I participated in the Great Food Blogger Cookie Swap and I loved it.  The boys loved getting surprise cookies in the mail, heck, I loved getting surprise cookies in the mail.  Who wouldn't love surprise cookies?  So of course I signed up again this year!

This year I got cookies from:

and I sent these darling little Animal Crackers to:
Ann Marie from Let's Give Peas a Chance
Hannah from Fleur-de-Licious
and 

 Love and Olive Oil and The Little Kitchen with be co-hosting the round-up at the end of the week so you can see all the delicious cookies the fantastic bloggers who participated this year shared with each other!

And so, without further ado...

Animal Crackers

1 ½ Cups plus 2 Tbs unbleached all-purpose flour
½ C oat flour
¼ C packed light brown sugar
¼ C granulated sugar
2 tsp finely grated organic lemon zest, plus 1 Tbs freshly squeezed lemon juice
1 tsp baking powder
¼ tsp fine sea salt
4 Tbs chilled, unsalted butter, cut into ½ inch pieces
¼ C buttermilk
2 tsp honey
1 tsp vanilla extract

In the bowl of a food processor or a large bowl, pulse or whisk the all-purpose flour, oat flour, brown sugar, granulated sugar, lemon zest, baking powder, and salt to combine. Add the butter and pulse or use a pastry blender or your fingers to cut the butter into the flour until the mixture resembles coarse meal. 15 pulses with a food processor.

In a measuring cup, combine the buttermilk, honey, and vanilla and stir until the honey has dissolved. Add to the flour mixture and pulse or sir with a wooden spoon until the dough just comes together. Remove the dough from the processor or bowl and knead gently on a lightly floured surface until smooth, 10 strokes. Flatten the dough into two equal-size disks, cover in plastic wrap, and chill them for at least 1 hour and up to 2 days.

Preheat the oven to 375. Line two baking sheets with silicone baking mats or parchment paper. Place one piece of the dough on a well-floured surface. Roll out the dough until it is 1/8 inch thick lifting the dough and rotating to make sure it's not sticking to the work surface and adding all-purpose flour as necessary.

Animal Crackers Recipe 
Use lightly floured cookie cutters to cut out animal shapes. Using a lightly floured bench scraper or offset spatula, transfer the cut-outs to one of the prepared baking sheets. Re-roll the scraps once and cut them out in the same way. Bake the animal crackers until light golden brown around the edges, 8 to 10 minutes, rotating the baking sheet once from back to front while baking. Cool the crackers on the sheet until they firm up, 5 minutes, and then transfer them to a wire rack to cool. While the first batch of crackers is cooling, repeat the rolling, cutting, and baking process with the remaining dough and scraps.

Animal Crackers Recipe

Ms. Manning has an icing recipe in her book if you'd like these to be even more festive!  Happy Holidays to all my fellow bloggers!  Keep your eyes peeled for another batch of CotC cookie recipes coming soon!

Wednesday, November 26, 2014

Another year, another cake...

     The ol' blog is celebrating its 4th year today!  I can't believe how quickly it's gone by. 


The boys had a Minecraft party this past weekend, and I will be posting pictures and recipes, but for now, I thought I'd post this little cupcake to celebrate another year of food, friends, and fun.

Chocolate Joe Joe's Vanilla Cupcakes:
Modified from America's Test Kitchen Classic Yellow Sheet Cake from The America's Test Kitchen Family Baking Book

2 3/4 C whole wheat pastry flour
2 tsp baking powder
3/4 tsp salt
2 sticks unsalted butter, softened
1 3/4 C sugar
4 large eggs, room temp
1 tsp vanilla extract
1 1/2 C whole milk, room temp
1 /3 box Joe Joe's cookies with chocolate centers, crushed

Line 24 cupcake cups with liners.  Preheat oven to 350.  Whisk flour, baking powder, and salt together in a bowl.  Cream butter and sugar together.  Add eggs and vanilla and mix to combine.  Alternate adding flour and milk, starting and ending with flour.  Stir in the cookies.  Portion the batter into the prepared cups.  Bake for 15-20 minutes.  Let cool in pan for 10 minutes, then set onto a cooling rack to finish cooling.  Frost when completely cool.


Frosting:
Modified from America's Test Kitchen Chocolate Frosting from The America's Test Kitchen Family Baking Book

10 oz chocolate chips
1 C heavy cream
1/4 tsp salt
1 1/3 C confectioner's sugar
2 tsp vanilla extract
2 1/4 sticks unsalted butter, cut into chunks and softened

Place chocolate into a food processor.  Bring the cream and salt to a boil in the microwave in a microwave-safe bowl.  Pour the hot cream over the chocolate and process until smooth.  Add the sugar and vanilla and continue to process until combined.  With the machine running, add the butter one piece at a time.  Continue to process until smooth.  Transfer the frosting to a small bowl, cover and refrigerate until thick and spreadable (about 1 to 1 1/2 hours).

Enjoy, everybody! 

Friday, September 19, 2014

S'more S'mores, Please!

I've got two boys.

I've got two boys who like campfires.

I've got two boys who like campfires in the Spring, Summer, Fall or Winter.

I've got two boys who like campfires in the Spring, Summer, Fall or Winter, because campfires mean S'mores.

All...


Kinds...


Of...


S'mores...


Let's count the ways, shall we?  Number 1, cookies and marshmallow.  You may remember my post from last year featuring these bad boys:


Or, 2, why not try it with Everybody's Mom's Chocolate Chip Cookies?  No need for an extra chocolate slice!


3) My eldest came home with the next idea from Scout Camp.  And let me say:  It's genius.  Put your S'mores toppings into an ice cream cone, wrap it in foil, and put it in the fire!  I added walnuts 'cuz yum.


4) A few of you may recall my facebook post encouraging Peep hoarding this Spring.


The number one thing I learned from facebook this year is that people hate Peeps, ya'll. This next picture is for those people:


Trust me on this, our neighbors taught us that Peeps over flame turn into a completely different thing.  It's like crème brûlée.  Then you smash it between graham crackers and chocolate.  This picture is for those of you who love Peeps.  And also for those of you who hate them, 'cuz they're pretty mutilated.

And, yes, they stay fresh this long.  Preservatives ftw.

If you'd like to skip the preservatives, I've got something for you... 

Number 5: Homemade S'mores

This one uses another technique we've learned from friends, chocolate frosting instead of chocolate bars.  No waiting for it to melt.  Just slathering and eating.  Our friends used store-bought frosting.  Not my thing, so homemade frosting it is.  Before you ask, I did try multiple times to make homemade vegan marshmallows.  They did not happen.  They were delicious, but they were gloopy and completely campfire incompatible.  I have not given up, but this post had to go up someday so for the time being, these are store bought 'shmallows.


Homemade Graham Crackers

America's Test Kitchen Family Baking Book  p. 177

1 3/4 C Graham flour (or whole wheat flour)
1/2 C all-purpose flour
1/2 C sugar
1 tsp baking powder
1/2 tsp baking soda
1/2 tsp salt
1/4 tsp ground cinnamon
8 Tbs unsalted butter, cut into 1/2-inch pieces and chilled
5 Tbs water
2 Tbs light molasses
1 tsp vanilla extract

Heat oven to 375°.  Process the flours, sugar, baking powder, baking soda, salt, and cinnamon in a food processor until combined, about 3 seconds.  Add the butter and process until the mixture resembles coarse meal, about 15 seconds.  Add the water, molasses, and vanilla and process until the dough comes together, about 20 seconds.  Divide the dough into 2 even pieces.  Roll each piece of dough out between 2 pieces of parchment paper to a 16X8-inch rectangle, 1/8 inch thick.  Remove the top pieces of parchment and trim each piece of dough into a tidy 15X7 1/2-inch rectangle with a knife, and then score each into eighteen 2 1/2-inch squares.  Prick each square several times with a fork.  Slide each piece of dough and parchment onto separate baking sheets.  Bake the cookies until golden brown, 10 to 15 minutes, switching and rotating the baking sheets halfway through baking.  Let the cookies cool completely on the baking sheets, then break them apart along the scored lines and serve.

Notes:
I dusted some of mine with a mixture of sugar and cinnamon.
These freeze really well.

Frosting
1 C Powdered Sugar
1 stick Butter
2 Tbs Cocoa Powder
1 Tbs cream

Beat the butter a little, then slowly add the sugar and cocoa powder.  If it's a little dry, mix in the cream.


Monday, July 21, 2014

Ice-Pops, Ideas, and a Give Away...

12 Ways to use Zipzicles Ice-Pop Pouches

So these are Zipzicles.

Zipzicle Ice-Pop Pouches
     You want these.  My friend Cara from Fork and Beans found some at Cost Plus World Market and went on to make some lovely homemade Otter-type pops.  I fiddled around on the Internet a bit and found that WizCo is just a few miles from my house!  They graciously sent me a sample pack and I went a little bonkers, ya'll.  I just kept on thinking of things to use these little pouches for!

Zipzicle Ice-Pops, Use 1 of 12
     First off, I did make pops.  'Cuz yeah, Summer.  These are each a different type of juice.  The clear one is a simple infused water concoction of nasturtium and mint.  Not sweet for the kiddles, but so nice for me on hot days!  Each pouch contains almost 1/2 a cup, so to make my grown-up Zipzicle:

Nasturtium and Mint Ice-Pop
1/2 C water per pop
2 nasturtium flowers per
1 two inch sprig fresh mint (about 5 leaves) per

Combine in a cup and let steep for 30 minutes.  You can muddle it a bit at the end if you like.  I chopped up a few blossoms to make it pretty, but you don't need to.  If you are using flowers, place a few chopped blossoms into the pouch, pour infused water in to the fill line, close bag, and tilt it back and forth gently to distribute the flowers evenly.  Lay flat for a few hours to freeze.

Homemade Nasturtium Mint Ice-Pops from Crackers on the Couch

The other pops are juices I bought at Trader Joe's, one is the Very Green Smoothie, one is carrot, and one is Tart Cherry.  The cherry one is especially good.  We also enjoy orange, grape, and fruit puree pops regularly!

And now for the rest!

Zipzicle Yogurt Tubes Use 2 of 12
     Next up, can we just talk about how long I've been wanting to make yogurt tubes?  I don't like store bought ones that are full of sugar and chemicals, and the organic frilly ones are few and far between.  I have thought for years that there had to be a better way.  Some way to make yogurt tubes at home.  This is it, yo!  These are homemade yogurt sweetened with a bit of honey.  No cane, beet or corn sugar, no rBST, just milk, bacteria, and honey.  Yummers.

Zipzicle Applesauce pouches Use 3 of 12!
     Number 3 is applesauce pouches.  1/2 C is a good portion of sauce.  You can fill past the fill line if you're not going to freeze it.  I found that the best way to fill these pouches with thicker things like yogurt and applesauce is to use a pastry bag to fill them half way, tap it once or twice to get out the bubble, and then fill the rest of the way.  For thicker substances or tough bubbles, a poke or two with a chop-stick will go a long way.

Zipzicle cracker pouch, use 4 of 12!
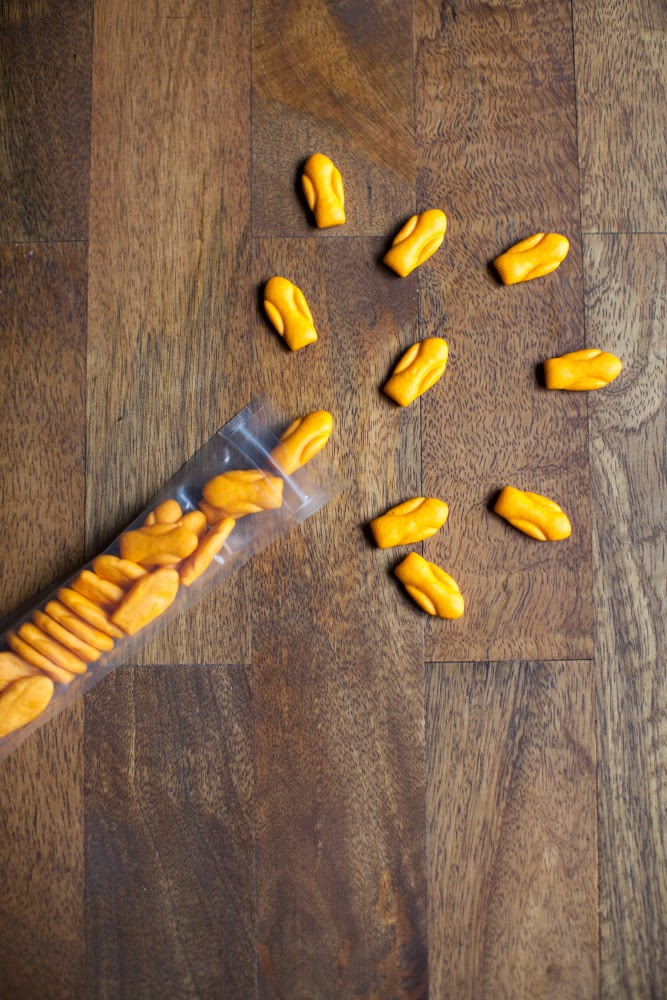
     Fourth up, any small, amusingly shaped cracker will fit beautifully into these pouches.  It's slightly less than a serving size, but just right for a lunchbox or a quick snack after karate.

Cute little s'mores treat sacks: Use 5 of 12! And speaking of snacks, let's talk dessert, shall we?  A few mini chocolate chips, some tiny marshmallows, and a graham cracker bear or two.  A large pastry tip makes a nice funnel for the chocolate chips.  I know this is the complete embodiment of opposite from what I said about the yogurt tubes, but you know, cute is cute sometimes and dessert is dessert and s'mores is s'mores.

Zipzicle pouches for trail mix: Use 6 of 12!
     For a healthier alternative while camping or hiking, Good Old Raisins and Peanuts really hit the spot.  A serving of peanuts almost fills up to the fill line, mix in a few raisins and GORP's your uncle!

Zipzicle pouches for packing hummus: Use 7 of 12!
     For flying, camping, or car trips, hummus makes a great snack, and 1/2 a cup of hummus makes a pretty healthy portion!  The flexibility of the pouches makes it really easy to get all of it out.  I've got a straw brush that I used to clean the pouches out after the hummus.

Zipzicles for Jello!  Use 8 of 12
    Again, with the food coloring, but you know what?  There's exactly enough room in these pouches for Jell-o.  I used the quick-set method so that the heat wouldn't melt the plastic.  Sets up faster that way, too!  I wonder if agar agar jello would work in these, but I think that by the time it was cool enough to pour, it would be set too far.  An experiment for another day, perhaps.
Zipzicles as party favor bags!  Use 9 of 12!
     Need a sweet little pouch for party favors?  Fill them up with candy, jewelry, or confetti!  (Maybe don't give out the confetti filled ones until the end of the party...)

Zipzicle soup pouches!  A great snack and use 10 of 12!
     I think this is my favorite idea: A little tomato soup and a pouch of oyster crackers!  Again, I poured the soup in cold, and served it at room temp.  It's a nice, healthy change-of-pace snack for the kid who's tired of cheese sticks and fruit slices.

Zipzicle craft packs!  Use 11 of 12.
     And then there are the non-food options.  Let's talk art-on-the-go, shall we?  Four thin markers fit very well in here, four or five colored pencils would do nicely, as well.  Just right for trips!  You can fit a few pipe-cleaners in here, too I bet, though I haven't tried it.  I did try Rainbow Loom bands and they were near impossible to get back out. Think, long and thin, and things that shake out easily.

Zipzicle small toy pouch.  Use 12 of 12.
     Speaking of things that shake out easily, a few Lego bricks are just the thing for a quick creation on the go.  Nanoblocks fit well, Micro Machines, too.

Here's a few more ideas!   
I haven't tested them, but you can!
  • Make your own "Pedialyte" pops.  Coconut water is an excellent (and more tasty) electrolyte replenisher!
  • Try these for pureed baby foods or toddler snacks like Cheerios.
  • Going camping? Fill one with ketchup, one with mayo, and one with mustard.
  • Maybe a small First-Aid Kit, a couple of Band-aids and a tube of Neosporin.
  • What about filling one with mouthwash for weekend trips?
And Now, A Give Away!!
Have some ideas for these lovely little bags?  Wanna get some for free?  Well, you, my friend are in the right place!  WizCo is allowing me to give three lucky people a free 12-pack of Zipzicle pouches!  Leave me a comment here or on my facebook page with your favorite ice-pop flavor or a new idea for the bags and you'll be entered to win!  Contest ends on Friday so chime in!

*Give Away Has Now Ended*

Friday, December 13, 2013

12 Days of Christmas Cookies Day 10: World's Best Brownies

     I have a confession to make.  My Mom had the secret to the world's best brownies.  She sent me the recipe 10 years ago.  And I've never made them...  *hanging head in shame*  The problem with making a pan of brownies is that I will eat a pan of brownies.  By myself.  Hiding in the closet so as not to be interrupted.  And I will be happy.  And covered in crumbs.  And in need of a crane to get out of the house.  So in the interest of not putting myself into a chocolate coma, I don't make brownies.  I once made a pan of vegan brownies that had black beans in it just to see what would happen.  I went up a pant size is what happened.  So just for you guys and just for Christmas I have decided to face my addiction and make these just for you.  If you do indeed become a closet brownie eater, don't come cryin' to me.  I gots my own problems.  Like how to hide this empty pan as quickly as possible.


World's Best Brownies
Yield: 1 9X13 inch pan

1/2 C butter
4 oz baking chocolate
4 eggs at room temperature
1/2 tsp salt
2 C sugar
1 tsp vanilla
1 C flour
1 C roughly chopped pecans (opt)

Prepare 9X13 inch pan by lining the bottom with parchment paper.  Preheat oven to 350°. Melt chocolate and butter in a double boiler or the microwave (being careful it doesn't boil).  Place in the refrigerator for a few minutes.  Beat eggs and salt until light in color and foamy.  Continue beating and gradually add sugar and vanilla until well creamed.  Remove chocolate from refrigerator.  With a few swift strokes, manually combine the cooled chocolate mixture into the eggs and sugar.  Before the mixture becomes uniformly colored, fold in (again by hand) flour.  If you want to add nuts, before flour is uniformly colored, stir in pecans gently.  Bake for 25 minutes if you want super gooey, not-quite finished brownies, 40 minutes, if you like them soft, but not oozing.  A toothpick test won't work well, but if you touch lightly in the middle of the pan, it should not leave a dent and the top will look done.  Remove the pan from the oven, run a knife around the edges and invert the baking pan over a cookie rack.  Remove pan and wait 5 minutes before peeling off paper.  Or you can just eat them out of the pan with a fork in your closet...


Review:
These are the best brownies in the entire world.

Thursday, December 12, 2013

12 Days of Christmas Treats Day 9: Chewy Eggnog Cookies


     Have I got a recipe for you eggnog lovers out there!  I always love a chewy cookie but am rarely successful in making one at home.  The folks at America's Test Kitchen came up with an easy one that works pretty well.  It's not as ooey-gooey chewy as the ones at the store, but it's also not sporting the entire contents of a university chem lab in the ingredient list.  A couple of years ago I created an eggnog cookie with quite a bit more nog in it.  I was surprised how little it took in these to make a recognizable flavor.  This recipe is entirely an ATK invention, the only thing I did was sub in eggnog for the milk.

Chewy Eggnog Cookies
Yield: 2 dozen

2 1/4 C flour
1 tsp baking powder
1/2 tsp baking soda
1 1/2 C sugar, plus more for rolling
2 oz cream cheese, cut into 8 pieces
6 Tbs unsalted butter, melted and still warm
1/2 C vegetable oil
1 large egg
1 Tbs eggnog
2 tsp vanilla extract

Adjust an oven rack to the middle position and heat the oven to 350°.  Line two large rimmed baking sheets with parchment paper.  Whisk the flour, baking powder, baking soda, and salt together in a medium bowl.  Set aside.

Place 1 1/2 C sugar and the cream cheese in a large bowl.  Place the remaining 1/3 C sugar in a shallow baking dish or pie plate and set aside.  Pour the warm butter over the sugar and cream cheese and whisk to combine (some small lumps of cream cheese will remain but will smooth out later).  Whisk in the oil until incorporated.  Add the egg, milk, and vanilla; continue to whisk until smooth.  Add the flour mixture and mix with a rubber spatula until a soft homogenous dough forms.

Divide the dough into 24 equal pieces, about 2 Tbs each.  Using your hands, roll each piece of dough into a ball (handle dough as briefly as possible as overworking will result in flatter cookies).  Working in batches, roll the balls in sugar to coat and set on the prepared baking sheet.  12 dough balls per sheet.  Using the bottom of a drinking glass, flatten the dough balls until 2 inches in diameter.  Sprinkle the tops of the cookies evenly with the remaining sugar, using 2 tsp for each sheet. (Discard the remaining sugar.)

Bake the cookies, one sheet at a time, until the edges are set and beginning to brown, 11 to 13 minutes, rotating the sheet after 7 minutes.  Cool the cookies on the baking sheet for 5 minutes; using a wide metal spatula, transfer the cookies to a wire rack and cool to room temp.


Notes:
      So I used a cookie scoop instead of dividing by 24 to make my cookies.  The result was around 54 thinner cookies.  This is probably why they weren't super chewy.  (They're still super delicious!)

Wednesday, December 11, 2013

12 Days of Christmas Treats Day 8: Dipped Ritz Cracker Sandwiches

    The first time I had Ritz peanut butter crackers dipped in white chocolate I was at the Christmas tree farm of an old friend of my family.  When she told me about them, I was skeptical.  Until I ate one.  Hello.  The problem with white chocolate though, is it's hard to find one that doesn't have all kinds of chemicals in it.  So I decided to try dark chocolate this year.  


     Instead of using just my family as lab rats, I subjected three unsuspecting food bloggers as well.  This year I joined The Great Food Blogger Cookie Swap for the first time.  Besides providing a link-up to all kinds of great bloggers, it raises money to fight children's cancer.  This year they've raised over $13,000!  It's not too late to donate!  Go to The Great Food Blogger Cookie Swap webpage find the donation button at the bottom. 

The Great Food Blogger Cookies Swap 2013

     The swap works is just like a regular mail swap: you get three names, three other people get your name, you send out three dozen cookies, and you receive three dozen in return.  The only difference here is that we link to each other's websites and share the recipe with you guys, too!
 
These tree bloggers sent me cookies:

The boy's favorites were all of them.  "Oh Mom!  These are my favorite!"  "You just said that about the other ones." "I know, it is, too!"  "I agree."

I sent these treats to these three bloggers: 

I hope they arrived in one piece, ladies!


And now it's time to share my recipe with you!  Start with the Ritz Crackers from  day one of the 12 Days of Christmas.

Ritzy Peanut Butter Crackers in Chocolate
(1 Recipe of Crackers yields about 24 sandwiches)
6 oz Enjoy Life Semi-Sweet Chocolate Chips
10 oz Felchlin Old World Chocolate 74% Organic
Zest of 1 tangerine

Make cracker sandwiches using about ¼ tsp peanut butter per sandwich. (I like a lot on mine generally, but much more than ¼ tsp tends to seep out the sides and melt into the chocolate.)

     In a double-boiler, melt 6 oz of semi-sweet chocolate chips with 10oz dark chocolate, making sure not to scrape the sides (this can introduce crystals into the chocolate that will make it seize). You can also do it in the microwave in a glass dish by setting it to half power and microwaving them for about a minute (chocolate is done when about half the chips have melted, stir them up and use the heat of the melted ones to soften the ones that aren't quite ready.)

     Dip sandwiches in chocolate using a couple of forks to aid in flipping, removing, and not burning your fingers off, place on parchment paper, and top with orange zest. Leave to dry.


Notes:
If you do make these with white chocolate instead, try topping them with crushed up candy canes!

Review:
The chocolate chips take some of the bitterness out of the dark chocolate and the orange brightens it up.  My kids prefer it without the zest, but the more adult palates in our household enjoyed them immensely.  

To see the rest of the round-up visit Love and Olive Oil for one half and The Little Kitchen for the rest!

Monday, December 9, 2013

12 Days of Christmas Treats Day 6: Thumbprint Cookies

Crackers on the Couch 12 Days of Christmas Treats Day 6: Thumbprint Cookies

     Look out!  Ya'll are about to get Rich Rolled.  This time you'll not be getting unexpectedly serenaded by an 80's crooner, you'll be devouring loads of tasty jam-filled cookies.  These are another of the last-minute phone call to Dad cookies.  They also came from the Better Homes New Cookbook by Meredith Press copyright 1965.  I used a jar of mixed fruit jam I made in the Summer, but any pretty jam will do.  In fact, you can swap out the jam for a Hershey's Kiss if that's the kind of tune your taste buds like to dance to.

Rich Rolled Cookie
Yield: 44 cookies

1 C butter
2/3 C sugar
1 egg
2 ½ C sifted flour
½ tsp salt
1 tsp vanilla
1/4 tsp jam per cookie

Cream butter sugar and egg. In a smaller bowl sift together flour and salt. Add flour mixture to the creamed mixture and combine thoroughly. Add vanilla. Chill dough 3-4 hours before rolling (or about 30 minutes in the freezer). Roll balls, press cookies in the center with a finger or thumb, use 1/4 tsp jam to fill the print.  Bake at 350° 8-10 min or until slightly colored.

Crackers on the Couch 12 Days of Christmas Treats Day 6: Thumbprint Cookies

Review:
My family loves these!  Yours will, too. 


Crackers on the Couch 12 Days of Christmas Treats Day 6: Thumbprint Cookies


Friday, December 6, 2013

12 Days of Christmas Treats Day 5: Peanut Butter Cookies

     Can I just say that my Dad is a saint?  Every Christmas that I've been doing the 12 Days for you guys, my Dad gets a phone call at the last minute from his frazzled daughter begging him to look through Mom's old cookbooks and recipe box for weird cookies he doesn't even remember eating half the time.  The recipe box never seems to have anything in it I'm looking for and the cookbooks have terrible tables of contents with mislabeled page numbers.  One even has a recipe title listed in the index that isn't actually in the book at all.  This cookie, though, everybody remembers because it's delicious.  I have modified it a bit from its 1965 beginnings to reflect my preferences (butter instead of shortening, etc), but it's still a delicious cookie your friends and family will love.

12 Days of Christmas Treats Day 5: Peanut Butter Cookies

Peanut Butter Cookie 
From Better Homes New Cookbook 
by Meredith Press 1965
Yield: almost 6 dozen
1 C butter, softened
1 C sugar
1 C brown sugar
2 eggs
1 tsp vanilla
1 C peanut butter
2 C sifted flour
2 tsp baking soda
½ tsp salt

Cream butter, sugars, eggs, and vanilla.  Add peanut butter.  Sift dry ingredients together, stir in.  Drop by rounded spoonfulls, make a criss-cross pattern on the top of each cookie with floured fork.  Bake at 350° for 10 min.

Review:
These are crispy and crunchity and peanut buttery and you will like them.

Thursday, December 5, 2013

12 Days of Christmas Treats Day 4: Panettone

     My husband and I, like many people, aren't the biggest fans of fruitcake.  A few years ago, we bought a panettone at Costco one Christmas.  It was the yummiest white bread we ever had with a tiny bit of dried fruit.  The heavenliest, softest, perfectest fruit cake ever invented for infinity.  Cut a piece off, put it in the toaster and slap a little butter on it.  Best breakfast in the entire world.  It never even occurred to me to make my own until I saw panettone papers in a specialty shop.  The angels above opened their heavenly throats and warbled a melodious tune.  Or maybe that was me singing to myself in the baking row.  Only the security cameras can tell for sure.  I found this delicious recipe for panettone on King Arthur Flour.  I modified the fruit amounts somewhat and have adjusted the cooking time to make some mini panettones for sharing!  This recipe uses a biga, which is a quick, overnight starter culture, it helps develop the flavor of a good dough.  Trust me, the extra time is worth it.


Mini Panettone
Yield: 8

Biga (Overnight Starter)
3/4 cup King Arthur Unbleached All-Purpose Flour
1/16 teaspoon yeast (just a pinch)
1/3 cup water

Dough
all of the biga 

2 1/4 cups King Arthur Unbleached All-Purpose Flour
1/4 cup warm water
2 large eggs
1/4 cup unsalted butter, softened
1 1/4 teaspoons salt
1/4 tsp vanilla extract
1/8 tsp orange extract
1/8 tsp lemon extract
2 1/4 teaspoons active dry yeast OR 1 tablespoon instant yeast
1/3 cup sugar
1/2 cup golden raisins
1/4 cup chopped dried apricots
1/4 cup dried currants
1/4 cup chopped dried pineapple
1 tablespoon orange zest
1 tablespoon lemon zest
The Biga: Combine the biga ingredients in a medium-sized mixing bowl, cover, and allow them to rest overnight (8 to 12 hours).

Dough: Combine all of the dough ingredients except the fruit, and mix and knead them together—by hand, mixer or bread machine—till you've made a soft, smooth dough. Allow the dough to rise, covered, for 1 to 1 1/2 hours, or until it's puffy (though not necessarily doubled in bulk). Gently deflate the dough, and knead in the fruits and zest.

Divide dough into 8 mini panettone cups.  Place cups on a baking sheet and cover with a sheet of plastic wrap.  Let the dough rise till it's just crested over the rims of the cups.  (It took mine three hours, but it could take much less time if your house is warmer than mine...)

Bake the bread in a preheated 400°F oven for 5 minutes; reduce the oven heat to 375°F and bake an additional 5 minutes; then reduce the heat to 350°F and bake for 10-15 minutes, tenting with aluminum foil if the crust appears to be browning too quickly. Remove the panettone from the oven and cool completely.  You'll know they're done when you thump the bottom and it sounds hollow.


Review:
This is great with mulled orange juice or a cup of coffee.  My kids aren't big fans, so this might be a more adult recipe.  I don't know about you, but I'm OK with that.

Monday, September 30, 2013

An E-book for the Vegan Gluten-Free Masses...

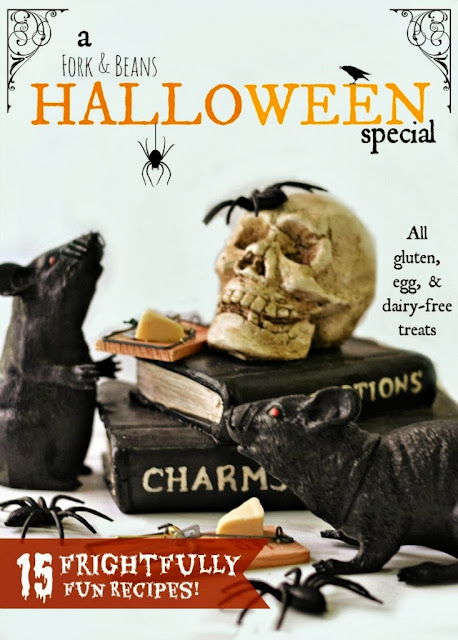
Fork and Beans Halloween E-book Cover
(Photo by Cara Reed)

     My regular readers know I have a friend named Cara Reed who runs a gluten-free vegan blog called Fork and Beans.  She graciously converts my recipes every Christmas during my 12 Days of Christmas Cookies for friends and family of my readership with special food requirements.  She is so incredibly creative and fun and Halloween brings it all together in a bubbling cauldron of witchy deliciousness with her vegan candies and super creative meal ideas for kids. (I actually bought a waffle iron to make my kids skull waffles and they still ask for them all the time!)  To celebrate this year, Cara is releasing her very first e-book and she is allowing me to share a recipe with you here!  Without further ado, I give you...

(Photo by Cara Reed)

Coats: 6 apples 
Ingredients:  
2/3 c. vegan butter 
2/3 c. light corn syrup 
1 1/3 c. sugar 
1/3 c. water  
2/3 c. peanut butter 

Additional Ingredients: 
6 apples 
Wooden sticks 
Chopped nuts for dipping 
Plastic fangs (I bought mine at the Dollar Tree—they came with candy blood) 

Directions: 
     Remove stems from each apple and place the candy apple sticks inside. Measure the size of the plastic fangs and cut out a section in the apple to fit inside. 
In a medium saucepan, dissolve the sugar in the water, butter, and corn syrup on medium heat. Bring to a boil.  
     At this point do not stir. Place a candy thermometer inside the saucepan and bring up heat in between soft and hard ball stage. 

     Reduce heat to lowest setting and add the peanut butter in. Mix thoroughly.  

     Dip each apple in the caramel and then the nuts. Before the caramel sets, place the plastic fangs inside the apples. Allow to cool 20 minutes. 

 There now!  Doesn't that look easy and delicious?!  Here's a list of recipes in her book:
(Excerpt from A Fork and Beans Halloween Special ebook)

There's some seriously cute stuff here for your little gluten-free ghouls and a couple for you ghastly grown-ups, too!  I bought the book yesterday and I'm monstrously geeked.  My boys are begging me for the Trick-or-Treat Cookies and I'm excited to make the Spaghetti and Eyeballs.  Her book is only $7!  You can Buy it Here and while you're at it, check out her blog!  Thanks, guys!  And here's wishing beastly amounts of success to you, Cara Reed!
Related Posts Plugin for WordPress, Blogger...