Showing posts with label comfort food. Show all posts

Wednesday, March 25, 2015

A Very 80's Easter

     When I was a kid, my Mom made lemon cupcakes with coconut sprinkled frosting in little baskets to take to school at Easter.  My Great Aunt made cakes shaped like bunnies with lemon cake and coconut sprinkled frosting to feast on at the huge family Easter luncheons she used to throw.  When I was pregnant with my first son and craving lemon everything, I had to have lemon cake with coconut sprinkled frosting (generously supplied by my friend Susan, who I am convinced is the reason I survived my first pregnancy without killing somebody in a lemon craving induced stupor).  What I'm saying is that lemon cake with coconut sprinkled frosting and me go waaaay back.

     Unfortunately, the kind of cake and coconut I ate growing up is not how I eat anymore.  I haven't bought a Duncan Crockerbury box in a decade at least.  I don't use sweetened coconut or green food coloring (with one exception).  But I really, really wanted to make those little cupcake baskets with my boys that my Mom made all those years ago. 

Naturally colored Easter cupcakes lemon and coconut with matcha for green

So I did.

     I found Trader Joe's jelly beans, flavored and colored with fruit juice, modified an America's Test Kitchen recipe to taste exactly like the ol' boxed cake lemon flavor, and colored the coconut with matcha powder.  The result was pretty much exactly like what I remember from childhood.  Except the jelly beans.  I'm particular about jelly beans.  Beware the dark purple TJ's jelly beans.  They are not grape.  TJ's, if you're going to throw licorice about all willy nilly, you gotta warn folks.  Allz I'm sayin'.

Easter cupcakes with natural colors and flavorings

A beautifully decorated little basket with a not grape jelly bean on it.  And two others.  Who might be in cahoots.

To make the baskets Mom used to use construction paper, but I found a sweet little set of scrapbooking papers at Target.  Cut strips about 3/4 inch wide and 9 inches long and tape or staple them to an empty cupcake wrapper.  These are great for holding other candies or nuts, too!

How to color coconut for Easter grass with matcha powder

     To make the coconut, I found Bob's Red Mill unsweetened shredded coconut, and got some matcha powder at my local natural foods store.  I heated 1 tsp coconut oil in the microwave until it melted, then stirred in 4 Tbs coconut until just moistened.  Then I stirred in 1/2 tsp matcha powder.  It was a nice mossy/grassy color without changing the flavor too much.  Keep in mind, eating it plain, you will be able to taste the tea, but once you add the flavor of the frosting, you can't taste it any more.

  Since the Bob's Red Mill coconut doesn't have as strong a "coconut" flavor as the moistened sugar-coated stuff, I added 1 Tbs coconut oil (in solid form) to my butter cream frosting.  I used two sticks of softened butter, 1 Tbs coconut oil, 4 cups of organic confectioner's sugar, and about a Tbs of milk. Cream everything together with a mixer until frosting is smooth and fluffy. You may want to adjust the sugar and milk levels of your own depending on how fluffy you like your frosting.

Lemon Cake
Yields: 24 cupcakes

1/2 C whole milk, room temp
4 large eggs, room temp
2 tsp lemon extract (I used Nielsen Massey)
1/4 tsp vanilla beans
1 3/4 C cake flour
1 1/2 C sugar
2 tsp baking powder
3/4 tsp salt
16 Tbs (2 sticks) unsalted butter, cut into 16 pieces and softened
Zest of 1 lemon

Heat oven to 350°F.  Line muffin tins with 24 liners.  In a medium sized bowl, whisk the milk and eggs together.  In the bowl of your mixer, whisk the flour, sugar, baking powder, salt, vanilla beans, and zest together.  On low speed, mix the butter pieces in one at a time until the mixture resembles moist crumbs.  Beat in all but 1/2 C of the milk mixture, then increase the mixer speed to medium and beat the batter until smooth, light, and fluffy, 1 to 3 minutes.  Reduce the mixer speed to low and slowly beat in the remaining 1/2 C milk mixture and the lemon extract until the batter looks slightly curdled, about 15 seconds.  Give the batter a final stir with a rubber scraper and portion into cupcake liners till they are 3/4 full.  Tap the pans on the counter to release bubbles and settle the batter.  Bake until a toothpick comes out clean, about 10-15 minutes, rotating the pans 1/2 way through baking time.  Remove cupcakes from tins and cool on a wire rack.

Review:
The boys have been begging me for these all day.  I love these.  I may never share them.  You're just lucky I shared the recipe with you.  In fact, I take it back.  You can't have it.  Happy Easter, ya cake thieves.

Monday, December 15, 2014

The Great Food Blogger Cookie Swap 2014...

Simple Animal Crackers Recipe

Last year I participated in the Great Food Blogger Cookie Swap and I loved it.  The boys loved getting surprise cookies in the mail, heck, I loved getting surprise cookies in the mail.  Who wouldn't love surprise cookies?  So of course I signed up again this year!

This year I got cookies from:

and I sent these darling little Animal Crackers to:
Ann Marie from Let's Give Peas a Chance
Hannah from Fleur-de-Licious
and 

 Love and Olive Oil and The Little Kitchen with be co-hosting the round-up at the end of the week so you can see all the delicious cookies the fantastic bloggers who participated this year shared with each other!

And so, without further ado...

Animal Crackers

1 ½ Cups plus 2 Tbs unbleached all-purpose flour
½ C oat flour
¼ C packed light brown sugar
¼ C granulated sugar
2 tsp finely grated organic lemon zest, plus 1 Tbs freshly squeezed lemon juice
1 tsp baking powder
¼ tsp fine sea salt
4 Tbs chilled, unsalted butter, cut into ½ inch pieces
¼ C buttermilk
2 tsp honey
1 tsp vanilla extract

In the bowl of a food processor or a large bowl, pulse or whisk the all-purpose flour, oat flour, brown sugar, granulated sugar, lemon zest, baking powder, and salt to combine. Add the butter and pulse or use a pastry blender or your fingers to cut the butter into the flour until the mixture resembles coarse meal. 15 pulses with a food processor.

In a measuring cup, combine the buttermilk, honey, and vanilla and stir until the honey has dissolved. Add to the flour mixture and pulse or sir with a wooden spoon until the dough just comes together. Remove the dough from the processor or bowl and knead gently on a lightly floured surface until smooth, 10 strokes. Flatten the dough into two equal-size disks, cover in plastic wrap, and chill them for at least 1 hour and up to 2 days.

Preheat the oven to 375. Line two baking sheets with silicone baking mats or parchment paper. Place one piece of the dough on a well-floured surface. Roll out the dough until it is 1/8 inch thick lifting the dough and rotating to make sure it's not sticking to the work surface and adding all-purpose flour as necessary.

Animal Crackers Recipe 
Use lightly floured cookie cutters to cut out animal shapes. Using a lightly floured bench scraper or offset spatula, transfer the cut-outs to one of the prepared baking sheets. Re-roll the scraps once and cut them out in the same way. Bake the animal crackers until light golden brown around the edges, 8 to 10 minutes, rotating the baking sheet once from back to front while baking. Cool the crackers on the sheet until they firm up, 5 minutes, and then transfer them to a wire rack to cool. While the first batch of crackers is cooling, repeat the rolling, cutting, and baking process with the remaining dough and scraps.

Animal Crackers Recipe

Ms. Manning has an icing recipe in her book if you'd like these to be even more festive!  Happy Holidays to all my fellow bloggers!  Keep your eyes peeled for another batch of CotC cookie recipes coming soon!

Friday, October 31, 2014

A Very Happy Halloween to You...

1950's Halloween Party

     Our Halloween party was this weekend.  It was a whirlwind of ladybugs, robots, spiders, and werewolves all wrapped up in a tidy 1950's-era package.  It was also pouring down rain and pitch dark so I don't have a lot of pictures of our scavenger hunt in progress, I'm afraid.  I have lots of shots like this:


Yeah...

So I'll tell you what we did and show you pictures of what it looked like sans kids...  We held a 1950's style Halloween party including some reproduction decorations.

1950's inspired Halloween party

1950's style Halloween Party

1950's Halloween party decorations

We carried the theme into the menu by trying to replicate a TV dinner in a more desirable way.  We served homemade meatloaf, mashed potatoes, and steamed peas and carrots mixed with mint.  There was also a jell-o salad style dish because 50's and a 7-Up Cake.  Our starter for the kids was Vienna Sausage size organic hot dog chunks.  We also had meatballs, gluten-free cookies, and the vegetarian main was beans and franks.  We washed it all down with punch and martinis!

1950's 7-Up cake


50's Housewife Halloween Party
This was an agar agar Jell-o salad stand in.  It was interesting.  I especially liked the salad dressing.


Minted Peas and Carrots
1 lb bag carrots, peeled and sliced
1 bag frozen peas
2 Tbs mint
salt and pepper to taste

Steam the carrots until almost done.  Add the peas and continue steaming until warmed through.  Toss with salt, pepper, and mint.  Serve immediately.

50's punch no HFCS!
Punch
1 Bottle Sparkling Apple cider
1/2 Gallon orange juice
1/2 Gallon Earthwise Wild Berry Guava Lemonade
12 scoops Raspberry Sorbet

Add all drinks to a large punch bowl and top with sorbet.  It doesn't look like much, but it tastes great and there are no HFCS or artificial flavors!  It also happens to taste great with vodka, so if you happen to make your martini a little too strong, dollop a little punch in there and you'll be a happy haunter!


One of our lovely hostesses, Danika.

 Our cowboy, David, who handed out the scavenger hunt sheets, sock hopping it up with a robot and a ladybug.  You just don't see that kind of thing every day.  For music, I found several, mostly 50's era songs including: Wooly Bully, Lil' Red Riding Hood, The Twilight Zone theme song, Bo Meets the Monster, Halloween Spooks (featuring Lambert, Hendricks and Ross), I Put a Spell on You, Witch Doctor, Punky Punkin, Morgus the Magnificent, The Purple People Eater, and of course, Monster Mash all downloadable on Amazon from about $.90 to $1.50.  Some of these songs are crazy weird.  Just sayin'.

 Our homage to 1950's cowboy flicks, the kids had to break out of jail by sliding down the slide.  The sheriff gave them a handy map to the rest of the scavenger hunt.  Apparently he was in on the whole thing...

First stop, Pin the Tail on the Donkey.

Halloween apple game
 Next up, apples on strings.  At every station, the kids got stickers to prove they completed the mission.

 
 Because it was raining and I was busy appleing out in it, I don't have one picture of our witch, Lauren, who many kids said was their very favorite part of the hunt, and was also one of our hosts.  She had a bubbling cauldron full of dry ice and a bowl full of "eyeballs" for the kids to scrounge through to help her find her jewels (skull rings which the kids got to keep).  So here's a picture of her hut, which you may remember as the troll house from our fairy party a few years ago.

50's inspired Halloween party Hula hoop
 Can't really have a 1950's party without a hula hoop, can you?  No.  No you can't.

 50's inspired halloween party frisbee toss
A classic game with a 1950's twist.  Tossing mini Frisbees into the pumpkin's mouth turns a bean bag toss into game using an iconic vintage toy.


Note to self: Yellow Frisbees are hard to find in a leaf pile...

Spooky ghosts in the rain...

 Fortunately revealed in the daylight to be balloons with flashing lights inside zip-tied to dowels.

 Our fortune teller (and co-host), Tori, before she braved the weather to read our guest's fortunes.

  It was wet business...

 EEK!  A GHOST!  Matt was the scariest ghost in a sheet the world has ever seen.  Three-year-olds the world over were terrified.  The kids were rewarded with Trader Joe's candies when they returned with their scavenger hunt sheets filled out.


1950's housewives Halloween costumes and party ideas
 Twin housewives, Bekah and myself.  At the end of the party.  With fallen hair and rubbed-off make-up.  Drinking.  I also discovered something about my costume.  All it takes is a hair change to turn perky, perfect wife-lady into:

The Lunch Lady.

Hoagies and grinders, baby.

Friday, September 19, 2014

S'more S'mores, Please!

I've got two boys.

I've got two boys who like campfires.

I've got two boys who like campfires in the Spring, Summer, Fall or Winter.

I've got two boys who like campfires in the Spring, Summer, Fall or Winter, because campfires mean S'mores.

All...


Kinds...


Of...


S'mores...


Let's count the ways, shall we?  Number 1, cookies and marshmallow.  You may remember my post from last year featuring these bad boys:


Or, 2, why not try it with Everybody's Mom's Chocolate Chip Cookies?  No need for an extra chocolate slice!


3) My eldest came home with the next idea from Scout Camp.  And let me say:  It's genius.  Put your S'mores toppings into an ice cream cone, wrap it in foil, and put it in the fire!  I added walnuts 'cuz yum.


4) A few of you may recall my facebook post encouraging Peep hoarding this Spring.


The number one thing I learned from facebook this year is that people hate Peeps, ya'll. This next picture is for those people:


Trust me on this, our neighbors taught us that Peeps over flame turn into a completely different thing.  It's like crème brûlée.  Then you smash it between graham crackers and chocolate.  This picture is for those of you who love Peeps.  And also for those of you who hate them, 'cuz they're pretty mutilated.

And, yes, they stay fresh this long.  Preservatives ftw.

If you'd like to skip the preservatives, I've got something for you... 

Number 5: Homemade S'mores

This one uses another technique we've learned from friends, chocolate frosting instead of chocolate bars.  No waiting for it to melt.  Just slathering and eating.  Our friends used store-bought frosting.  Not my thing, so homemade frosting it is.  Before you ask, I did try multiple times to make homemade vegan marshmallows.  They did not happen.  They were delicious, but they were gloopy and completely campfire incompatible.  I have not given up, but this post had to go up someday so for the time being, these are store bought 'shmallows.


Homemade Graham Crackers

America's Test Kitchen Family Baking Book  p. 177

1 3/4 C Graham flour (or whole wheat flour)
1/2 C all-purpose flour
1/2 C sugar
1 tsp baking powder
1/2 tsp baking soda
1/2 tsp salt
1/4 tsp ground cinnamon
8 Tbs unsalted butter, cut into 1/2-inch pieces and chilled
5 Tbs water
2 Tbs light molasses
1 tsp vanilla extract

Heat oven to 375°.  Process the flours, sugar, baking powder, baking soda, salt, and cinnamon in a food processor until combined, about 3 seconds.  Add the butter and process until the mixture resembles coarse meal, about 15 seconds.  Add the water, molasses, and vanilla and process until the dough comes together, about 20 seconds.  Divide the dough into 2 even pieces.  Roll each piece of dough out between 2 pieces of parchment paper to a 16X8-inch rectangle, 1/8 inch thick.  Remove the top pieces of parchment and trim each piece of dough into a tidy 15X7 1/2-inch rectangle with a knife, and then score each into eighteen 2 1/2-inch squares.  Prick each square several times with a fork.  Slide each piece of dough and parchment onto separate baking sheets.  Bake the cookies until golden brown, 10 to 15 minutes, switching and rotating the baking sheets halfway through baking.  Let the cookies cool completely on the baking sheets, then break them apart along the scored lines and serve.

Notes:
I dusted some of mine with a mixture of sugar and cinnamon.
These freeze really well.

Frosting
1 C Powdered Sugar
1 stick Butter
2 Tbs Cocoa Powder
1 Tbs cream

Beat the butter a little, then slowly add the sugar and cocoa powder.  If it's a little dry, mix in the cream.


Monday, September 1, 2014

Throwing a Little Something Together...

     I've got friends who have an obsessive desire to follow recipes exactly.  I used to be this person.  It's what you do when you're first learning how to cook.  But I think it makes you afraid a little.  Afraid you might mess something up.  You know what?  You almost never do and a lot of times what you come up with is better than what the Internet says, especially one of those recipes from TV, blerg.  AND most of the time the recipe has got one or twelve things you don't have sitting in your fridge at the moment.  So let's talk about what is in your fridge.  At any moment I have every ingredient necessary for a good soup, Italian anything, stir-fry, and hummus.  Always have the ingredients for hummus.  All you need for hummus is any bean variety, oil, garlic, and salt.  All you need for soup is a can or two of tomatoes and a variety of vegetables, and sometimes you can pull it off without the tomatoes!  Italian needs tomatoes, basil and garlic.  Mushrooms are good, other herbs, or onions, but really all you need are tomatoes, basil, and garlic.  Let's get to that stir-fry now.


I started on this because I had some peanut sauce from the Farmer's Market calling my name all week.  I also had purple cauliflower, red cabbage, carrots, a squash from my garden, oyster mushrooms, a white bell pepper, half an onion, and some garlic.  Sounds like stir-fry to me.  Does it matter what color your vegetables are?  Nope.  Do you need all those vegetables to make a stir-fry?  Nope, though it does help to feed a larger group to have a variety if you only have small quantities of each like I had.  Do you have to have fancy soba noodles like I did?  Not even.  I wasn't even thinking of noodles when I realized I had the makings for stir-fry.  I was going to do rice first, but realized I hadn't left enough time to pull it off, so noodles it was!  What I'm trying to say here is relax.  Take a deep breath.  It's just one dinner.  You can do it.  If all else fails, there's always peanut butter or grilled cheese, or whatever sandwich combination your family is allowed to eat in this day of allergens and intolerances.

The biggest thing to remember when doing a stir-fry for a family is not to cook everything in the same pan unless you have a huge pan.  I like my stir-fry veggies warmed and nearly raw, cooking everything in the same pan tends to steam everything and take forever so you're left with a long cook time and mushy veg.


Refrigerator Clean-Out Stir Fry
Serves 4

3 large carrots, sliced
1/2 large onion, sliced
2 large garlic cloves, thinly sliced
1/2 medium cabbage, sliced
1 large or 2 small yellow squash, sliced
1/2 lb oyster mushrooms, chopped
1/2 cup cauliflower florets
1 bell pepper, sliced
2 green onions, sliced
1 Tbs sesame seeds
1 bunch of soba noodles, boiled and drained
1 tsp high heat oil
1 Tbs peanut sauce, soy sauce, or tamari sauce

On medium/high heat, cook onions first in a small amount of oil until they have softened slightly, then set them aside, then carrots cooked until slightly soft and set aside, continue cooking vegetables one at a time until all are cooked, excluding the green onions and sesame seeds, mushrooms and garlic can go in together.  Mix all the veggies together.  Plate noodles and top with cooked veggies, finish with the sauce of your choice.

Now, go to your fridge and start experimenting!!  Here's a few more ideas to get you started:
Chicken, pork, or tofu, eggplant, peas, bok choi, broccoli, any color of bell pepper, zucchini, green beans, water chestnuts, baby corn, bamboo shoots.

Monday, July 21, 2014

Ice-Pops, Ideas, and a Give Away...

12 Ways to use Zipzicles Ice-Pop Pouches

So these are Zipzicles.

Zipzicle Ice-Pop Pouches
     You want these.  My friend Cara from Fork and Beans found some at Cost Plus World Market and went on to make some lovely homemade Otter-type pops.  I fiddled around on the Internet a bit and found that WizCo is just a few miles from my house!  They graciously sent me a sample pack and I went a little bonkers, ya'll.  I just kept on thinking of things to use these little pouches for!

Zipzicle Ice-Pops, Use 1 of 12
     First off, I did make pops.  'Cuz yeah, Summer.  These are each a different type of juice.  The clear one is a simple infused water concoction of nasturtium and mint.  Not sweet for the kiddles, but so nice for me on hot days!  Each pouch contains almost 1/2 a cup, so to make my grown-up Zipzicle:

Nasturtium and Mint Ice-Pop
1/2 C water per pop
2 nasturtium flowers per
1 two inch sprig fresh mint (about 5 leaves) per

Combine in a cup and let steep for 30 minutes.  You can muddle it a bit at the end if you like.  I chopped up a few blossoms to make it pretty, but you don't need to.  If you are using flowers, place a few chopped blossoms into the pouch, pour infused water in to the fill line, close bag, and tilt it back and forth gently to distribute the flowers evenly.  Lay flat for a few hours to freeze.

Homemade Nasturtium Mint Ice-Pops from Crackers on the Couch

The other pops are juices I bought at Trader Joe's, one is the Very Green Smoothie, one is carrot, and one is Tart Cherry.  The cherry one is especially good.  We also enjoy orange, grape, and fruit puree pops regularly!

And now for the rest!

Zipzicle Yogurt Tubes Use 2 of 12
     Next up, can we just talk about how long I've been wanting to make yogurt tubes?  I don't like store bought ones that are full of sugar and chemicals, and the organic frilly ones are few and far between.  I have thought for years that there had to be a better way.  Some way to make yogurt tubes at home.  This is it, yo!  These are homemade yogurt sweetened with a bit of honey.  No cane, beet or corn sugar, no rBST, just milk, bacteria, and honey.  Yummers.

Zipzicle Applesauce pouches Use 3 of 12!
     Number 3 is applesauce pouches.  1/2 C is a good portion of sauce.  You can fill past the fill line if you're not going to freeze it.  I found that the best way to fill these pouches with thicker things like yogurt and applesauce is to use a pastry bag to fill them half way, tap it once or twice to get out the bubble, and then fill the rest of the way.  For thicker substances or tough bubbles, a poke or two with a chop-stick will go a long way.

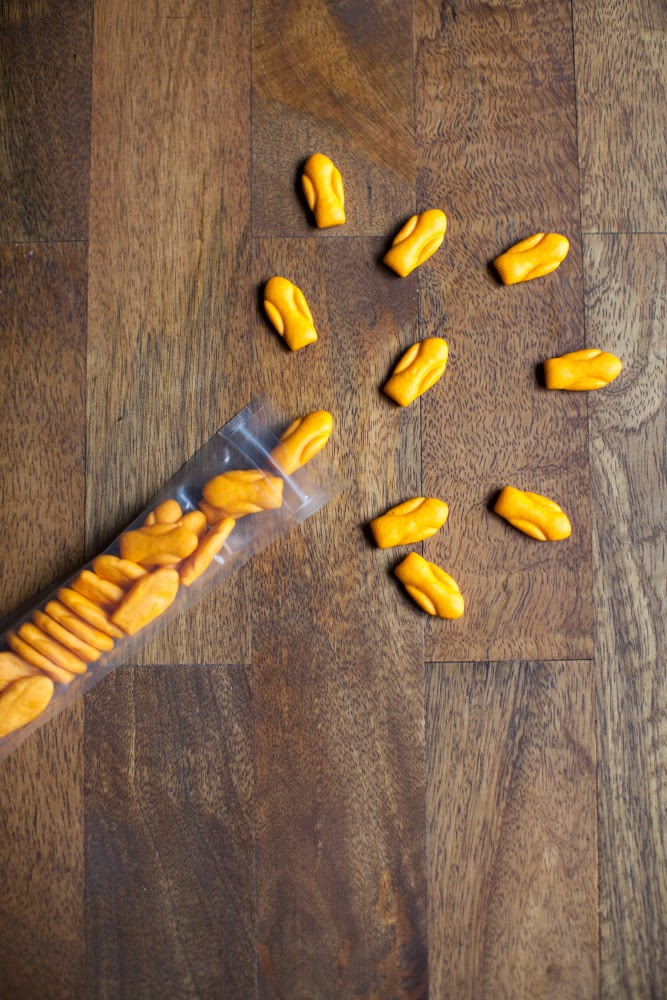
Zipzicle cracker pouch, use 4 of 12!
     Fourth up, any small, amusingly shaped cracker will fit beautifully into these pouches.  It's slightly less than a serving size, but just right for a lunchbox or a quick snack after karate.

Cute little s'mores treat sacks: Use 5 of 12! And speaking of snacks, let's talk dessert, shall we?  A few mini chocolate chips, some tiny marshmallows, and a graham cracker bear or two.  A large pastry tip makes a nice funnel for the chocolate chips.  I know this is the complete embodiment of opposite from what I said about the yogurt tubes, but you know, cute is cute sometimes and dessert is dessert and s'mores is s'mores.

Zipzicle pouches for trail mix: Use 6 of 12!
     For a healthier alternative while camping or hiking, Good Old Raisins and Peanuts really hit the spot.  A serving of peanuts almost fills up to the fill line, mix in a few raisins and GORP's your uncle!

Zipzicle pouches for packing hummus: Use 7 of 12!
     For flying, camping, or car trips, hummus makes a great snack, and 1/2 a cup of hummus makes a pretty healthy portion!  The flexibility of the pouches makes it really easy to get all of it out.  I've got a straw brush that I used to clean the pouches out after the hummus.

Zipzicles for Jello!  Use 8 of 12
    Again, with the food coloring, but you know what?  There's exactly enough room in these pouches for Jell-o.  I used the quick-set method so that the heat wouldn't melt the plastic.  Sets up faster that way, too!  I wonder if agar agar jello would work in these, but I think that by the time it was cool enough to pour, it would be set too far.  An experiment for another day, perhaps.
Zipzicles as party favor bags!  Use 9 of 12!
     Need a sweet little pouch for party favors?  Fill them up with candy, jewelry, or confetti!  (Maybe don't give out the confetti filled ones until the end of the party...)

Zipzicle soup pouches!  A great snack and use 10 of 12!
     I think this is my favorite idea: A little tomato soup and a pouch of oyster crackers!  Again, I poured the soup in cold, and served it at room temp.  It's a nice, healthy change-of-pace snack for the kid who's tired of cheese sticks and fruit slices.

Zipzicle craft packs!  Use 11 of 12.
     And then there are the non-food options.  Let's talk art-on-the-go, shall we?  Four thin markers fit very well in here, four or five colored pencils would do nicely, as well.  Just right for trips!  You can fit a few pipe-cleaners in here, too I bet, though I haven't tried it.  I did try Rainbow Loom bands and they were near impossible to get back out. Think, long and thin, and things that shake out easily.

Zipzicle small toy pouch.  Use 12 of 12.
     Speaking of things that shake out easily, a few Lego bricks are just the thing for a quick creation on the go.  Nanoblocks fit well, Micro Machines, too.

Here's a few more ideas!   
I haven't tested them, but you can!
  • Make your own "Pedialyte" pops.  Coconut water is an excellent (and more tasty) electrolyte replenisher!
  • Try these for pureed baby foods or toddler snacks like Cheerios.
  • Going camping? Fill one with ketchup, one with mayo, and one with mustard.
  • Maybe a small First-Aid Kit, a couple of Band-aids and a tube of Neosporin.
  • What about filling one with mouthwash for weekend trips?
And Now, A Give Away!!
Have some ideas for these lovely little bags?  Wanna get some for free?  Well, you, my friend are in the right place!  WizCo is allowing me to give three lucky people a free 12-pack of Zipzicle pouches!  Leave me a comment here or on my facebook page with your favorite ice-pop flavor or a new idea for the bags and you'll be entered to win!  Contest ends on Friday so chime in!

*Give Away Has Now Ended*

Related Posts Plugin for WordPress, Blogger...