Unlike
the butter post in which cream became butter in a matter of moments, this week's yogurt process is an exercise in patience. But not too much if you do it at night. Then, it's an exercise in sleeping. My favorite kind of exercise...
A few years ago, I found a blog called
Crockpot 365. This dear lady posted a new crockpot recipe a day for 365 days. And one of the things she made was yogurt. Oh My. Her method required a timer and since I never, ever, ever, ever, *sigh*
ever remember to set mine, I found another blog post at
wikihow with temperatures for making yogurt. I like how simple the crockpot recipe is, but it takes a lot of baby sitting that I generally don't have the patience for. And there are a lot of steps in the wikihow article I also really don't feel like messing around with. Recently, I came up with my own method for making yogurt using a mixture of these two methods and this is how it goes:
You'll need:
Yogurt culture
Milk, any kind will do, even non-fat*
Crock Pot
Large heavy bottomed pot
Thermometer
Whisk
Container for storing your yogurt in
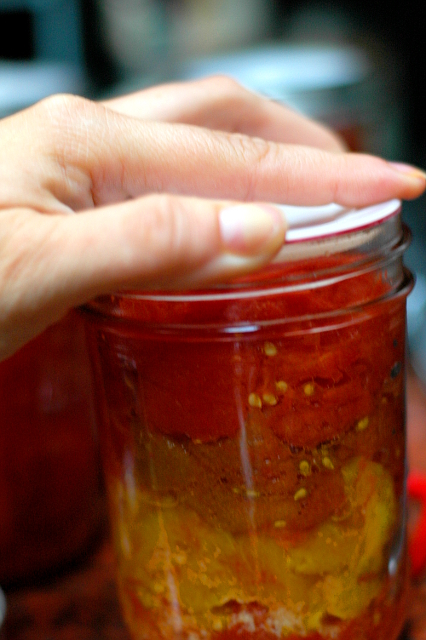
Acquire yogurt culture. You can buy powdered culture, but most people just buy a small carton of plain yogurt at the store. I have found my very favorite yogurt for starting a batch is Dannon. Don't ask me why, I actually don't like it by itself. But something in it makes the best-tasting homemade batch to start off. Be sure to save 1/2 C of your yogurt to be the base for your next batch. If you forget or it goes bad before you are ready to make your next batch, just start again with store-bought! For this demonstration, I am using yogurt left over from my last batch. Because I'm cool like that.

Heat milk to 185° in a heavy bottomed pot, stirring with a whisk the
whole time to keep it from burning. I put mine on high heat so it heats
up faster (5-7 minutes) If you are uncomfortable with using high heat,
by all means, use lower heat, but you will have to stand there stirring
longer. You don't have to use raw milk, I just thought I'd give it a try this time and found I really like it! You can use any kind of milk whole, non-fat or anywhere in between, *
but not ultra-pasteurized. Apparently, the ultra-pasteuriziation process, in addition to making it taste weird, kills everything in it. Since yogurt requires bacterial action, U-P milk just won't work.
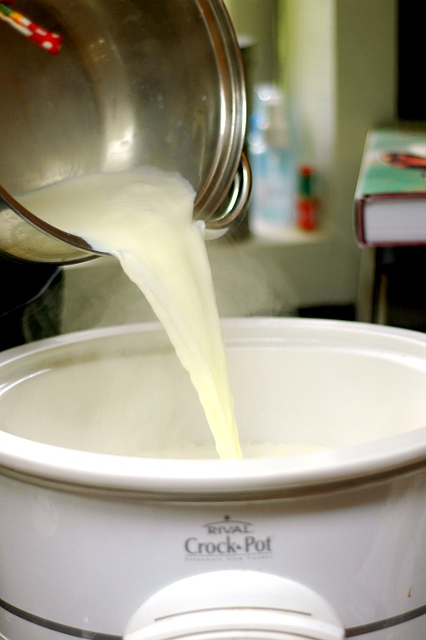
Just in case you need to know what it looks like to pour milk into a pot...
This is what stirring with a whisk looks like...
When milk reaches 185°, remove from heat and pour into room temperature
crock pot. Remove yogurt from fridge and leave on counter to
warm up.
Milk getting poured again. Groundbreaking, right?
When milk cools down to between 110 and 90 degrees, whisk culture
into warmed milk. Depending on the temperature of your room, this can take an hour to an hour and a half.
You see this? This is a highly adequate picture of what it looks like when you put the lid on your crockpot...
Cover and wrap in insulated bag or towels. Let sit
at least 8 hours. The longer you let it sit, the firmer it will be.
This is what mine looked like the next day. I let it sit for quite a while since I got knocked on my tail by a cold between starting the yogurt and getting around to opening it up. Nearly 18 hours, I estimate. You can see the cream layer on this whole milk yogurt. A half gallon of milk will yield approximately the same amount of yogurt.
If you see some yellow water-y looking stuff floating on top of your yogurt this is perfectly normal. It stands to reason that the one time I actually wanted to see it so I could photograph it for you guys I didn't get any! This is the first time this has ever happened... Maybe the longer sitting time? Anyway, I use a big spoon to scoop it out, as I like my yogurt a little thicker. You can stir it in if you want. If you want your yogurt even thicker, many people add a little powdered milk to theirs, though I never have. On rare occasion, I strain mine through some cheese cloth or coffee filters to make it extra thick, but I feel like it wastes a lot of yogurt to do this (reduces the volume by more than half) so while it's delicious, I save that for special occasions.
My youngest son's favorite breakfast of all time...
Occasionally I have had the milk not set. Perhaps the yogurt was
added when the milk was too warm, or maybe the culture was bad. Once, I
had it turn out pink. In either of these cases, (especially the pink
one) it's best to throw it out and start again. That said, I've only
had those results maybe three times in the years I've been making my own
yogurt.
But when it works (and it totally will, trust me) it's another one of those funny little miracles in the kitchen. You buy it in the store for years, but you never think about how simple it is to make all your own.
This yogurt beats the pants off anything you've ever bought. Not sour at all, just creamy and wonderful. If you don't want to eat it just plain, we have used fruit, agave nectar, honey, sucanat, and pure maple syrup as sweeteners. I also like cinnamon and vanilla as flavorings. You can use this in Indian cooking (Raita, anyone?), baking, smoothie creation, and also apparently as a facial and a hair conditioner. Eh. Who knew?
One last note, I've never done it, but it seems homemade soy yogurt is a thing that people out there make. It appears to be a similar process and relatively simple, but you have to add a thickener like agar flakes. And I hear, sometimes it involves a microwave...