Showing posts with label cake. Show all posts

Wednesday, March 25, 2015

A Very 80's Easter

     When I was a kid, my Mom made lemon cupcakes with coconut sprinkled frosting in little baskets to take to school at Easter.  My Great Aunt made cakes shaped like bunnies with lemon cake and coconut sprinkled frosting to feast on at the huge family Easter luncheons she used to throw.  When I was pregnant with my first son and craving lemon everything, I had to have lemon cake with coconut sprinkled frosting (generously supplied by my friend Susan, who I am convinced is the reason I survived my first pregnancy without killing somebody in a lemon craving induced stupor).  What I'm saying is that lemon cake with coconut sprinkled frosting and me go waaaay back.

     Unfortunately, the kind of cake and coconut I ate growing up is not how I eat anymore.  I haven't bought a Duncan Crockerbury box in a decade at least.  I don't use sweetened coconut or green food coloring (with one exception).  But I really, really wanted to make those little cupcake baskets with my boys that my Mom made all those years ago. 

Naturally colored Easter cupcakes lemon and coconut with matcha for green

So I did.

     I found Trader Joe's jelly beans, flavored and colored with fruit juice, modified an America's Test Kitchen recipe to taste exactly like the ol' boxed cake lemon flavor, and colored the coconut with matcha powder.  The result was pretty much exactly like what I remember from childhood.  Except the jelly beans.  I'm particular about jelly beans.  Beware the dark purple TJ's jelly beans.  They are not grape.  TJ's, if you're going to throw licorice about all willy nilly, you gotta warn folks.  Allz I'm sayin'.

Easter cupcakes with natural colors and flavorings

A beautifully decorated little basket with a not grape jelly bean on it.  And two others.  Who might be in cahoots.

To make the baskets Mom used to use construction paper, but I found a sweet little set of scrapbooking papers at Target.  Cut strips about 3/4 inch wide and 9 inches long and tape or staple them to an empty cupcake wrapper.  These are great for holding other candies or nuts, too!

How to color coconut for Easter grass with matcha powder

     To make the coconut, I found Bob's Red Mill unsweetened shredded coconut, and got some matcha powder at my local natural foods store.  I heated 1 tsp coconut oil in the microwave until it melted, then stirred in 4 Tbs coconut until just moistened.  Then I stirred in 1/2 tsp matcha powder.  It was a nice mossy/grassy color without changing the flavor too much.  Keep in mind, eating it plain, you will be able to taste the tea, but once you add the flavor of the frosting, you can't taste it any more.

  Since the Bob's Red Mill coconut doesn't have as strong a "coconut" flavor as the moistened sugar-coated stuff, I added 1 Tbs coconut oil (in solid form) to my butter cream frosting.  I used two sticks of softened butter, 1 Tbs coconut oil, 4 cups of organic confectioner's sugar, and about a Tbs of milk. Cream everything together with a mixer until frosting is smooth and fluffy. You may want to adjust the sugar and milk levels of your own depending on how fluffy you like your frosting.

Lemon Cake
Yields: 24 cupcakes

1/2 C whole milk, room temp
4 large eggs, room temp
2 tsp lemon extract (I used Nielsen Massey)
1/4 tsp vanilla beans
1 3/4 C cake flour
1 1/2 C sugar
2 tsp baking powder
3/4 tsp salt
16 Tbs (2 sticks) unsalted butter, cut into 16 pieces and softened
Zest of 1 lemon

Heat oven to 350°F.  Line muffin tins with 24 liners.  In a medium sized bowl, whisk the milk and eggs together.  In the bowl of your mixer, whisk the flour, sugar, baking powder, salt, vanilla beans, and zest together.  On low speed, mix the butter pieces in one at a time until the mixture resembles moist crumbs.  Beat in all but 1/2 C of the milk mixture, then increase the mixer speed to medium and beat the batter until smooth, light, and fluffy, 1 to 3 minutes.  Reduce the mixer speed to low and slowly beat in the remaining 1/2 C milk mixture and the lemon extract until the batter looks slightly curdled, about 15 seconds.  Give the batter a final stir with a rubber scraper and portion into cupcake liners till they are 3/4 full.  Tap the pans on the counter to release bubbles and settle the batter.  Bake until a toothpick comes out clean, about 10-15 minutes, rotating the pans 1/2 way through baking time.  Remove cupcakes from tins and cool on a wire rack.

Review:
The boys have been begging me for these all day.  I love these.  I may never share them.  You're just lucky I shared the recipe with you.  In fact, I take it back.  You can't have it.  Happy Easter, ya cake thieves.

Tuesday, November 26, 2013

Another Wonderful Year...

     My blog is three today!  I am astonished how far my photography has come.  It was an afterthought.  When I started the blog I was just going to do some recipes give them a review and call it a day.  A friend suggested I start adding pictures.

They looked like this:

And this:

And this:

Yikes.

Somehow, I fell in love with the medium of photography.  The fickle partner that is sunshine in the Pacific Northwest, the food that refuses to look beautiful even though it's delicious, the ever elusive perfect styling set up.  And yet, I love it.  I.  Love. It.  This year I did my first professional photo shoot.

They looked like this:
Uncle Eyal's Baba Ganouj Photo Shoot

And this:
Uncle Eyal's Zahug Photo Shoot

 And this:
Uncle Eyal's Kyle

 I think a little celebration is in order.

Old-Fashioned Chocolate Cake from America's Test Kitchen

Old-Fashioned Chocolate Cake
Recipe from The America's Test Kitchen Family Baking Book, p. 298
Serves 8-10 

1/4 C Dutch-processed cocoa powder, plus extra for dusting
1 3/4 C all-purpose flour
1 1/2 tsp baking soda
1 tsp salt
1 C buttermilk, room temp
2 tsp vanilla extract
4 oz unsweetened chocolate, chopped
1/2 C hot water
1 3/4 C sugar
4 large eggs, room temp
2 egg yolks, room temp
12 Tbs unsalted butter, cut into 12 pieces and softened

1. Adjust an oven rack to the middle position and heat the oven to 350 degrees.  Grease two 8- to 9-inch round cake pans, then dust with cocoa powder and line the bottoms with parchment paper.  Whisk the flour, baking soda, and salt together in a medium bowl.  In a small bowl, whisk the buttermilk and vanilla together.

2. In another medium bowl, combine the chocolate, 1/4 C of the cocoa powder, and hot water and set over a large saucepan of barely simmering water, making sure the water does not touch the bottom of the bowl.  Heat the mixture, whisking often, until the chocolate is melted and the mixture is smooth, about 2 minutes.  Stir in 1/2 C of the sugar and continue to heat until thick and glossy, 1 to 2 minutes.  Remove the bowl from the heat and set aside to cool.

3. In a large bowl, whip the eggs and egg yolks together with an electric mixer on medium-high speed and gradually add the remaining 1 1/4 C sugar, about 1 minute.  Continue to whip until mixture is very thick and voluminous, 4 to 8 minutes.

4.  If using a standing mixer, replace the whisk with the paddle attachment.  Beat the cooled chocolate mixture into the egg-sugar mixture on medium speed until thoroughly incorporated, 1 to 2 minutes.  Beat in the butter, one piece at a time, about 30 seconds.

5.  Reduce the mixer speed to low and beat in one-third of the flour mixture, followed by half of the buttermilk mixture.  Repeat with half of the remaining flour mixture and the remaining buttermilk mixture.  Beat in the remaining flour mixture until just incorporated.

6. Give the batter a final stir with a rubber spatula to make sure it is thoroughly combined.  Scrape the batter into the prepared pans, smooth the tops, and gently tap the pans on the counter to settle the batter.  Bake the cakes until a toothpick inserted in the center comes out with a few crumbs attached, 25 to 30 minutes, rotating the pans halfway through baking.

7.  Let the cakes cool in the pans for 10 minutes. Run a small knife around the edge of the cakes, then flip them out onto a wire rack.  Peel off the parchment paper, flip the cakes right side up, and let cool completely before frosting, about 2 hours.

Vanilla Frosting
Makes about 4 C, enough for a sheet cake or 2-layer cake
Be sure to use unsalted butter here.

3 sticks unsalted butter, cut into chunks and softened
3 Tbs. heavy cream
2 1/2 tsp. vanilla extract
1/4 tsp. salt
3 C (12 oz) confectioner's sugar

1. Beat the butter, cream, vanilla, and salt together in a large bowl with an electric mixer on medium-high speed until smooth, 1 to 2 minutes.

2.  Reduce the mixer speed to medium-low, slowly add the confectioner's sugar, and beat until incorporated and smooth, 4 to 6 minutes.  Increase the mixer speed to medium-high and beat until the frosting is light and fluffy, 5 to 10 minutes.

This cake is vanilla in the middle, so I took 1/3 out, then added 1/2 cup cocoa powder and mixed it in well. 

Review:
You're gunna want a big glass of milk with this.  And maybe some vanilla ice cream.  Whether it's a birthday, a milestone, or just a nice, clean kitchen, this is definitely the cake for your celebration!

Wednesday, March 27, 2013

Sometimes Things Just Don't Work Out...

You may remember last year's post in which I tried to find my friend Laura's cake, failed, and coincidentally our trip to Hawai'i was coming up and also Easter.  It's that time again.  It's almost Easter, we're on our way to Hawai'i, and I'm going through my recipe box looking for Laura's cake. 

I found another recipe that sounded about right, but the problem was that it used a boxed cake mix, instant pudding, and Cool Whip.  And you guys know that's not how I cook, right?  So I decided to make the whole thing from scratch. 


My poor pineapple had bed head...


 First time I ever opened a coconut.  It wasn't terribly hard, actually...

And this was the product.

 Isn't it gorgeous?!


 And it tasted?

 Absolutely.

 Disgusting.

The cake was perfect.  Genuinely wonderful.  The frosting was Spectacularly Awful.  I narrowed it down to the pineapple.  It tasted fine by itself, but somehow when it got mixed in with everything else it was bitter and... I'm just gunna say it... unholy.  It was unholy, people.

So I am giving you the original recipe.  That tastes good.  And not gross.  And I will tell you what I did in case you want to avoid whatever innocent mistake I made that went that horribly, horribly, horribly awry.  

Pineapple Cake
Yellow cake mix (prepare as directed on box)
1 pack (small) vanilla instant pudding
4 oz cream cheese
1/2 pint of half and half
1 can crushed pineapple (drained)
1 C shredded coconut
1/2 large container Cool Whip
Chopped walnuts

Combine pudding, cream cheese, half and half.  Mix till smooth on medium speed for about 2 minutes.  Fold pineapple, coconut and Cool Whip into pudding mix.  Frost cake.  Sprinkle with walnuts.

What I Did
The cake recipe is modified from the All-Purpose Buttery Yellow Layer Cake from The America's Test Kitchen Family Baking Book, pg. 280.

1/2 C Whole Milk, room temp.
4 large eggs, room temp.
2 tsp vanilla extract*
1 3/4 C (7 oz) cake flour (I used Bob's Red Mill PastryFlour)
1 1/2 C (10 1/2 oz) sugar*
2 tsp baking powder
3/4 tsp salt
16 Tbs (2 sticks) unsalted butter, cut into 16 pieces and softened
*I found vanilla sugar at the store.  I used 1 C sugar + 1/2 C vanilla sugar

1. Adjust an oven rack to the middle position and heat the oven to 350 degrees. Grease and flour two 8- or 9-inch round cake pans, then line the bottoms with parchment paper.  Whisk the milk, eggs, and vanilla together in a small bowl.

2. In a large bowl, whisk the flour, sugar, baking powder, and salt together.  Using an electric mixer on medium-low speed, beat the butter into the flour mixture, one piece at a time, about 30 seconds.  Continue to beat the mixture, one piece at a time, until it resembles moist crumbs, 1 to 3 minutes.

3. Beat in all but 1/2 C of the milk mixture, then increase the mixer speed to medium and beat the batter until smooth, light, and fluffy, 1 to 3 minutes.  Reduce the mixer speed to low and slowly beat in the remaining 1/2 C milk mixture until the batter looks slightly curdled, about 15 seconds.

4. Give the batter a final stir with a rubber spatula to make sure it is thoroughly combined.  Scrape the batter into the prepared pans, smooth the tops, and gently tap the pans on the counter to settle the batter.  Bake the cakes until a toothpick inserted in the center comes out with a few crumbs attached, 20 to 25 minutes, rotating the pans halfway through baking.

5.  Let the cakes cool in the pans for 10 minutes.  Run a small knife around the edge of the cakes, then flip them out onto a wire rack.  Peel off the parchment paper, flip the cakes right side up, and let cool completely before frosting, about 2 hours. 

This part is awesome.

Now for the rest of it:
1. To open the coconut, I used the heat and beat method I found here: http://www.wikihow.com/Open-a-Coconut though, I think the oven is supposed to be 400 degrees instead of 200 degrees.
I shredded it in the food processor using the shredding plate.  Then I toasted it in the oven following these directions.

2. I peeled and cored the pineapple and also shredded it using the shredding plate in the processor.  Then I drained it for a few seconds in the strainer.  There ended up being about 10 ounces.

3. I made the vanilla pudding recipe from my Valentine's post.  I used half of it.

4. I made whipped cream using 1/2 pint of whipping cream, three tsp agave nectar and 1/2 tsp vanilla.

5. And I used a brand of cream cheese that doesn't have any chemicals and junk in it.

And then I mixed it all up and somehow it tasted like earwax.  So there you go.  You tell me.

And you know what else?  It's still not Laura's cake...  I'm pretty sure this was one my Great Aunt Ophelia used to make.

But it was beautiful.

On the homeschool front this year, I used many of the same books from last year, but I also found two new story books for the kids.  Punia and the King of the Sharks a Hawaiian Folktale and Pig Boy: A Trickster Tale From Hawai'i.  Both of them were a hit with the boys!  Libraries are awesome, ya'll!

Friday, August 24, 2012

Five Minutes till Vegan Love Fest!

     It is now day 7 of my son's Week Without Milk.  He's been having some tummy issues and I suspect milk for many reasons I won't bore you with.  On Sunday our family went to a birthday party and of course, cake was right out.  He was so disappointed that I promised him a cupcake on Friday.  It has been his one hold out thought in a week devoid of pizza, macaroni and cheese, and grilled cheese sandwiches (his absolute favorite thing in the whole wide world).   Poor kid.  And I have been eschewing milky things too so he doesn't feel like the only one.  Poor me.


     The quickest cake in the entire world to make is the microwave 5 minute cake in a cup.  The problem with those cakes is that they taste almost, but not quite, entirely unlike chocolate cake, to paraphrase Douglas Adams.  I figured that the problem was probably the egg, but I didn't know how to remedy the situation.  Then I found this vegan recipe over at Super Cool Food Blog and that was the answer!  It's fantastic!  I modified it a bit to fit what I had in my house and because I promised Boy 1 a cupcake, I "baked" them in cupcake wrappers set inside ramekins.  The instructions below are for one mug cake, followed by directions for two cupcakes.


Five Minute (Vegan) Chocolate Mug Cake
Makes one serving

4 Tablespoons all-purpose flour
4 Tablespoons sucanat
2 Tablespoons cocoa powder 
1 teaspoon baking powder
3 Tablespoons water
2 Tablespoons coconut oil
1 teaspoon red wine vinegar
1/2 teaspoon vanilla
1) Add coconut oil and water to a small dish and microwave for about one minute or until coconut oil is melted.
2) In a large mug, mix flour, sugar, cocoa powder, and baking powder with a fork until well-mixed.
3) Add the coconut oil mixture, vinegar, and vanilla and stir until incorporated.
4) Microwave on High for about 1.5 minutes. Check cake; if it appears too wet, microwave for additional 30 second increments. Depending on the strength of your microwave, cake will likely be done (but a little gooey) around the 2 minute mark.

For Cupcakes:

For step 2 and 3, mix ingredients in a bowl instead of a mug.  Put one liner in each of two ramekins and divide the batter between them.  Microwave for about a minute and check them.  My tester came out clean at 1 minute, but they were still a little jiggly, so I nuked em' again for another 30 seconds and called them done.

If you want to frost them, stick them in the fridge for about 5 minutes.  I just mixed up a bunch of stuff for these.  Mostly butter and cream.  That aught to be quite the test for his system!

Note:

     I don't really suggest chocolate frosting for these, it's a little too much, but it's what my son wanted.  I think a nice vanilla may be a better way to go.

Review:

Come to me, my love... Where have you been all my week?


 Ahhhh...


Ew?!

Just Kidding!
(You had me there for a minute, boy...)


Wednesday, March 28, 2012

Float Like a Butterfly

     I am a card carrying member of the Jeans Jumper Brigade.  Yes, I'm a homeschool Mom.  I can't even begin to describe how grateful I am that we are in a situation where I can stay home and deal with love on my kids.  I have wanted to homeschool since I heard there was such a thing.  Before I was married.  Before I had kids.  Blah, blah, blah, homeschooling is awesome, I'm awesome, my kids are awesome...

     As part of our awesome home school of awesomeness, we have been doing "Hawai'i Month" in the lead-up to our visit to the Big Island.  Our boys really hope to see the volcano and the lava tube, a macadamia nut farm, black sand beaches, and my youngest wants to eat shave ice and see a cowboy!  My wishlist mostly includes malasadas and mai tais...

     I had a mind to make you guys an Easter cake this week all covered up in coconut and then I realized how well this particular cake fits into our Hawai'i unit, too.  Coconut, bananas, pineapple, and vanilla all grow in Hawai'i!

     The boys helped me whip this together.  I got the recipe from my Mom.  When she gave it to me she thought it might be a recipe from a family friend, but having baked it, I can see that it's not the one she used to make.  Still, it's pretty darn yummy!  It's called a Butterfly Cake.  I've seen other similar recipes online called Hummingbird Cakes.

Aaahhh a cake lovely enough for a pedestal. 

Emperor Zurg crashed the photoshoot...

Butterfly Cake
2 C sugar
1 C oil
3 eggs
3 C flour
1 tsp. salt
1 tsp. baking soda
1 tsp. cinnamon
8 oz. can crushed pineapple
2 C mashed bananas
1 C chopped pecans
1 1/2 tsp. vanilla

Blend sugar, oil, and eggs well.  Sift flour, salt and baking soda together.  Add to the sugar mixture.  Add the rest of the ingredients.  Bake in a tube pan for 1 hour 10 minutes at 350°.  Remove from pans and cool on a wire rack for at least two hours before frosting.

Icing:
16 oz box confectioner's sugar
8 oz cream cheese
1 stick unsalted butter
coconut flakes (optional)


Notes:
     One of the Hummingbird Cake recipes I found said to divide the batter into three round cake pans and double the frosting recipe.  I used the frosting recipe above and baked it in two round cake pans.  As you can see, I didn't have quite enough frosting.  Also, dividing it into two pans caused the cake to be a little too thick, so the cake was pretty dry on the outside.  I remedied that by using a tip from Bakerella and used a spray bottle to spray some coconut milk on the cake to moisten it.  It didn't add as much coconut flavor as I was hoping, but it did a great job of moistening the cake!


Here is a little of what the library dished up for our study this month:

Books:
Pikoi and Other Legends of the Island of Hawai'i Our favorite story is "The Gift of Ku," a legend about how breadfruit was brought to the island.
Hawaiian Word Book Great, illustrated kid's dictionary of introductory Hawai'ian words includes a pronunciation CD
Pele and the Rivers of Fire, an introduction to Pele and her brother shark and sister waves.
The Last Princess: The Story of Princess Ka'iulani of Hawai'i.  This one was a little long for the boys, but it was interesting for me!
Other Media:
Putumayo Kids Presents Hawai'ian Playground (CD) We translated some of the lyrics so it's a great way to reinforce some of the language they are learning.
Travel with Kids-Hawaii: The Big Island of Hawaii (DVD)This series is great.  We watched the Kauai one last year and it was great to have an idea of some kid-friendly places to go.
Projects:
We built and erupted a volcano and studied about how volcanoes work.

I can not believe how much they loved this volcano!

     We also ate Puka dogs, taro chips, and  Hawaiian Punch (The things I do in the name of education...)

     If you'd like to see more of what I want to squeeze into our visit to the Big Island, check out my Pinterest board!

Tuesday, February 14, 2012

Valentine's Day is Not for Sissies...

     I have to say first thing that I didn't really plan on doing a Valentine's Day post.  But then I made the pie pops.  And then I made the cupcakes.  And then I made the Valentines.  And I simply had to. 
Doily Valentines, just like Mom used to make.  The present is a box of candy hearts.  (The boys are nuts for those awful things!)

     The second thing I have to say is I am not a big "pink person."  Until I made the pie pops.  And the cupcakes.  And the Valentines.  And now I am in love with Valentine's Day for the sheer pink girliness of it.


     The boys have a skating party today with a group of other homeschooled kids (shhhh... they don't know yet...).  We're supposed to bring Valentines for 12 kids and a treat to share.  Long, rambling, boring story (involving a frustrating trip to Michael's and an extended fruitless search for chocolate lips) short, I decided to make pie pops for the Valentines.  I know.  Every blogger in the world has made them, but I had to, you see?  They're just so stinkin' cute.  And, Cheese and Sprinkles!  Who wouldn't want to eat pie on a stick?!


     I've been baking my tail off today.  None of it is even remotely original and I don't care.  It's all delicious!  These pie pops are everywhere (originated by Luxirare) and are pretty self explanatory, but I thought I'd share the crust recipe I used.  It's from the Better Homes and Gardens Old Fashioned Baking book on page 76.

2 C all-purpose flour
1/2 tsp salt
2/3 C shortening or lard (I used 1/3 C shortening and 1/3 C salted, softened butter)
6 to 7 Tbs cold water

In a large bowl, stir together flour and salt.  Using a pastry blender, cut in shortening or lard till pieces are the size of small peas.  Sprinkle 1 Tbs of the water over part of the mixture, then gently toss with a fork.  Push to side of the bowl.  Repeat, using 1 Tbs of water at a time, till all is moistened.  Divide dough in half.  Form each half into a ball.

***
The rest is my direction:
     Roll the dough out and cut with cookie cutters.  Place bottom half of the pop on a cookie sheet lined with wax paper or parchment.  Gently press lollipop stick onto the bottom half.  Place small amount of jam (about 1/4 tsp depending on the size of your shape) over the stick.  Then put the second half on top and seal the edges with a broken piece of lollipop stick.  You can use an egg white wash over top if you really want to make them special.

     Bake at 375° for 10-15 minutes or until tops are nicely browned.  Remove as quickly as possible to a cooling rack.  Any jam that has leaked out will caramelize on the paper and it's darn near impossible to get them up if they cool completely.  (Trust me on this...)

     These cupcakes are the treat we're bringing.  I used my favorite cupcake recipe of all time by Cheryl Porro over at Cupcake Bakeshop.  The frosting is hers, without the chocolate and considerably less milk.  I added natural food coloring to make the pink and a tad of vanilla extract.  These.  Cupcakes.  Are.  Divine.  (Even though my piping skills are not...)

I hope you are all spending today with the one(s) you love.  Have a sweet and happy Valentine's Day, everybody!  (Wish me luck at the skate party, wrangling two sugared-up kids on skates is one of those wacky times that try men's souls...)

Monday, January 30, 2012

On Valentine's Day Have Cake for Breakfast!


     When Cara over at Fork and Beans announced her vegan gluten-free baking competition, I thought,  "Oh... that's nice..."  Then she requested I enter and behold, I was terrified.  (I love you Cara, seriously, I do, but baking is hard, vegan baking is harder, gluten-free baking is even harder and the "make up your own recipe" thing just totally broke my mind for like a week...)  I suggested heart shaped ice as my recipe.  At one point (while my first trial was baking in the oven) I was still seriously considering it as an option...


     While I was trying to come up with an idea, I ruled out a simple sauté dish right away because, well (besides the fact that it's not baking) it hardly counts as gluten-free unless it would normally have gluten in it, right?  But for a recipe to be truly mine, it needed to be something using local in-season ingredients and it needed to be relatively healthy.  I didn't want to use any chemicals which unfortunately seem to play a large part in commercial gluten-free products.   Xanthan gum in particular is a big one on my "That Just Ain't Natural" list that seems to be in even organic and all natural gluten-free products.

     I live in Washington State.  Things that are local, in-season, and bakeable are precisely: apples (from storage) and Winter squash (from storage).  Ayup.  No sweet little red strawberries, forget about a gorgeous pink raspberry, and watermelon is right out.  So I thought, "Well, what about a butternut squash cake with vegan cream cheese frosting sweetened with maple syrup?"  And that, my friends is what I endeavored to create.  At one point I found a very similar sounding recipe on Gluten-Free Goddess, but hers called for a lot of ingredients I didn't have and it also had eggs in it.  I referenced it a little for ratios, but ultimately came up with a very different recipe.

     The whole "cake" thing didn't really work out.  It ended up as an awesome breakfast bread that we Can't.  Stop.  Eating.  Besides the butternut squash, the hazelnuts are local to us and Bob's Red Mill is technically considered local too I guess, coming from Oregon, though it feels a little like cheating...

Vegan and Gluten-Free Butternut Squash Bread
1/2 C coconut oil (still solid)
1 C Sucanat
1/2 C silken tofu purée
2 T cornstarch combined with 2 T water
1/4 C blackstrap molasses
1 1/4 C butternut squash purée
2 C Bob's Red Mill All Purpose GF Baking Flour
2 tsp baking powder
1/4 tsp salt
1 t cinnamon
1/2 C chopped hazelnuts
Optional:  You can substitute 1/4 butternut squash with 1/4 C banana purée.  It makes it taste like banana bread.  My hubby prefers it this way.

If you don't just happen to have a bunch of butternut squash purée laying around, cut one in half, roast each piece, cut side down, at 450° for about an hour.  Then peel when cool and purée.  I did this step a few days ahead.  You can also microwave butternut squash in a similar fashion in about 10-15 minutes.  If you make the squash the same day you bake your bread you can also purée the tofu and banana while the squash is cooking.  The blender worked great for the tofu while I managed to get a great banana purée from my mini food processor.

Once you have your purées, pre-heat oven to 350°.  Grease a loaf pan with coconut oil and dust with BRM flour.  Set aside.   In a large mixing bowl, combine coconut oil and Sucanat using the high speed of your mixer until very well combined.  Add the banana purée (if using), tofu purée and cornstarch mixture and mix everything well.  Mix in molasses and squash purée.   Once you have all the wet ingredients mixed with the sugar, begin combining the dry ingredients in a small bowl.  This will give the Sucanat a little time to dissolve. Slowly begin adding flour mixture to the wet mixture about 1/4 at a time.  Add hazelnuts, and mix until just combined.  Pour batter into prepared pan and bake for 60 minutes or until a cake tester comes out clean.


     The result is a warm and comforting moist bread that is perfect just out of the oven for breakfast with a little butter (or whatever substitute you like).  As it cools, it's not as good, but that's nothing a few seconds in the microwave can't cure...  But since this is a Valentine's Day Contest, why not kick it into pretty pink dessert mode with a little pink frosting?

Frosting
2 C powdered sugar
1/2 C Tofutti cream cheese
2 T pure maple syrup
4-5 drops natural food coloring

Combine all ingredients in a small mixing bowl and beat til combined.

I feel the same way about Tofutti cream cheese as I do about mascarpone cheese: It should never be eaten by any human ever unless it's full of confectioner's sugar and resting on top of a cake.  Then it's happiness on a fork.  The natural food coloring I use has beets in it, which gives the frosting a slightly fruity flavor.  I like it. Technically, the powdered sugar I used isn't vegan.  If you're being really careful,  The Vegan Chef has a recipe for DIY vegan powered sugar.

 Isn't that just pretty like a Valentine Princess?

     I hope you all have a lovely Valentine's Day no matter how you start it out.  February 6th is the deadline so there's still time to enter the contest!  It really is much less complicated than it seems!  And three winners receive $75 gift cards to their favorite store!


Wednesday, December 28, 2011

12 Days of Christmas Cookies: Afterward...

     And no, I'm not going to talk about how much bigger my "afterward" has gotten after all those Christmas cookies!
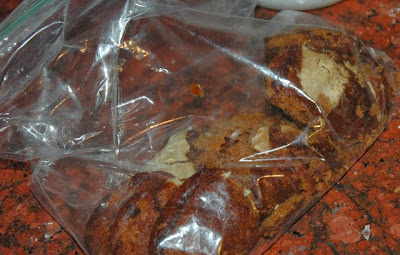
     I had me a mishap with the Soft Ginger Cookies with Orange Glaze.  The cookies turned out beautifully.  They froze beautifully.  But instead of separating them with a piece of parchment like the directions said, I thought I'd save myself the step and after freezing them on cookie sheets, stacked them on top of each other inside a gallon baggie.  I checked them periodically by opening the bag and taking one or three out for "quality assurance" purposes and they all separated fine.  So I got the big head.  I thought, "Phsaw!  I got this all figured out right here!"  Well, then defrosting day came.  Instead of taking them all out of the bag and defrosting them separately on a cookie rack like I should have, I left them in the baggie on the counter over night.  And in the morning, this is what I had:

I didn't even try to take an appetizing picture of this here mess.  It was unappetizing to say the least...

So I puzzled and puzzed till my puzzler was sore.  And then I thought of something I hadn't before!  Cheesecake.... Oooooohhh mama...

    I fiddled around online until I found this no-bake cheese cake recipe which I edited to suit the crust.  Yep.  You heard me.  I made a bunch of those lovely cookies into a crust.  They were so moist, all I had to do was crumble them up and cram them into a springform pan! 

Phoenix Cake
15-20 soft ginger cookies crumbled
8 ounces cream cheese
1/3 cup sucanat
1/3 C orange juice
1/2 sour cream
2/3 C powdered sugar
1/2 tsp cinnamon
1/4 tsp cloves

Crumble cookies and press tightly into a greased springform pan.  Mix the rest of the ingredients and pour over crust.  Refrigerate, uncovered at least overnight.  The longer you let it set, the firmer it will get.  You can reduce the juice and powdered sugar down to 2 Tbs of each, but you will lose some of the orange juice flavor.

Top it with a little golden syrup if you like.  I prefer it without.

Review
I love this cheesecake!  It tastes like orange juice with cloves in it.  My favorite Christmas drink.  And I know it's past Christmas, but I thought some of you might have a few cookies laying around... If you like the cookies, you'll like this cake.

Sunday, July 31, 2011

Education Implementation!

First there were the berries...


And now for the recipe!  I found this sublime cake at Italian Food Forever. I didn't have everything the recipe called for so I made some modifications.  Yummy, yummy modifications.  I was looking for a recipe to use up some left-over ricotta cheese.  A lot of these recipes call for tons of butter and eggs, but this one was just right in that department.  I didn't have any lemon or lemon extract so I made some substitutions.  Here is my version.

Ricotta Cake
3/4 Cup Butter, softened
3/4 Cup Sugar
1/2 tsp almond extract
1 tsp vanilla extract
3 Large Eggs, separated
1 Cup Ricotta Cheese
1/2 Cup Plus 2 Tablespoons All-purpose Flour
2 teaspoons Baking Powder
Dash of salt
1 pint mixture of blackberries and black raspberries

Preheat oven to 325°. Grease and flour an 8 inch spring-form pan.  Beat the butter and sugar until light and fluffy.  Add the extracts, egg yolks and ricotta cheese and beat until smooth.  Add the flour, baking powder and salt to the butter mixture and beat until just combined.  Wash your beaters well (if there is any fat from the butter left on them, the whites won't form properly), then beat the egg whites in a separate bowl until stiff (you'll know it's stiff when you can hold the bowl upside down without it pouring out).  Gently fold the egg whites into the batter.   Pour the batter into your prepared pan.  Float the berries on top of the batter (they may sink to the bottom during baking depending on the type).


Bake 30-45 minutes, or until a cake tester stuck into the center comes out clean.  Allow to cool as long as you can stand it before removing form.  Room temp is best, but it's great warm, too!


Variations:
  • If you can't get your hands on wild berries, regular raspberries from the market are fabulous, too.
  • If you have it, 1 Tbs of lemon zest (about 1 lemon worth) is great in this.

Review:
This is my kind of recipe.  It's a snap to throw together, bakes quickly, everybody loves it.  It's fancy enough to make for a nice occasion yet simple enough to bring to a pot luck.  It's the least fussy cake I've ever made.  It's relatively low in calories, too!  And oh yeah, you're gunna love it!

Friday, April 29, 2011

Who likes cake? Do you like cake? 'Cuz I like cake...


     Growing up, I wasn't one of those smiling daughters who dutifully studied her Mother's techniques in the kitchen.  I was was the kind of daughter who did only what she had to in the kitchen (a.k.a. the dishes) and spent the rest of the time reading Stephen King books in her bedroom.  I just wasn't interested.  I wish I'd been more studious then.  Instead of learning every thing from the Food Network in college, I could have learned everything from Mom (at least past the few basics she was able to squeeze in between Christine and The Stand).
     Mom used to make this cake all the time growing up.  She made it for bake sales and as gifts at Christmas.   It's also my wedding cake.   This is a very special cake.  This is my Mom's recipe.  As I recall, she made it up.  She was always very proud of this cake and with good reason.  It's fantastic!  It also comes together fairly quickly.  I'm posting this today in honor of her birthday.  Happy Birthday, Mom!  I wish I could share this with you...

Grammie's Fresh Apple Cake
3 eggs
3 C fresh apples
3 t vanilla
1 c oil
2 c sugar
1 C chopped pecans (opt)
3 C flour
1 t salt
3 t cinnamon
1 t baking powder
1 t baking soda
1 t allspice
1/2 t nutmeg

Add sugar to oil and mix until sugar dissolves a bit.  Beat eggs til light and fluffy.  Add eggs, apples, vanilla, and nuts to the oil/sugar mixture.  Mix dry ingredients together and slowly add to egg/sugar mixture.  Mix very well.  Bake in a greased and floured tube pan or 2 loaf pans for about 1 hour at 325.
var: 1 C sugar + 1 C brown sugar omit allspice and add cloves.


My substitutions/additions:
I used mostly Sucanat this time.  It was pretty dry.  I'm not sure if it was the Sucanat or if I over-baked it a tad.  Anyhoo, more to soak up the ice cream with, right?

Tips:
Using all white sugar will yield a cake slightly lighter in color.  It can also take up to an hour and a half to bake this in a bundt pan.


Review:
I liked this recipe so much apparently, that I had three copies of it in my recipe box... This is a great cake by a great woman.  She actually did show me how to make this and it's a wonderful thing to bake it and think of her.  Of course it's a keeper.
Related Posts Plugin for WordPress, Blogger...