Thursday, October 20, 2011
I'm a Little Weird...
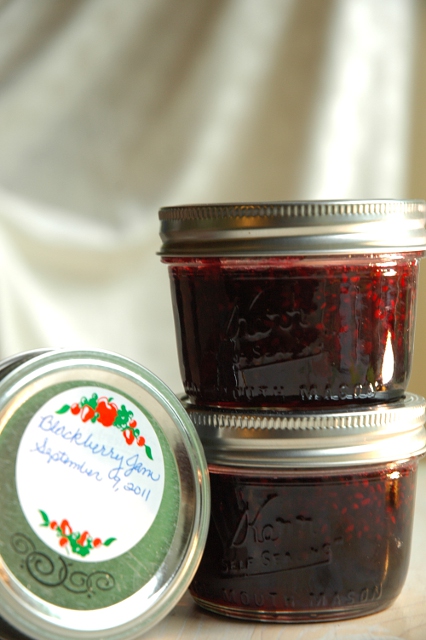
I like to can. I just absolutely love to cook up a giant batch of something or other, pour it into jars and pressure cook the snot out of it. This year, I did three batches of jam, tomatoes, two kinds of pickles, and most recently, mushroom stock. It is so reassuring to know that I am saving food for my family for a year or more. And I use it. When I put stuff in the freezer it usually lives there until it grows fur and I throw it out. I've been doing the whole October Unprocessed thing this month and I decided it might be a great opportunity to put up some mushroom stock which I've always wanted to do but never got around to. This was so incredibly simple, I can't believe I haven't done it before.
Mushroom Stock
3 large portobello mushroom caps
1/2 to 1 lb chanterelle mushrooms
3 medium carrots
1 large onion
4 large cloves garlic
4 sprigs thyme
1 sprig sage
4 sprigs rosemary
1 Tbs whole peppercorns
6 Quarts of water
Scant amount salt
Roughly chop mushrooms, onions and carrot. Put everything else in the pot whole and boil in 3 quarts of water until veggies are soft. Add remaining water and bring to a boil. Salt very sparingly.
In the mean time, prepare your pressure canner and canning jars.
Strain out veggies, catching soup in a large bowl. Press juice out of the veggies as much as possible using a wooden spoon or a potato masher. Place in jars and pressure can for 30 minutes. Yields about 6.5 pints.
Review:
I realized a few dozen soups or so ago that portobello mushrooms add a whole new dimension. They are so earthy and meaty they knock the socks off regular button mushrooms. If you don't want them to turn your soup dark, you can remove the gills, but I think it's unnecessary. I can't wait to use this stock in my next batch of soup. If you must, you can freeze this, just don't tell me. It might break my heart...
Speaking of soup and because I'm a little weird, I decided I couldn't bear to trash all those gorgeous mushrooms and veggies. It took a huge leap of imagination on my part, but I turned them into "Cream" of Mushroom soup! This whole "food blogger" thing isn't always kind to the ol' waistline, so instead of using cream, I tried non-fat milk. It wasn't bad at all!
"Cream" of Mushroom Soup
1 batch of left-over mushrooms and veggies, herb stems removed
2 cloves garlic, pressed
2 C non-fat milk
2 C mushroom stock or water
Salt and Pepper
Heat veggies and garlic in water until it boils. Slowly add in milk, salt, and pepper. Purée. Serve with a big hunk of crusty bread and a little fresh or sour cream drizzled on top. Some fresh thyme would be nice, too if you've got any left.
Review:
Very nice. Make sure you cook down your garlic well, though. I didn't and the boys found it too hot.
I've got apple and pear sauces to put up yet this season. I believe I'll do a more in-depth tutorial on canning if you guys are interested...
Friday, October 14, 2011
Tuesday, October 11, 2011
Accidentally Vegan Banana-Nut Muffins
When we travel, we're usually leaving in the middle of the night or first thing in the morning. No matter what, nerves and time constraints usually make it difficult for us (OK, for me) to eat a solid meal before we get to the airport. Besides having a nosh, I love this recipe for cleaning out my fridge. There's always a bit of fruit or an errant veggie or two hanging around in my fridge plotting to go bad while we're on vacation. It's super easy to grate a zucchini, a couple of carrots, an apple, a half eaten salmon (you know, whatever you have lying around) into this thing. I picked this specific recipe because when I found it online I only had a couple of bananas handy. Most of the online recipes called for 3 or 4, but this one only needed two. I have added up to 5 bananas to it and it has only served to make it more moist and yummy, but it's really handy for when I've only got a couple that are going the way of the dodo.
I'm not going to lie. I made this recipe months ago. It's been languishing in my "to post folder" forever while I busied myself concocting various and sundry recipes using garlic scapes and Chinese Okra. It's time these humble, yet satisfying muffins made an appearance! Since I was using these as a "clean out the fridge dump special," I had assumed some items I normally have yet, when I opened the fridge door not only did I not have any eggs, I was out of milk, too! Fortunately, I had bought some almond milk that week for my son who has cow milk issues. (I usually buy him goat milk, which would have been fine, but no quite so appetizing.) I added an extra banana to sub for the egg. Here is the original recipe, followed by what I did.
Really Easy Banana Nut Bread
2 Bananas
1 Egg, beaten
1 C Sugar
1/4 C Melted butter or margarine
1 1/2 C Flour
1 1/2 tsp Baking powder
(Optional) walnuts or chocolate chips
Mash bananas. Add beaten egg, sugar, and melted butter. Stir in dry ingredients until moist. Place in greased and floured loaf pan. Bake at 350° for 1 hour. Slice and serve warm. (To double, decrease a little sugar.)
Accidentally Vegan Banana-Nut Muffins:
3 Bananas
1 C Sucanat
1/4 C Vegetable oil
1 1/2 C Whole wheat flour
1 1/2 tsp Baking powder
1/4 C Pecans
1 T Almond milk
1/2 C Oatmeal
1/2 Half apple peeled, chopped or grated
Dash cinnamon
Mix and bake following the original directions. To make muffins, divide the batter into a lined cupcake tin and reduce cooking time to about 15-20 minutes (another reason I love muffins for travel, they cook so quickly!) Yields about a dozen.
Review:
Could have used another banana for moisture maybe, but pretty great over all. All my boys loved them and we had a great vacation. I'm sure it's because we got a good, yummy start!
Labels:
breads,
breakfast,
comfort food,
kids,
leftovers,
mid-week,
quick,
Unprocessed October,
vegan,
Vegetarian
Wednesday, October 5, 2011
Chinese Okra
I talked in my farmer's market post about one of my favorite finds this year: Chinese okra. In case you are lucky enough to come across these, I thought I'd share a couple of recipes.
The first thing to do, for both recipes is to trim the top, bottom and ribs off the okra:
This breakfast dish is the one the lady at the farmer's market suggested. It's a light, fresh, way to start the day.
Chinese Okra Breakfast Scramble
1 medium sized Chinese Okra
1/2 medium onion
2 cloves garlic
2 eggs
olive oil
salt and pepper
Peel the ribs off the okra and chop into 1/2 inch cubes. Cube the onion, and peel and thinly slice the garlic. Saute in a pan with a little olive oil until the okra is soft and the onion is browned. Add eggs and scramble. Season with salt and pepper as desired. Yields about 3 servings.
This recipe is very similar, but better suited for other meals.
Chinese Okra Sauté
1 medium Chinese okra
2 ears of corn
2 cloves garlic
1/2 medium onion
4 oz chanterelle or other mushroom
olive oil
salt and pepper
fresh rosemary
Peel ribs off okra and chop into 1/2 inch cubes. Chop onion and mushrooms. Cut kernels off corncob and thinly slice garlic. Heat olive oil in a large frying pan and sauté garlic, onion, mushrooms, and okra until okra is softened and the rest of the veggies are slightly browned. Add corn last and sauté quickly until corn is slightly toasted. Season as necessary and top with a few fresh rosemary leaves. Perfect for a side at dinner or all by itself for a light lunch. Serves 4 as a side, and 1 as a generous main dish.
Review:
A little like zucchini, a little like a green pepper, not at all like okra that grows so well in the south, this little veg is sure to please. If you find some at your local market, try it out and let me know what you do with it!
The first thing to do, for both recipes is to trim the top, bottom and ribs off the okra:
This breakfast dish is the one the lady at the farmer's market suggested. It's a light, fresh, way to start the day.
Chinese Okra Breakfast Scramble
1 medium sized Chinese Okra
1/2 medium onion
2 cloves garlic
2 eggs
olive oil
salt and pepper
Peel the ribs off the okra and chop into 1/2 inch cubes. Cube the onion, and peel and thinly slice the garlic. Saute in a pan with a little olive oil until the okra is soft and the onion is browned. Add eggs and scramble. Season with salt and pepper as desired. Yields about 3 servings.
It's terrific by itself or turn it up another notch with sweet, in-season tomatoes!
This recipe is very similar, but better suited for other meals.
Chinese Okra Sauté
1 medium Chinese okra
2 ears of corn
2 cloves garlic
1/2 medium onion
4 oz chanterelle or other mushroom
olive oil
salt and pepper
fresh rosemary
Peel ribs off okra and chop into 1/2 inch cubes. Chop onion and mushrooms. Cut kernels off corncob and thinly slice garlic. Heat olive oil in a large frying pan and sauté garlic, onion, mushrooms, and okra until okra is softened and the rest of the veggies are slightly browned. Add corn last and sauté quickly until corn is slightly toasted. Season as necessary and top with a few fresh rosemary leaves. Perfect for a side at dinner or all by itself for a light lunch. Serves 4 as a side, and 1 as a generous main dish.
Review:
A little like zucchini, a little like a green pepper, not at all like okra that grows so well in the south, this little veg is sure to please. If you find some at your local market, try it out and let me know what you do with it!
Monday, October 3, 2011
A Bit More on Berries
In the spirit of Unprocessed October, I thought I'd go ahead and post the rest of those native berries I mentioned a while ago. What can be less processed than berries you walked outside and picked yourself?
Sambucus caerulea
These are elderberries. I had never seen these until last week when my forager, David, brought some to the farmer's market. They are interesting tiny little berries, they have a fairly large seed compared to the flesh around them, so they're a little crunchy, but they taste great. David suggested drying them and then using them as you would blueberries in pancakes or muffins or on top of oatmeal. I used these fresh and made them into cough syrup for my son who's come down with a cold. =(
These are snowberries:
(Symphoricarpos albus)
They might be my favorite native berry, even though they're inedible. They are just so beautiful clinging to the bare branches in the wintertime. My bushes don't produce as prolifically as ones that get more sun. (And are less covered in English ivy...) *ahem...*
Vaccinium ovatum
These are evergreen huckleberries. I bought these last Spring and haven't gotten around to planting them yet (eek!) so I don't really know much about these berries. I assumed they'd be a little larger than this, and probably would have been if I hadn't been such a bad Mommy...
This is a Himalayan blackberry bush...
Rubus armeniacus
If you get a bunch of good berries, this is what happens:
If you get one sour berry, this is what happens:
These will also make you pull that face.
Mahonia nervosa
These are low Oregon grapes. They are sour as all get out, though the underlying flavor is pleasant in my opinion. You know, if you can get past the gut clenching sour part... There is a very similar looking plant called tall Oregon grape, the berries are more oblong, but rest assured they are still sour enough to suck off the insides of your mouth.
Gaultheria shallon
And these little darlings are salal berries. They usually grow right next to the Oregon grape and wouldn't you know it? They're sweet, a little like a blueberry. I've heard people make jelly out of them and use the Oregon grape as the pectin, though mine barely produce, so I don't have that luxury... These pictured here are a little smaller than the norm partly because it's so late in the season, and partly because they get very little sun which is great for the plant, but not so great for the berry production.
Vaccinium deliciosum
And finally, another native huckleberry, the Cascade huckleberry or Cascade bilberry. These berries are larger and sweeter than most other huckleberries. Usually around the size of small blueberries. David hooked me up with some of these this year, too. They're great in oatmeal with a little chia and molasses! The Latin name says it all!
I've said it before and I'll say it again, don't eat anything unless you know for sure what it is. That said, I hope I have encouraged you to find out what edible natives grow in your area and to search them out. From prickly pears in California, to blackberries in Washington, to teaberries in North Carolina, to dandelions on lawns everywhere, you may be surprised what you can find to nosh on!
Monday, September 26, 2011
Boldly Going Where No Chocolate Pie Has Gone Before!
My food blogger friend, Chinmayie, from over at LoveFoodEat created a luscious chocolate mousse pie with a secret ingredient. Listen up, folks, I'm about to spill the beans... It's beets! I made it a few weeks ago and discovered how super easy and super yummy it is. You would never know there were beets in it. Don't get me wrong, I can go to town on some beets. Roasted, they're one of my favorite vegetables. But this pie, it's just pure, smooth, chocolate yum all in your mouth. The beets are purely for texture. The crust is very simple, just 5 ingredients, so when I found gluten-free hazelnut flour at my farmer's market, this pie sprang to mind immediately. I finally made it last week when I had a friend over for dinner who is eating a gluten-free diet. I was surprised how well this converted! Chinmayie was kind enough to allow me to re-blog her recipe with my updates. I also converted my cornbread recipe, and I'll be posting that soon!
For the crust:
* 1 cup hazelnut flour
* 2 tbsp cocoa powder
* 4 tbsp sugar (I used Sucanat)
* ¼ cup coconut oil
* 3-5 tbsp cold water
Grease a pie pan with coconut oil. If your coconut oil is liquid, first place it in the freezer/refrigerator till solidifies (mine is always solid except on the very hottest days). Mix the flour, cocoa powder, and sugar until combined, then incorporate the coconut oil slowly with your fingers. When it resembles bread crumbs, add enough cold water to make dough. Press it into a pie pan with your fingers as you would a graham cracker crust. Bake at 410°F for 8-10 minutes or till firm. Let it cool completely.
For the mousse:
* 1 cup semi-sweet chocolate
* 1 large beet (or 2 medium size)
Peel and cube beet. Cover with water and boil till soft, then drain and blend into a smooth purée. Melt the chocolate, using a double boiler, till smooth. Turn off the heat and let it cool for a few minutes. Now add 1/2 C of the beet purée and mix well. Pour this chocolate/beet mixture into the prepared pie crust and smooth the surface with a spoon. Refrigerate overnight. Whereas, the regular wheat crust version of this pie is ready in a couple of hours, this pie really needs to sit overnight in the fridge. It helps the crust release from the pan a little easier. Another thing that might help in this regard is to dust the pan with a little gluten-free flour after greasing it, but I haven't tried this.
Notes:
In the filling, I used 1/2 C Scharffen Berger 70% Cacao Baking Chunks and 1/2 C 62%. I have also used plain old grocery store generic semi-sweet chocolate chips, which work just as well or better.
Review:
You don't want to miss this one, friends! Thank you, Chinmayie, for sharing this recipe and allowing me to adulterate it shamelessly. For those of you who aren't gluten-free, try her original recipe. You won't be disappointed!
But for right now...
Gather your ingredients, cuz it's Pie Time!! *Squeeee!*
* 1 cup hazelnut flour
* 2 tbsp cocoa powder
* 4 tbsp sugar (I used Sucanat)
* ¼ cup coconut oil
* 3-5 tbsp cold water
Grease a pie pan with coconut oil. If your coconut oil is liquid, first place it in the freezer/refrigerator till solidifies (mine is always solid except on the very hottest days). Mix the flour, cocoa powder, and sugar until combined, then incorporate the coconut oil slowly with your fingers. When it resembles bread crumbs, add enough cold water to make dough. Press it into a pie pan with your fingers as you would a graham cracker crust. Bake at 410°F for 8-10 minutes or till firm. Let it cool completely.
For the mousse:
* 1 cup semi-sweet chocolate
* 1 large beet (or 2 medium size)
Peel and cube beet. Cover with water and boil till soft, then drain and blend into a smooth purée. Melt the chocolate, using a double boiler, till smooth. Turn off the heat and let it cool for a few minutes. Now add 1/2 C of the beet purée and mix well. Pour this chocolate/beet mixture into the prepared pie crust and smooth the surface with a spoon. Refrigerate overnight. Whereas, the regular wheat crust version of this pie is ready in a couple of hours, this pie really needs to sit overnight in the fridge. It helps the crust release from the pan a little easier. Another thing that might help in this regard is to dust the pan with a little gluten-free flour after greasing it, but I haven't tried this.
Notes:
In the filling, I used 1/2 C Scharffen Berger 70% Cacao Baking Chunks and 1/2 C 62%. I have also used plain old grocery store generic semi-sweet chocolate chips, which work just as well or better.
Review:
You don't want to miss this one, friends! Thank you, Chinmayie, for sharing this recipe and allowing me to adulterate it shamelessly. For those of you who aren't gluten-free, try her original recipe. You won't be disappointed!
Labels:
beets,
comfort food,
dessert,
gluten free,
hazelnuts,
kids,
quick,
vegan,
Vegetarian
Tuesday, September 20, 2011
Dinner by Chance...
I recently had a serendipitous congruence of leftovers. (Whew! Dragged out the $5 words for that one!) Not long ago, I spent a large portion of a two days putting up tomatoes. It just so happens to have been the same week I made the quinoa kale wraps. I ended up with a few large tomatoes that I had broiled for canning, but didn't have enough to make a whole jar. I wasn't sure what to do with them till I scrounged around and found the leftover lentils and quinoa and I also had some baby bella mushrooms. A wonder was born. Can I just say how much I love this?
The tomatoes are barely cooked, paired with fresh basil and roast vegetables. Mix in a little quinoa and french lentils? It's just wonderful...
Start with a few demure ingredients... I used chanterelle mushrooms this time and French lentils. I will forever be indebted to my friend Matt who introduced me to French lentils... They hold their shape so much better than regular green or brown lentils. Also, I really liked the earthiness of the chanterelles in this tonight, though the baby bellas were nice, too. (P.S. I grew that basil!)
Cut X's in the bottoms of your tomatoes. Remove stems, and place them on a roasting pan with the X's up.
Place vegetables in the center of a roasting pan with a little olive oil drizzled over top.
Roast veggies at 450° for 10-15 minutes until garlic is soft. Remove herbs after roasting.
Broil tomatoes. Once tomato skins blacken slightly and crack, remove from oven and let cool until you can handle them enough to remove skins.
Chop tomatoes, mix with vegetables, warmed quinoa and lentils. Garnish with chopped basil, and serve!
Roast Vegetables with Quinoa and Lentils
5 medium or 2 large tomatoes
1-2 C leftover quinoa cooked with veggie bullion
1-2 C leftover lentils
5-6 cloves garlic, in skins
1 medium onion, cut into 8 chunks
1 sprig fresh rosemary
4 sprigs fresh thyme
1 C whole baby bella, white, or chantrelle mushrooms
1 stem fresh basil, chopped
olive oil
Place garlic, onion, and mushrooms on pan, drizzle with oil. Place rosemary and thyme sprigs on top of mound. Bake at 450° for 10-15 minutes, until garlic is soft. Remove from oven. Switch oven to "Broil" and place tomatoes on top rack. Broil tomatoes until skins begin to crack and blacken, between 5 and 10 minutes. Remove from oven and let cool. Meanwhile, reheat quinoa and lentils in a pan or the microwave. Once roast vegetables have cooled slightly, squeeze garlic from paper shell and discard shell. Peel tomatoes and chop, roughly. Combine quinoa, lentils, tomatoes, garlic, and onion blend, top with basil. Serve warm or cold.
Salt and pepper as you wish, though I find it unnecessary.
For instructions on cooking the quinoa and lentils from scratch, see my previous post.
Review:
The nearly raw tomatoes and the fresh basil make this very "new" tasting, while the mushrooms and roasted garlic really mellow it out. Quinoa is my favorite grain so I am always happy to find new uses for it. The Littles will eat everything but the onions, which is great because there's so much healthy stuff going on here! It is one of the few dishes that really is good warm, room temp, or cold. Hope you enjoy this as much as we do!
Labels:
beans,
comfort food,
gluten free,
leftovers,
mid-week,
mushrooms,
quinoa,
vegan,
Vegetarian
Subscribe to:
Posts (Atom)