Saturday, November 26, 2011

Happy Birthday, Baby Blog!

     It's been one whole year since I started this blog.  I can't believe how far it's come!  I've "met" some wonderful bloggers (Wazzzup, ladies?!  Whoopwhoop!), found some really cool new ingredients (Dear Garlic Scapes, Will you marry me?), and learned a gob about photography (though, I've got at least three gobs more to learn).  I have also discovered that someone needs to invent a food blogger's thesaurus.  "Delicious," "tasty," and "wonderful" only cut it for so long...  I've got some exciting ideas for next year's posts (well, they're exciting to me, I hope you guys will like them, too!)

     And so, what does one have for breakfast on the frosty, chilly, cold, and blustery anniversary of one's food blog?  Why HOT CHOCOLATE PANCAKES, of course! 


This is a variation on my normal pancake base.  A yummy, delicious, fantastic, terrific variation...  It's also tasty and wonderful...  But the whipped cream is what really sells it.

Hot Chocolate Pancakes
2 C flour
1/4 C cocoa
1/2 C sugar
1/2 tsp cinnamon
3 tsp baking powder
1/2 tsp salt
2eggs
2 tbs oil
1 1/2 Cups milk
1/2 tsp vanilla

Combine all the dry ingredients.  Then add the wet ones.  Stir it all up and fry it in a pan, over medium heat, with a little oil.

Maple Syrup Whipped Cream
1/2 pint whipping cream
2 Tbs pure maple syrup

Add both to a bowl and beat with a mixer until whipped cream forms.  (If you over-beat, it will turn into butter which will be yummy, but not whipped cream...)


Review:
The pancakes are great.  A wonderful vessel for holding the cocoa.  And the whipped cream gives your mouth the warm, milky, feeling of hot chocolate.  I learned to drink my hot chocolate with cinnamon in Mexico (if you haven't tried it, you really should!) I think it works well in this, but you can omit it if you like.

Thanks for all your visits, guys!  I hope you've had as much fun as I have this year!

Thursday, November 24, 2011

Thursday, November 17, 2011

Simple Fall Soup

Thanksgiving is just a week away!  ACK!  This little soup is very quick and would make a nice starter or an easy tummy soother for the day after.

2 cups cubed butternut squash
1 large sweet potato
2 medium potatoes
1/4 onion
2 cloves garlic
salt & pepper
fresh thyme or rosemary, optional

Peel and cube veggies.  Boil in about 4 cups of water for 30 minutes or until veggies are soft.  Puree and add additional water as necessary until soup reaches desired consistency.

Review:  
A very quick and filling soup that serves 4.  You could easily double everything for a larger group.


I hope you've enjoyed my Thanksgiving posts!  It'll be back to normal programming next week.  But coming up in December I've got some seriously awesome cookies!

Wednesday, November 16, 2011

Cider for your Celebration


     You guys know I believe in supporting local business almost to a stalkery, pretentious, extreme.  Most of my favorite local businesses are farms I visit at my farmer's market.  I also have a favorite local toy store, butcher, grocery store...  Here in the Seattle area we are fortunate that a lot of the big name national brands are local.  Hello, Amazon, Starbucks, Microsoft, and Costco?  But my very favorite businesses to support are small, family-run businesses who produce quality, artisanal, products.  I have huge respect for farmers, having killed nearly every plant I've ever planted, so any thing that comes from a farm be it an egg, an apple, or a bottle of hard cider are practically a miracle to me.


    Not all ciders are the same, though.  I have bought some that were good, but tasted more like champagne.  The Snowdrift Cider Cliffbreaks Blend, made in Wenatchee, WA, tastes like apples.  A little sweet, a whole lot wonderful.  We served this at our Halloween party along with red and white wines.  The cider was the only bottle that was completely consumed!  I heard many comments about how great was.  If you live in Washington State, I highly suggest you try out this cider.  If you don't, they sell online, too! 


     This is not a paid advertisement.  Snowdrift Cider doesn't have any idea who I am.  I just like their cider and I think you will, too.  If you decide not to buy Snowdrift, I hope you will take the opportunity to check your own grocery store for ciders made in your area!

Tuesday, November 15, 2011

A Tiny, Tangy Tale...

Once upon a time there was a berry. It was a sour little thing. It looked like this:


And then somebody put a ton of sugar in it and boiled the heck out of it and it turned into this:


And the world rejoiced! It went on to play a supporting role in every single Thanksgiving Day celebration across the United States and eventually branched out into juices, salads, and energy bars. It's quite the American success story, really.

My entire life I ate one type of cranberry sauce. Ocean Spray whole berry from a can. No generic would do. You can't skimp on Thanksgiving, after all. Then one day, my friend Susan shoved this stuff in my face and I never looked back. She got the recipe from her horticulture professor, Zane.  Where he got it, the world may never know.  But it is so easy to make, there really is no excuse not to.  It might take 10 minutes to make it.  15 tops.

Zane's Cranberry Sauce
8 oz cranberries
2/3 C water
1/2 C sugar
1/4 C port wine

Place cranberries in pan with water. Boil cranberries until soft.  (They will pop).  Add sugar to pan and stir till dissolved.  Add port.  Simmer till sauce reaches desired thickness and taste.

Notes:
  • I like to leave about a quarter of the berries un-popped so there is still a little sour zing.
  • For all intents and purposes, this is jam.  It will thicken after it cools, so don't worry too much if it looks a little thin in the end.
  • I like my cranberry sauce cold.  I make it the day before, pop it in the fridge and all I have to do on Thanksgiving is put it in a nice dish and put it on the table. 
Review:
This is better than the canned stuff and it's almost as easy as opening a can.  Plus, you're left with almost an entire bottle of port!  Woot!

Monday, November 14, 2011

Pears... Just Pears... Awesome Pears...


Asian pears are very firm and crispy almost like an apple.  A friend gave me a bag a few weeks ago and I've still got them hanging around.  I came up with this when I had some left-over syrup from canning a bunch.  Let me tell you something... this is fantastic.  This works best with really firm pears, it can get a little gritty if they're too soft.  These will be great for Thanksgiving as either a side or a dessert.

Pears
2 C water
1 1/4 C Sucanat
4 C peeled, cored, and sliced Asian pears
1 tsp cinnamon
1/8 tsp ground cloves
1 Tbs butter

Boil water and sugar until thickened into a syrup.  Add spices and pears and boil again until pears have soaked up juice and syrup has thickened more.  Just before serving, add butter and stir until melted.


Review:
Super yums!  Make this a day or two ahead, it reheats great.

Saturday, November 12, 2011

A Thanksgiving Timeline...


     When I plan for Thanksgiving, I like to make sure that I know which food I'll be making, what I have already, what I need to buy, and when I'm going to make it.  This is what my lists look like for this year.  (Though this is a much neater version, all in one place.  The "real" version is scribbled on a million scraps of paper which move around on legs of their own and also seem to multiply.  I'm thinking of instituting a breeding program...)

     There are a couple of things on the menu that I haven't and won't give recipes for.  My mashed potatoes and green beans aren't anything to write home about.  They're good places to put butter and gravy and quick things to make the day of that I don't have to think about when I'm focusing on not burning the darn chicken.

Menu
Dish
Timeline
Bread Up to 1 month in advance
Pumpkin Monday
Cornbread Tuesday
Stuffing Wednesday
Gravy Wednesday
Cranberries Wednesday
Pears Wednesday
Roast Veg. Wednesday
Dessert Wednesday
Chicken Thursday
Mashed Potatoes Thursday
Green Beans Thursday


Check Lists
Check the Pantry
Check the Fridge
Check the Cellar
Grocery List
cloves
cinnamon
nutmeg
ginger
salt
pepper
sugar
brown sugar
whole wheat flour
all purpose flour
bread flour
vegetable oil
olive oil
3/4 C cornmeal
1/4 C grits
1 can evaporated milk
2 C mushroom stock
pecans
2 boxes of butter
2 C milk
eggs


5 small red potatoes + more for mashed potatoes
3 onions
1 1/2 heads garlic
3 medium apples


1 Quince
1 Parsnip
Chicken
1 package of Poultry herbs (Rosemary, Sage, Thyme)
1 package of Sage
1 Fruity White wine like Riesling or Pinot Grigio
Celery
8 oz Cranberries
1/2 lb Chanterelles
1 Portobello
6 pears
1 box yellow cake mix
1 bottle whipping cream
Fresh Greenbeans
Snowdrift Cider

Friday, November 11, 2011

11-11-11

     In honor of this momentous date.  And also because it's the end of the week.  And also in continuation of my Thanksgiving Postapalooza.  I am going to post the only pumpkin dessert you will ever find me eating.  Remember last week when I said I hate pumpkin pie and I had plans for the leftover pumpkin?  These, my friends, are those plans...


     My Mom gave me this recipe for the first Thanksgiving I ever celebrated with my husband.  Years later, she swore she'd never heard of it and I ended up giving it back to her.  When she gave it to me she told me she got it from someone at a potluck.  It certainly does seem like something that would have come out of some Southern Grandmother's kitchen...  Stuff with this much fat and sugar can only come from some Southern Grandmother's kitchen.  (Paula Deen, I love you...)  It's a little on the sweet side.  I like to tame it with a few chopped pecans, though I didn't for demonstration purposes.  But I guarantee, when all is said and done, you will want to take a bath in this stuff.

     First things first, remove the skins on your pumpkin, and purée the remainder of the flesh.  If you don't have quite 2 Cups worth, microwave half a butternut squash or *gasp!* open a can of pumpkin to make up the difference.  I found the purée to be too watery for this cake so I drained it for a few minutes in some cheese cloth. 

  
Pumpkin Pie Dessert 
Crust:
1 box yellow cake mix (divided)
1 stick melted butter
1 beaten egg

Filling:
2 C pumpkin
3/4 C evaporated or whole milk
1 C sugar
2 eggs
1/2 Tbs cinnamon
1/8 tsp ginger
1/4 tsp nutmeg
1/4 tsp cloves

Topping:
1 box Yellow Cake Mix (divided)
1/4 C sugar
1/4 stick softened butter
1/4 tsp cinnamon

Optional:

1 C Chopped pecans
Whipped cream or ice cream

To assemble:
Preheat oven to 350°.

Take 1 C of cake mix and place into a small bowl.  Put the rest of the mix in with a stick of melted butter and 1 beaten egg and mix well.  Grease a 9X13 inch pan and press mixture into the bottom to form a crust.

In another bowl, mix pumpkin, milk, sugar, and eggs.  Add cinnamon, ginger, nutmeg, and cloves.  Pour over crust.

For the topping, mix sugar with the reserved 1 C of cake mix and cinnamon, then incorporate 1/4 stick softened butter.  Combine until crumbly.  Sprinkle over top.  (Now is also the time to sprinkle the pecans if you want them).

Bake for 45 minutes.


Review:
I have made this for 11 Thanksgivings, now.  It's on its way to becoming a tradition around here.  It's enough like pumpkin pie that pie lovers don't feel gypped and it's far enough away from pie that I can actually stand it.   And when I say "stand it" I mean "sit down and eat a whole pan by myself."  Dare I say it?  I have to say it!  This dessert goes to Eleven!!

Thursday, November 10, 2011

The Star of the Show...

     Thanksgiving is just two weeks away!!  Up until now, I've shared an entirely vegetarian menu, so all you folks out there who say, "What do I feed my vegetarian guests?" Now you know.  But today?  Today is all about meat.  My very first post on this blog, nearly a year ago was this very dish.  I didn't even include a picture.  Today?  Today there's a picture...

Com'on now!  I don't even eat meat and this looks good.

     I got the recipe from Country Living Magazine many years ago, and have made it every Thanksgiving since.  Because it's just me, the hubs and two small boys most years, an entire turkey just doesn't make any sense.  When we have a ton of people over, I have made two, but I have never made another turkey.  When we've got two teenagers in the house, I may have to revisit this... o.O  This is also my "showing off for the fancy people" dinner.  Mr. Crackers loves it when we have fancy people over for dinner... 

     I haven't modified the recipe much since I posted this, but the times have never worked for me, so this post will include some time changes.  OK all you meaties, this one's for you:

Apple and Sage Roast Chicken with Pan Juices
First things first, Prepare the bird:
Thaw it out if it's frozen.  Empty out all the stuff in the cavity if there's anything in there.  Rinse inside and out, and dry well (this step is really important for the rub to stick properly).  Next assemble the ingredients:

1 roasting chicken
3/4 t salt
3 medium apples, cored and quartered
3 small onions, quartered
2 celery stalks, quartered
2 cloves garlic
2 T fresh sage, chopped
1/4 C butter, softened
1 T whole-grain mustard
1/8 t cracked white pepper
1 t fresh thyme
1/4 C fruity white wine, such as Riesling
3/4 C fresh apple cider

Directions:

   1. Preheat the oven to 375°F. Rub the inside of the chicken with 1/2 teaspoon salt. Chop 1 apple, 1 onion, and the celery into 2-inch pieces. Toss the apple mixture with the garlic and 1 tablespoon sage, and place it all in the chicken cavity.
   2. Tie the legs together with kitchen twine, and tuck the wings securely under. Mix the butter and mustard to a smooth paste and rub over the chicken skin and sprinkle with the remaining salt and white pepper. Place the bird in a medium roasting pan. Roast in the lower third of the oven for 30 minutes. Brush any remaining mustard-butter over the bird and continue to roast for 30-45 more minutes.
   3. Baste the chicken with the pan drippings, and sprinkle with remaining sage and the thyme. Scatter the remaining apples and onions around the bird, tossing lightly to coat with the drippings. Add the white wine, and roast the chicken 15 minutes. Baste the bird, and toss the apples and onions again for even browning. Continue to roast until bird juices run clear and the meat between the leg and thigh reaches 160°F. Remove from the oven and transfer the chicken to a serving platter. Arrange the apples and onions around the chicken.
   4. Prepare the jus: Tip the roasting pan so the liquid pools to one end, and use a large spoon to remove any excess fat from the pan juices. Add apple cider and place the pan over medium-high heat. Use a wooden spoon to scrape the bottom of the pan, and then pour the jus over the chicken, apples, and onions. Serve warm.

Tips:
  • For instructions on trussing a chicken: http://www.ehow.com/how_2098435_truss-chicken.html
  • I use Inglehoffer Original Stone Ground mustard on this chicken and sprinkle a half teaspoon or so of whole mustard seed for good measure, too.  I just like how it looks in the end.
  • I never make the jus.  Mostly because I don't have a stove top safe roasting pan.  That, and it gets a little Christmas Story up in here when I make this chicken so to keep the hounds at bay, I get it to the table as soon as possible...
Review:
I reviewed this last time and the review remains the same.  Everyone I've ever served this to has loved it.  The end!

Wednesday, November 9, 2011

Quince Charming?


     That thing in the front there that looks like a pear is a quince.  It's like the pear's hardest, sourest, crunchiest cousin.  The chef guy at my favorite grocery store even gave them the stink eye.  But when I asked him if he thought they'd be good in roast veggies, his eyes lit up like Christmas.  They smell really sweet, a little like a flower.  Usually, quinces are made into jam or jelly or a pie with another sweeter fruit like apples.  Roasted, they do become quite mushy, but keep their slightly sour taste.  I used two sweet root vegetables to help lift it a little.  Overall, it was pretty interesting.  If you can't find a quince, you could use apples in this or a firm pear.


Roast Quince and Root Vegetables
5 or 6 small red potatoes (skin on)
1 peeled quince
2 small beets, peeled
1 medium sweet potato, peeled
1 large parsnip, peeled
1/2 large onion, quartered
2 cloves of garlic, quartered
1 stem rosemary
2 stems thyme
Olive oil
Salt and pepper

Preheat the oven to 400°.  Slice the beets into rounds and chop the quince and all the veggies into bite size pieces.  Toss the veggies and the quince with a little olive oil, season with salt and pepper, and toss in the leaves of the rosemary.  Roast covered for 45-60 minutes.  Remove cover, add thyme leaves and roast for another 30 minutes or until the onion has started to brown nicely.  And then you get this:

 Whoa, Mama!

Review:
The quince stays a little sour.  Mixed in with a big bite of everything though, it virtually disappears.  It just leaves a little bit of something to accent the rest.  I like it.  But it's not for everybody.  My kids, for example...  If your family is full of traditionalists, use an apple.  If you've got a bunch of weird adventurous family members give em' a quince!

Tuesday, November 8, 2011

Everything is Gravy...


     I don't eat gravy very often but I loved the idea of doing a mushroom gravy for Thanksgiving.  The fact that I had a pound of chanterelles sitting in my fridge didn't hurt either... It's chanterelle season here in the Pacific Northwest.  If you can get some now, store them in a paper bag in your fridge and they should keep until you want to use them on Thanksgiving.


Mushroom Gravy
1/2 pound fresh chanterelle mushrooms
1/2 large portobello mushroom
1/2 large onion
2 medium cloves garlic, pressed
leaves from 1 sprig rosemary, chopped small
leaves from 3 sprigs thyme
3 C Water
1 C mushroom stock
1 Tbs butter
1/4 C whole wheat flour
1/3 C white wine
Salt and Pepper

Heat mushrooms and onions in a large skillet until onions soften and mushrooms release their juices.  Press garlic into pan and stir to cook it a little.  Add water and herbs, simmer on low, covered for an hour.  Add mushroom stock as water evaporates.  When mushrooms and onions have simmered, remove from heat and purée about half of it using a regular or immersion blender. In a smaller pan, melt the butter.  Add the flour and stir continuously until flour begins to have a cooked, toasty smell (1-3 minutes).  Add the wine a little at a time, stirring until it forms a paste.  Put large skillet back on the heat, and slowly incorporate the flour mixture.  Stir continuously to keep from forming lumps.  Season to taste.

Tips:
This could be easily veganized by substituting margarine or olive oil for the butter.  If you want to try it gluten free, I really like the Bob's Red Mill GF flour, but haven't tried it in this.  If you do, let me know how it goes!  Is corn starch GF?  That would probably work just fine, too and you could probably skip the butter all together...  See how well I research my recipes?

Review:
I could eat a whole pan of this stuff by myself, growling like a dog at anyone else who wandered into the kitchen.  As the lone vegetarian at my table, it really helps add some texture and depth to my plate.  And the meat eaters say it goes well with their dinner, too.  It reheats easily.  Just add a little water before you heat it and it should loosen right up.  A great make-ahead candidate.


I'm sorry.  I really did try to take a picture of the gravy that didn't look like dog food.  You'll have to trust me on this.  It's ugly, but it's Yummy!!

Monday, November 7, 2011

Give Us This Day Our Whole Wheat Bread...


     I love my bread machine.  Like, love it, love it.  It makes me pizza dough.  It makes me garlic bread.  It's even been known to deliver unto me a banana bread or two.  But no matter how hard it works, it will never be able to make my Mom's bread.  It takes real elbow grease and determination to make this lovely stuff.  You just can't compare the final outcome.  Because this recipe takes so long between all the rising and the punching and the baking, I'm giving it to you today.  The bread freezes great, so make it, freeze it, and thaw it out the night before Thanksgiving.  (It also makes two loaves so you can snarf one as soon as it comes out of the oven!)

     This is my Mom's recipe.  She invented it so there are a few quirky little things in there she did more out of superstition than anything else.  For example, to proof her yeast, she used sugar and flour.  You really only need one or the other.  But she wanted to make absolutely certain that hers would rise!  I do it her way because she taught me, and I'm a sucker for tradition, superfluous as it may be...  Also, at the time she gave me this recipe, she was enamoured with PAM Cooking Spray.  You'll see it referenced several times.  When I make it, I use a good olive oil in a pump sprayer, brush melted butter over it, or just omit the step all together, like I did today.  This recipe is peppered with instructions as Mom was dictating and explaining at the same time over the phone.  I removed some and put them in a glossary section at the end so the recipe wouldn't take forever to read for those of you who actually know how to bake bread.

Grammie's Whole Wheat Bread
2 packs active dry yeast (to find the freshest possible, sometimes you have to flip through to the back of the display)
1/2 C water (boil and let cool)
1 tsp white sugar
1 tsp white flour

Put water, sugar, and flour in a bowl.  Stir till dissolved.  Put finger into mixture and count to 5.  When almost burns at 5, add yeast and stir (temp will be between 100°-110° for those of you who are sticklers for science).  Will foam if working.  Foam about 10 minutes in a draft-free spot.  Don't stir any more.

Scald 2 C milk (Milk starts to steam, but before it boils)
1/2 C brown sugar
3 Tbs margerine (I use butter)
3 tsp salt
Add milk to margerine, sugar, and salt.  Mix.  Cool milk mixture to same temp as yeast.  (Stick your finger in it if you want or use the thermometer again.)
3 C whole wheat flour
1 C bread flour (all purpose OK)
Add to milk mixture.  Mix very well.  Will be pretty thick.  Add yeast.  Mix.  Add one or more "optional" ingredients (listed below). 


Mix in 2 more Cups of bread flour.  Knead on floured surface for at least 10 minutes (The more you knead, the better it will be).  When sticky, add flour.  Grease bowl or pan.  Put top of bread in bottom of greased bowl and flip over to grease the dough.  Let rise 1 1/2 hours or until dough has doubled in size.


Punch bread down.


Knead for 2 minutes.  Shape into 2 balls.  Let rest (put bowl over balls for 15 minutes).  Put dough balls onto a greased cookie sheet and spray with PAM (you can also put dough into loaf pans if you like).


 Let rise for another 1 1/2 hours.


Preheat oven to 375°.  Bake at 375° for 10-15 minutes to kill yeast.  Bake another 30 minutes at 350°.  Don't let your oven go below 325°.

Optional ingredients:
1/2-1C wheat germ (toasted honey kind)
1 Tbs nutritional yeast
2 eggs
1/2 C yogurt
wheat berries

Mom also gave me instructions for a quicker method that only involved one rise instead of two.  She called it the "One Punch Way" which is kind of a misnomer since there is no punching with this method, but who'm I to argue?

The One Punch Way:
From first knead.  Divide into 2 balls.  Shape it.  Let rest 15 minutes.  Put on greased sheet.  Spray with PAM.  Then rise 1 1/2 hours.  Preheat and bake.  The difference will be the texture. 


Bread Making Terms (As explained by my Mom and expanded a bit by me):

Proof: To make sure your yeast is fresh, and to dissolve it before adding it to your dough, you proof it by mixing it into warm water with a little sugar or flour.  The yeast eats the sugar and that's what causes the bubbles.  

Rise: Rising means the yeast is working to make the dough puffy.  To make bread rise properly it needs to be out of any breeze, in a warm environment.  You can put your dough in a warm oven, the microwave, or leave it covered on the counter as long as it can stay around 80° degrees.  I am lucky enough to have a warming drawer in my oven with a "proof" setting.  Additionally, to keep moisture in, Mom always covered hers with a clean, warm, damp towel.  Other bakers may tell you to use cling wrap. 

Punch: Literally, punch it down with your fists or push it with your hands.  This will cause a little more gluten to form.  Making the dough rise twice, changes the consitency of the dough, giving it more chew and density.

Other notes:
  • Mom always kept her yeast in the egg compartment of the fridge.  I do too.  It doesn't necessarily have to go in the egg compartment, but it will keep longer in the fridge.  Keep an eye on it though, the older it gets, the less likely it is to rise.  
  • If you do keep your yeast in the fridge, you'll get the best rise if you let it warm to room temperature before trying to proof it.
  • Finally, if you don't already know this, you should never lick your fingers with raw yeast on them.  In other words, don't eat raw bread dough.  You'll get a stomach ache like you wouldn't believe.
Review:
Is there any smell more wonderful than the smell of bread baking in the oven?  I submit that there is not!  This bread is worth the effort, quirky Mom weirdness and all.  Just a tiny bit sweet, it's great for sandwiches or with a meal.  Or try it warm with a little butter and honey.  It'll knock your socks off!

Friday, November 4, 2011

Thanksgiving... It's coming...

     This time of year, Halloween, Thanksgiving, Christmas, it's the time of year most of us Americans snuggle down, bury ourselves in tradition, and hibernate until Spring.  Carving pumpkins, eating candy, carving turkeys, eating pie, carving hams, eating cookies... (Lots of knives and sweets involved, I just realized...)  This is what these few months are all about.

     For me, there are few meals that can compare to the Thanksgiving meal.  It's the only meal of the year that I eat stuffing, much to my husband's disappointment.  It's the only meal of the year that involves cranberries.  Mmmm... cranberries...  And third, it's the only meal of the year that involves cranberries, stuffing, and mashed potatoes all together on one fork.  My fork.  Happiness.

     But I'll tell you something that is not traditional in my house.  I don't like pumpkin pie.  Like, at all.  I do not like it with a fox.  I do not like it in a box.  I do not like it cold or hot.  I do not like it, I do NOT!  I may be deported for this.  But before you get all totally annoyed and offended, I do like to use pumpkin in other dishes.  Like this one:


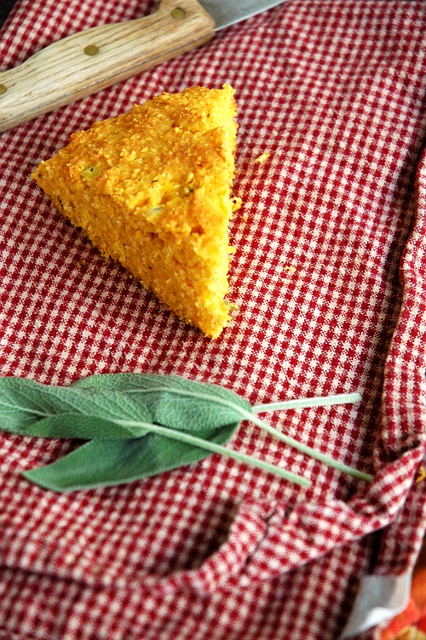
Pumpkin Sage Cornbread.  Oooooh yeah... I got the idea for this a few years ago out of a magazine that is currently floating around somewhere in my house.  I made it two years ago, and promptly lost the darn thing.  I looked for it all year last year and again this year and still can't find it, so I just gave up and made it up.  And you know what?  I like my version better!  Hah!  Take that random disappearing magazine!  One secret to this cornbread is the type of pumpkin you use.


This is a Long Island Cheese Pumpkin.  I had never seen one until this year and bought it as a decoration for our party because it was so beautiful.  When I was developing the cornbread recipe, the first time I tried to use a sugar-type pie pumpkin.  The result was a little underwhelming.  I couldn't taste the pumpkin!  But this little stunner packs a ton of flavor into her beautiful exterior.


Look at all those flavor pockets!  =)  It's super easy to cut and cleans like a dream, too.

So, the first thing you need to do to make this cornbread is to roast the pumpkin.  Select a good, medium sized pumpkin, about the size of a soccer ball.  This recipe only uses about half, but not to worry, I've got big plans for the rest of it!


Slice the pumpkin along the rib lines and arrange on baking sheets (Mine took up two sheets).  Roast, uncovered for 30 minutes at 425° or until a knife pierces the flesh easily all the way through.  Allow to cool, and remove skins.

Peel enough to make 1 C of pumpkin puree. 5-6 ribs.

Then make it!

Pumpkin Sage Cornbread

3/4 C Bob's Red Mill cornmeal
1/4 C Bob's Red Mill corn grits
1 C all purpose flour
1/2 tsp salt
4 tsp baking powder
1 egg
1 C pumpkin puree
1/4 C vegetable oil
1/4 c pumpkin chunks
1 Tbs finely chopped fresh sage

Combine all ingredients except pumpkin chunks and sage and stir well.  Add pumpkin and sage and stir in gently.  I bake mine in a cast iron pan that's been pre-heated in the oven.  You can use a regular greased metal or glass pan, too.  Bake at 425° until the top is slightly browned and a cake tester comes out clean, about 20-25 minutes.

Review:
Sage?  Yes.  Pumpkin?  Yes!  Really steeenkin' yummy?  Yeeeees!  For Thanksgiving, make this the day of, it's beautiful warm with a little butter.

Now, if you want, you can serve this just as it is at Thanksgiving.  It is very, very, very, very good.  But if you want to get all crazy and homemade this year, you can do what I'm doing.  It's going in to Pumpkin Sage Cornbread Stuffing.  You heard me.

To convert your beautiful, delicious, cornbread into stuffing, make this two days ahead.  Allow it to cool completely.  Then:

Pumpkin and Sage Cornbread Stuffing

1 Tbs butter
2 Stalks celery, sliced
1 Onion, chopped
1 Clove garlic, chopped
1 C Walnuts
4 Stems fresh thyme, soft stems chopped, leaves removed off tough stems
1 Cornbread, crumbled, allowed to dry overnight
1 C Mushroom stock
Salt and Pepper

Saute celery, onion, and garlic in butter until vegetables are soft.  At the very end, toss in the walnuts and the thyme and stir until thyme is wilted.  Combine the crumbled cornbread with the onion mixture, then add mushroom stock and salt and pepper to taste.  Place in a casserole and bake at 350° for 20-30 minutes. 

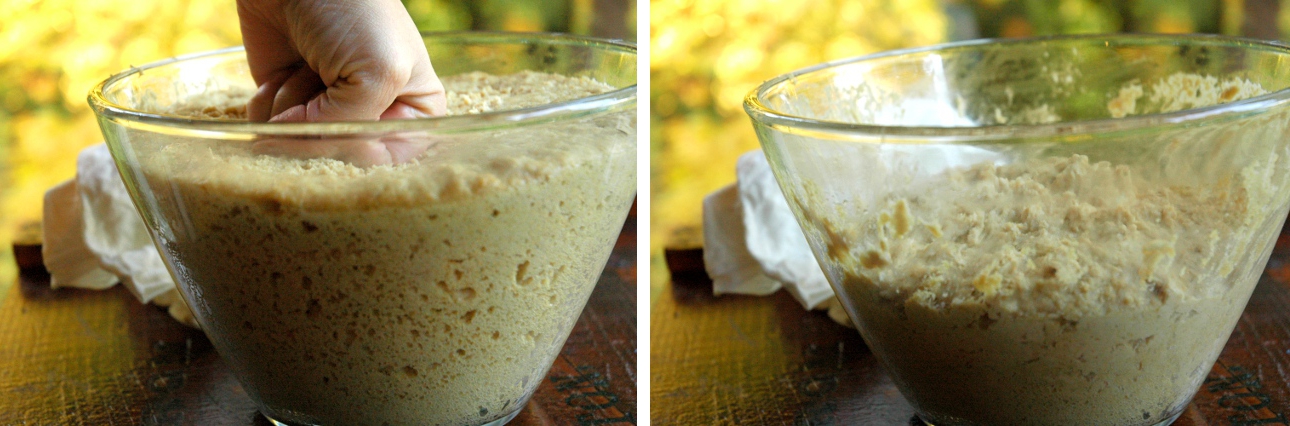
See that funny little tool in the background there?  It's an antique food chopper.  And it worked like a charm for making the crumbles.  If you don't have one, you can just crumble it with your fingers...

Review:
This is a great one to make the night before.  It stores in the fridge beautifully and is a dream to reheat.  (A few minutes at 350° until it's warm throughout).

This is just the beginning, folks.  I can't wait to show you all that we'll be having this year!


Your Best Recipes Button
This recipe will be featured on November's YBR Roundup!
Related Posts Plugin for WordPress, Blogger...