Wednesday, December 28, 2011

12 Days of Christmas Cookies: Afterward...

     And no, I'm not going to talk about how much bigger my "afterward" has gotten after all those Christmas cookies!
     I had me a mishap with the Soft Ginger Cookies with Orange Glaze.  The cookies turned out beautifully.  They froze beautifully.  But instead of separating them with a piece of parchment like the directions said, I thought I'd save myself the step and after freezing them on cookie sheets, stacked them on top of each other inside a gallon baggie.  I checked them periodically by opening the bag and taking one or three out for "quality assurance" purposes and they all separated fine.  So I got the big head.  I thought, "Phsaw!  I got this all figured out right here!"  Well, then defrosting day came.  Instead of taking them all out of the bag and defrosting them separately on a cookie rack like I should have, I left them in the baggie on the counter over night.  And in the morning, this is what I had:

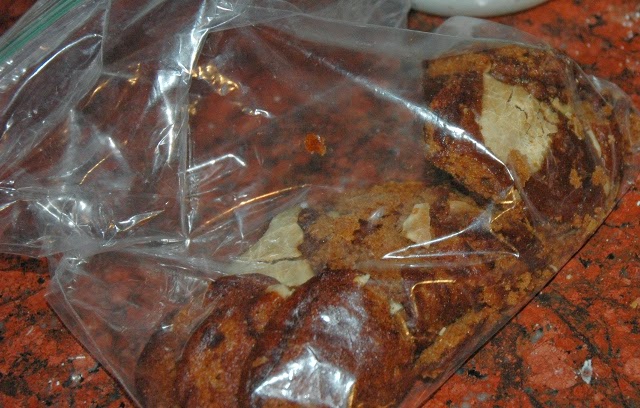
I didn't even try to take an appetizing picture of this here mess.  It was unappetizing to say the least...

So I puzzled and puzzed till my puzzler was sore.  And then I thought of something I hadn't before!  Cheesecake.... Oooooohhh mama...

    I fiddled around online until I found this no-bake cheese cake recipe which I edited to suit the crust.  Yep.  You heard me.  I made a bunch of those lovely cookies into a crust.  They were so moist, all I had to do was crumble them up and cram them into a springform pan! 

Phoenix Cake
15-20 soft ginger cookies crumbled
8 ounces cream cheese
1/3 cup sucanat
1/3 C orange juice
1/2 sour cream
2/3 C powdered sugar
1/2 tsp cinnamon
1/4 tsp cloves

Crumble cookies and press tightly into a greased springform pan.  Mix the rest of the ingredients and pour over crust.  Refrigerate, uncovered at least overnight.  The longer you let it set, the firmer it will get.  You can reduce the juice and powdered sugar down to 2 Tbs of each, but you will lose some of the orange juice flavor.

Top it with a little golden syrup if you like.  I prefer it without.

Review
I love this cheesecake!  It tastes like orange juice with cloves in it.  My favorite Christmas drink.  And I know it's past Christmas, but I thought some of you might have a few cookies laying around... If you like the cookies, you'll like this cake.

Wednesday, December 21, 2011

12 Days Detox

12 Days of cookies was soooo fun!  Thank you all for your following along and leaving me such kind comments!  Whew!  That was a lot of sugar!  Yummy, yummy sugar....  But now it's time to eat something that doesn't make my eyes twitch or float in it's own butter boat.  I thought I'd use some winter vegetables and a throw a little Christmas in there with some chestnuts!

Chestnuts are wonderful in this, but you could substitute hazelnuts.  I'd actually love to get my hands on some chinkapins one day.  Their sweet flesh would be beautiful with the kale.  But there aren't any Christmas songs about chinkapins that I'm aware of...

(Chanterelle mushrooms, kale, shallot, parsnip, chestnuts)

Parsnips are lovely.  If you haven't tried them, they're a little like a carrot.  When they're cooked, they're like a cross between a carrot and a potato.  Fried in a pan, they develop a delicious caramelized crust around the edges and it's just heaven.

I used a combination of chanterelle and yellowfoot mushrooms both of which are at the very end of their season here.

These are yellowfoot.  Yellowfoots?  Yellowfeet...?   Whatever they are in plural form, my forager, David, said that they are related to chanterelles.  They both like living under evergreen trees.  You can really tell when you eat a raw chanterelle.  They're hot and peppery and taste like a pine tree.  Cooked, they mellow out into chewy, earthy bliss.  The yellowfoot have a slight anise flavor raw.  They are smaller, so they cook up much more quickly than the chanterelles.  Very soft, and very similar to a button mushroom in flavor except for the faint taste of anise.  Unlike the chanterelles, I could happily eat these raw.


Pan Fried Parsnips
6 chestnuts shelled and sliced
2 large parsnips
olive oil
6 oz chanterelle and/or yellowfoot mushrooms
1 large shallot
1 bunch of kale
salt and pepper

Shell out your chestnuts and peel off as much of the papery inner layer as you can.  Slice thinly and cook over medium low heat for 3-5 minutes or until the skin begins to flake off.  Remove from pan and remove as much paper as you can.

While the chestnuts are cooking, you'll have time to slice the parsnips to about 1/8-1/4 inch thickness.  Once the chestnuts are done, put about a tablespoon of olive oil in the warm pan and add the parsnips.  Fry on medium-high heat until they soften and begin to caramelize, around 10 minutes for thinner slices.

While the parsnips are cooking, you can peel and slice your shallot and roughly chop the mushrooms.  When parsnips are softened, add mushrooms and shallots.  Cook until the mushrooms and shallots begin to brown (about 10 minutes).

Remove the well cooked parsnips, mushrooms and shallots to a side plate.  If there are any parsnips that aren't thoroughly cooked, leave them in the pan.  Deglaze with a little water or maybe some white wine.  (I didn't have any on hand, but I was wishing I did...) Add kale and steam in the deglazing liquid for a few minutes.  If you like (and I like) you can let the fluid cook away and brown the kale a little.

Stir the parsnips, shallots, and mushrooms back into the kale, salt and pepper to taste, and serve topped with chestnuts. 

Review:
The first time I made this, I only made about half.  Mr. Crackers and I were both really disappointed there wasn't more!  Serve this with rice if you like, I think tonight I'm going to try it with wild rice.  Other things you might try in this are apple, garlic and fresh herbs like thyme or rosemary. 

PS, Do you like that platter?  It's an early Christmas present.  I'm in love...

Friday, December 16, 2011

12 Days of Christmas Cookies: Day 12


     And so, as we draw to a close, what other cookie is more "Christmas" than a decorated sugar cookie?   These are the cookies we always left for Santa.  This is another recipe my Mom gave me out of one of her cookbooks and let me tell you, Martha Stewart ain't got nothin' on this cookie.  I used her recipe once when I thought she was infallible.  Alas, she is.


Grammie's Sugar Cookies
2/3 C shortening (10 T margarine or butter.  I use butter.)
3/4 C sugar
1/2 tsp grated orange peel (squirt of lemon juice)
1/2 tsp vanilla
1 egg
4 tsp milk
2 C sifted flour
1 1/2 tsp baking powder
1/4 tsp salt

Thoroughly cream shortening, sugar, peel and vanilla.  Add egg; beat till light and fluffy.  Stir in milk.  Sift together dry ingredients; blend in creamed mixture.  Divide dough in half and chill 1 hour.

On lightly floured surface, roll 1/8 inch thick.  Cut into desired shapes.  Bake on greased cookie sheet at 375° for 6-8 minutes.  Cool slightly on pan.  Remove to rack to finish cooling.  Decorate.

Yield 2 dozen

Icing:
Well, folks.  I'd like to tell you that there is a super secret recipe that I use for making icing.  There isn't.  It's confectioner's sugar and milk.  A little food coloring.  It uses a GOB of sugar.  I'd say start with 2-4 cups of sugar, add milk 1 Tbs at a time until it's slightly thicker than you want it to be, then divide it out in cups (as many as the colors you want to make) then add food coloring until it's the color you want.  If it's too thick add a little more milk.  If it's too thin, use more sugar.  For a hardcore tutorial on how to ice beautiful cookies, check out Sweet Sugar Belle!  I wish I'd found this before I made these!  I actually frosted all these with a butter knife...  I'm so démodé it's gauche!


Review:
My boys love making and decorating these just like I did when I was a kid.  They have the perfect flavor and texture.  I heard Santa is especially keen on these when they've got sprinkles...  Just a heads up...

Thank you for following this cookie series and a super duper huge THANK YOU to Cara at Fork and Beans for going along with my crazy scheme!  I think some awesome cookies came out of this!  If you haven't been visiting Cara's site because you aren't vegan or gluten free, I encourage you to visit anyway.  She's funny, her food is cute, and goshdarnit she's just a swell gal!

Merry (almost) Christmas Everybody!!

Thursday, December 15, 2011

12 Days of Christmas Cookies: Day 11

I can't believe we're nearly done!


     When I was trying to develop some cookies for this series, one  of the most "traditionally Christmas" things I could think of was mincemeat.  I've never eaten it the traditional traditional way (with actual meat) but Mom always used to make a homemade version using raisins and apples and spices.  We haven't been able to locate her recipe so I tried to wing it with these.  These are super awesome delicious cookies.  They don't taste exactly like mincemeat since I couldn't scratch up any currants and, well, you know how I feel about raisins.  I used golden raisins in this.

Almost Mincemeat Cookies
1 C butter
1 C Sucanat
1/8 tsp ginger
1/8 tsp nutmeg
1/4 tsp cloves
1/2 tsp cinnamon
1 egg
1 C wheat flour
1 C white flour
1/2 C apple, peeled and diced
1 Tbs orange zest
1/4 C chopped golden raisins
1 C walnuts

Cream butter and Sucanat.  Mix in egg until well blended.  Add spices and flour.  Add zest, raisins, apples and walnuts and stir till just blended.  Spoon onto a cookie sheet and press lightly.  (I used a cookie scoop.) Bake at 325° for 10 minutes.

If you can come up with some currants, throw in a handful, the more the merrier!


Review:
These are great!  They are my favorite cookie from the ol' EMUOoMHCIP.  Healthier than the rest of the cookies in this series because of the whole wheat and the Sucanat and more in line with how I like to eat on a regular day.  Go on over to Fork and Beans and see what Cara thought of these!

Wednesday, December 14, 2011

12 Days of Christmas Cookies: Day 10


     Yet another cookie from the early days of my marriage.  I don't really know what possessed me to buy a persimmon.  If I found this recipe first, or if I bought one and didn't know what to do with it, but this is the only thing I've ever done with a persimmon and probably the only thing I ever will do with one.  I found the recipe on the net.

      If you get your hands on an unripe persimmon, it may be the most wrongest (that's an expression, right?) food encounter you will ever have.  They are so sour they will suck the enamel right off your teeth.  Persimmons need to be almost melting before they're ripe.  They are very sweet and juicy then, but still leave a weird dry aftertaste.  These cookies can be made with ripe or unripe persimmons as I have made it many times in the past and only ever used ripe ones this year by virtue of the fact that they sat on my counter long enough to actually ripen...  The secret is combining the persimmon and baking soda first before incorporating the persimmon into the dough.  The baking soda neutralizes the "wrongness..."  That's the official scientific explanation, anyway.

     At any rate, these cookies are cakey and moist and nobody will ever guess there's a sour ol' persimmon in there!

Persimmon Cookies
1 C sugar
1/2 C margarine
1/2 C brown sugar
2 C flour
1 tsp baking soda
1 tsp baking powder
1/4 tsp salt
1/2 tsp nutmeg
1/2 tsp cinnamon
1 C persimmon pulp
1 egg beaten
1 tsp vanilla
1 C raisins or dates (I used dates)
1 C nuts
Cream butter and sugars.  Add other ingredients.  Drop cookies by spoonful on greased or foil-lined cookie sheet.   Bake at 350° for 10-12 minutes. 
Makes 8 dozen

Review:
Yet another cookie that makes a ton and is worth the effort!  Cara at Fork and Beans is still plugging along over there with her gluten free and vegan cookies!  Go and check this one out!

Tuesday, December 13, 2011

12 Days of Christmas Cookies: Day 9


     Let's talk about eggnog shall we?  First of all, my three year old calls it "Ed Nok" and that's just too cute.  Second of all, I love it.  Anybody who says otherwise is just wrong.  Thirdly, I've never had any with alcohol in it.  Not that that has anything to do with this post, I just haven't.  As an Ode to Eggnog, Christmas drink of the gods, I thought I'd make a cookie.  This is another of my EMUOoMHCIP experiments.  And it turns out, the dough was perfect for a cookie press!


Eggnog Cookie Press Cookies

1/2 C butter
1 C sugar
1/2 C eggnog
2 C flour
1 Tbs sugar
1/8 tsp nutmeg
cinnamon chips (optional)

Cream butter and sugar.  Add eggnog and mix till well blended.  Mix in flour until well blended.  Put in the cookie press and squish out whatever shape you want.  Combine sugar and nutmeg and finely dust over pressed cookies.  Bake at 325° for about 12 minutes.  I put cinnamon chips on some of the flour shaped cookies, but they are unnecessary.

Notes:
  • Once the cookie sheets are hot, it will be hard to get the cookies to release from the press.  You have to wait for the sheets to cool completely before you can use the press again.
  •  I used eggnog from a local dairy (Twin Brook Creamery) so I know there's no high fructose corn syrup or other junk in it.  If you buy another brand, your results may be different just judging by the "extra ingredients."  If you wanted to get serious about it, you could even make your own eggnog!
Review:
I always like the idea of cookie press cookies, but never really like the outcome of cookie press cookies.  These actually taste much better than standard cookie press dough.  The cookies are softer, though the texture is a little weird.  Maybe they need more butter.  Everything is better with more butter.  Me and Paula Deen are simpatico on this...  Anyway, they're pretty and my boys like them and they're fun to squoosh. 

Cara at Fork and Beans made some darling little snowmen with her gluten free and vegan version of this recipe, go look!

Monday, December 12, 2011

12 Days of Christmas Cookies: Day 8


     This is another cookie I've been making for ages.  Another from my husband and I's first Christmas, in fact.  This one came off a box of Amport Dates.  I don't know what else to say about them other than they're probably one of the first cookies I ever made as a wife.  At the time, I could make biscuits, macaroni and cheese, fried eggs, and frozen dinners.  They're so easy even a newlywed can do it!  They freeze and ship great, too.


Oatmeal Date Cookies
12 Tbs (1-1/2 sticks) butter
1/2 C granulated sugar
1 C brown sugar
1 egg
2 Tbs water
1 tsp vanilla extract
2/3 C unbleached all-purpose flour
1 tsp. ground cinnamon
1/2 tsp salt
1/2 tsp baking soda
3 C quick cook oats
8 oz Amport chopped dates

Preheat oven to 350°.  Grease two cookie sheets

Cream butter and both sugars until fluffy.  Add egg and beat thoroughly.  Mix in water and vanilla

Sift together flour, cinnamon, salt and baking soda; add to the egg mixture and mix well.  Add oats and dates and mix.

Form large cookies on prepared cookie sheets.  Bake for 15 to 17 minutes, until edges are done but centers are still soft.  Remove to a rack and cool.

Yield 25-30 large cookies


Review:
     These cookies are crunchy and just basically good all over.  Like an oatmeal raisin cookie without the icky raisins.  They're the reason I buy Amport dates every year.  If you don't want to search everywhere for them, it's the dates that have been chopped up and processed into little "logs" and covered with oat flour.  You can get them in bulk bins at your grocery store sometimes.  Throw in a handful of walnuts or pecans if you like.  We all need a few nuts in our lives!  Speaking of whom, check out my buddy Cara at Fork and Beans!  She's been doing a fantastic job converting these recipes for all our vegan and gluten free friends out there. 

Sunday, December 11, 2011

Terra Madre Day Misfire...

     Well, yesterday was international Terra Madre day. And I missed it. Like a giant dork. What? You've never heard of Terra Madre? What sort of uncultured swine are you?! Sheesh. It takes all sorts, I guess.  (Don't worry you're no more uncultured than I am for missing it entirely...) Terra Madre day is basically a day celebrating the local food of your area. It goes hand in hand with the Slow Food movement. It's a day to be aware of where your food comes from and to try to buy as local as possible.

     A lot of the slow food movement is based in the green movement. Concerns about greenhouse gases caused by shipping foods long distances and packaging waste force a lot of people into "slow" thinking.

     Frankly, I don't really care about that. I think that food that was picked closer to home is healthier. A flavorless tomato grown in a hot house sitting on a shelf for a week losing all its nutrition just doesn't do it for me. Especially when I can get in-season beauties at my farmer's market that are so good I won't even consider buying a tomato in the store out of season. (A bone of contention in this house on more than one occasion, I must say. "Why don't we ever have tomatoes?" "When those store bought things start tasting like tomatoes I'll buy them!  It's not my fault they never do!")

     My other big reason for shopping locally is that it supports local farmers. I grew up in a rural area of NC.

 It's pretty, right?

 This is the house I grew up in.  My Dad lived here growing up.  My Grandmother grew up here.  Deep roots.

      Almost everyone there farmed. My cousin ran a dairy. Until he could no longer make money at it, had to shut down his farm and get a job in town. Most of the food producing farmers had already preceded him. If anyone farms the area I grew up in now, it's Christmas trees.


     I love Christmas trees. I'm a Christmas tree snob now because of the quality of tree produced there, but the point is that you can't eat a Christmas tree. I think it's simultaneously sad and terrifying that so few people grow the food we eat in this country. Gone are the backyard gardens.


     Show of hands, now.  How many of you knew that potatoes make leaves? And flowers!  We're all friends here, no embarrassment.  Green grass fields which once fed cattle are slowly being overgrown with weeds or bulldozed to erect McMansions. Frankly, it makes me a little sick to think what would happen in this country if we ended up in a Great Depression scenario. At least people in the 1930's knew how to grow their own food. I'm including myself, here. I have veeeeery limited experience when it comes to farming.  So limited in fact, I've never... actually... farmed...  If something drastic happened, we'd be in the soup line with the rest of you poor sots. And so, I support local farmers. They are heroes in my eyes.  Keepers of history.  This is one of the times when I put my money where my mouth is.  I think more people should farm and I think those of us who don't should support the few who do.
Don't even get me started on Monsanto.

So after all that ranting and holier-than-thouing would you like to know what I did for Terra Madre Day?

Yep.  Went and bought a Christmas Tree.  

Support your local farmer!

Friday, December 9, 2011

12 Days of Christmas Cookies: Day 7

     I love Russian Tea.  Black tea with orange juice and spices.  It reminds me of Christmas mornings on the couch with Mom before the sun came up.   She was always too excited to sleep (I know, right?) so she would wait on the couch for the first kid who woke up.  Whoever it was (me, mostly) got to drink a hot drink and watch the Christmas lights in the dark with Mom until it was a decent hour or she got tired of waiting whichever came first.  Usually the latter.  We opened a lot of presents in the dark...  Sometimes we drank hot chocolate, sometimes hot orange juice with cloves (holy smacks it's good), or sometimes Russian tea.  I really wanted to try to capture the flavor of tea in a cookie.  


     And thus, I embarked upon my first Entirely-Made-Up-Out-of-My-Head Cookie Invention Project... (Also known as the EMUOoMHCIP.  After all, we learned in Kidnergarten that all good things start with emu.  Wait... that's not right...)  I knew I wanted to use a shortbread cookie as a base because they're so simple and light, I thought it would show off the flavor of the tea nicely.  I researched a little on how to get the flavor of tea into baked goods and ran across this technique on  Cupcake Project.  Essentially, you boil loose tea in butter until the tea releases its color then you strain it through a fine mesh strainer or cheese cloth and then let the butter set back up.  Pretty simple.  So here we go!
Russian Tea Cookies

1 C unsalted butter
1 Tbs loose black tea leaves
1/2 C sugar
1 1/2 C flour
1 Tbs orange zest
1/4 tsp cinnamon
1/8 tsp cloves

Boil butter with tea leaves for a minute or two until leaves change the color of the tea.  Strain butter through strainer.  Push out as much butter from the tea as you can.  Put the butter in the fridge until it just sets.

When it has set, cream butter and sugar.  Add flour, zest, and spices and mix completely.  Roll into balls and bake at 325° for 10 minutes.

Review:
Pretty darn good if I do say so myself!  The flavor of the orange zest comes through really well.  You could boil the tea a little longer in the butter if you wanted a stronger tea flavor.  They're better on the second day when they've cooled completely.  I am extremely proud of these.  The EMUOoMHCIP also yielded two other cookie recipes that I'll be sharing next week as the 12 Days of Christmas Cookies continues!  To find out how Cara at Fork and Beans fared with these, go check out her post!

Thursday, December 8, 2011

12 Days of Christmas Cookies: Day 6

I mention my friend Susan on this blog pretty regularly. She has given me a lot of recipes. And she is the Queen of Cookies. Like hardcore.  She makes 20 batches at the same time and when she's finished her kitchen is spotless.  I can barely manage one at a time and when I'm done the health inspector would have a conniption in my kitchen.  This year, she's making all her cookies with a broken hand.  Yep.  Even one handed she's getting more stuff done than I am...  Susan gave me this recipe and it is great.  Thanks, Suz!  You're an inspiration!


Susan's Chocolate Peanut Butter Squares
1 1/2 C peanut butter
1 stick butter, melted
1 t vanilla
2 C powdered sugar
2 C crushed graham crackers
1 bag semi-sweet chips, melted

Mix peanut butter, butter, vanilla, sugar, and crackers. Press into a 9X13 inch pan.  Pour chocolate over pan. Refrigerate 2+ hours.

Go now and check out my bloggy buddy Cara's (who also just broke her hand) gluten free and vegan post on Fork and Beans and tell her how sorry you are for her poor ol' broken hand!  And then get the heck out of here, because apparently, knowing me will somehow get your hand broken!

Wednesday, December 7, 2011

12 Days of Christmas Cookies: Day 5


     When I turned 12, some old friends of my family gave me cookie stamps.  Let me tell you something.  I loved those people, but they might as well have given me a bonnet.  I thought the stamps were neat, but old fashioned and too mature for me.  And well, I just wasn't that impressed.  They got put away for when I was older.  I don't know how I came to dig them out of storage, but some time after I got married they came into my possession again.  I remembered Bob and Laura's thoughtfulness and by then they had both passed away, so it was with no small amount of nostalgia that I packed them up. They followed me through a couple of moves until I finally decided it was time to dust them off.  Around that same time, I happened upon a recipe for cookie stamp shortbread in Country Sampler magazine (Oct/Nov 2000 p. 37).  I'm so glad I finally used them!  Now when I make these I feel very mature and grown up.  Like a 6 year old wearing her Mother's shoes.  Or a 12 year old wearing a bonnet making shortbread cookies!  Plus, it makes one stinkin' good cookie.

Cookie Stamp Shortbread
1 1/2 C butter
3/4 C sugar
3 1/2 C flour
Cream butter and sugar thoroughly.  Add flour gradually, 1 C at a time.  Mix until well blended; do not over mix.  Roll into one-inch balls and place on un-greased cookie sheet..  Stamp with warm cookie stamp.  (Warm by preheating in oven; keep warm by placing near oven vent)  Bake at 325° for 15-20 minutes.

Yield 5 dz.

Tips:
  • My oven isn't under my cook-top so I just put the stamps back in the oven for a few seconds to heat them up again.  
  • Be sure to use extremely fresh ingredients in these, they have a very delicate flavor so every ingredient counts.
  • Find some lovely handmade in the USA cookie stamps here: http://www.cookiestamp.com/
Review:
The perfect shortbead cookie.  Even if you don't have a stamp, this is just wonderful.  As shortbreads, they are fragile so they don't mail very well, but freeze just fine. 

Don't forget to head on over to Fork and Beans to check out Cara's vegan/gluten free version of these!

Tuesday, December 6, 2011

12 Days of Christmas Cookies: Day 4


Let me tell you something.  You haven't lived until you've eaten these.  They are a gigantic pain in the Jingle Bells to make, but they are so very, very worth it.  This is one of the first cookies I ever looked up on the internet waaaay back in the dark ages when there was still a browser called "Netscape" and everyone you knew was getting their e-mail from this thing called "America Online" and only rich people had cellphones and no matter how rich you were, all your phone did was make phone calls.  So the URL I have for it is an ancient AOL member address.  This is one of those recipes that's listed everywhere now, but 1999 AOL Member, "Chettoron," a huge Thank You! for changing my life all those years ago!  (Excuse me, I have to go soak my dentures now...)

Soft Ginger Cookies with Orange Glaze
 Cookies:
1 C buttermilk
2 tsp baking soda
3/4 C oil
1 C sugar
1 C dark molasses
2 eggs
3 3/4 C flour
1 tsp. salt
2 tsp. cinnamon
1 tsp. ginger
1 tsp. nutmeg
1/2 tsp. allspice
1/2 tsp. ground cloves

In a small bowl, combine buttermilk and baking soda and set aside.  They will foam up.  In a larger bowl combine oil, sugar, molasses and eggs and beat until well mixed (about 1 minute).  Add the milk misxture and blend.  Sift dry ingredients.  Slowly add dry ingredients to wet mixture.  Let stand 15 minutes.  Preheat oven to 325.  Spoon onto oiled cookie sheet.  Bake 8-9 minutes til top springs back.  DO NOT OVER BAKE.  The cookies should be quite soft.  While cookies are baking, combine glaze ingredients.

Glaze:
2 C + 1 Tbs. confectioner's sugar
1 Tbs. butter (very soft)
1/4 C orange juice
2 tsp. grated orange zest
1/2 tsp. vanilla
dash salt

Remove cookies to wax paper lined cooling rack.  Frost while still warm with 1/2 tsp. glaze per cookie.  Let cool completely.  Transfer to trays and place in freezer.  Once frozen, pack in tins in single layers separated by wax paper.  These freeze well.

Review:
Soft, cakey, put 20 in your mouth at once kind of cookies.  It makes a heap so the effort is well worth it in the end and they do freeze beautifully.

And speaking of beauty, go check out the lovely Cara at Fork and Beans!  She's kicking major Jingle Bells over there with all her gluten free vegan conversions!

Monday, December 5, 2011

12 Days of Christmas Cookies: Day 3


   You've may have seen them before.  You may have eaten them before.  But if you've never made them from scratch, you don't know what you're missing.  They are, indeed, Snickerdoodles.  I got this recipe from Mom who got it from one of her cookbooks.  Behold now, as I launch into a rambling soliloquy on how these were one of the many highlights of my childhood.  And how the smell of these baking brings me back to the balmy, glided afternoons of my youth.  About cherished memories of my brother and I rolling dough and dusting sugar.  And dewy mornings spent prancing barefoot through fields of flowers toward herds of wild snickerdoodles... Ahhh... Wild snickerdoodles... *sigh...*

I wasn't kidding about the rambling...  

These are yummy.  You will like them.

Snickerdoodles
1 C butter
1 1/2 C sugar + 2 T
2 eggs
2 3/4 C flour
2 t cream of tarter
1 t baking soda
1/4 t salt
2 t cinnamon

Cream butter, 1 1/2 C sugar and eggs till fluffy.  Combine flour, cream of tarter, baking soda, and salt in a separate bowl, and slowly add to creamed mixture till well blended.  Wrap dough in plastic wrap and store in the fridge for 30 minutes.  Combine cinnamon and remaining 2 T sugar in a small dish or plate.  Divide the dough into balls and roll in sugar mix.  Bake 12-15 minutes at 375°.


Review:
They're crispy.  They're chewy (if you eat them while they're still hot).  They're happiness on a plate.  They freeze well too, so make them early if you need to!  My boys loved helping with these so they're great for a family project.  If you happen upon a wild herd, approach carefully and bring a net.  Snickerdooleus yummifera can be pretty wily... Fortunately, the domesticated version here (Snikerdooleus getinmahbelliana), is pretty darn docile...

Now quick!  Rush over and visit Cara at Fork and Beans for her vegan gluten free version! (Get out of here while you still can...)

Friday, December 2, 2011

12 Days of Christmas Cookies: Day 2


This is a kolache.  It's pronounced Ko-Lahtch-Key.   It is awesome.  Like beyond awesome.  And you cover it with sugar until it looks like snow!  Traditionally, you would use apricot jam, but strawberry or raspberry make it so pretty for Christmas.  I used the tayberry I bought from Blue Cottage Jams.  And if you don't care what color it is, blackberry is great, too.  Basically, put jam on it.  It'll make you happy.

Jam Kolaches
1/2 C butter, softened
1 sm package ( 3oz) cream cheese, softened
1 1/4 C flour
1/4 C strawberry (or other) jam
1/4 C confectioner's sugar

Cream butter and cheese in a medium bowl.  Beat until fluffy.  Add flour, then mix well. Roll dough to 1/8 inch thickness on lightly floured surface.  Cut with 2 inch round cutter.  Place 2 inches apart on lightly greased cookie sheet.  Spoon 1/4 tsp jam on each cookie.  Fold opposite sides together.  Bake at 375° for 15 minutes.  Cool completely on wire racks and sprinkle with confectioner's sugar.
Yield about 2 dozen

Tips:  
  • I used a square fondant cutter to cut the shapes, but you can use a round biscuit cutter or even a glass if it's all you have.
  • If you're having trouble getting the sides to stick together, a little water or milk applied by fingertip should do the trick.

Review:
These are crispy and melty and light.  Not too sweet.  You will wonder where they have been all your life.  Just ask Cara at Fork and Beans!  She has made a gluten-free vegan version for our joint venture.  Go and see it!

UPDATE!!
Hi guys!  We're doing the 12 Days of Christmas again this year!  Check it out!

Thursday, December 1, 2011

New Series! The Twelve Days of Christmas Cookies!!

     I am so excited to introduce you guys to Cara Reed from forkandbeans.  She's vegan and gluten free and she might be the most fun blogger on the planet.  Just sayin'.  She has agreed to help me with a little project I dreamed up for all you gluten free readers out there...  As you all know, it's December and as you all also know, Christmas is coming up in just a few days.  I thought it would be fun to do 12 Days of Christmas Cookies, but I felt sorry for all you guys.  I've got several friends who eat gluten free either because of celiac disease or for other health reasons.  So I asked Cara if she'd be willing to convert my recipes!  Every day til December 16, I'll be sharing a new cookie with you and Cara will post her gluten free version! 


     This first one is sort of a cookie in shape only, but it's one I've loved since childhood.  As a kid they were called "Peanut Butter Delights."  In college a friend said she called them "Preacher's Cookies."  The recipe I found online called them "No Bake Peanut Butter Cookies."  I've seen lots of versions of the name usually involving some sort of animal poo reference (Really?  Why would I want to eat something called a "Cow Flop?"  I grew up with cows.  Believe me.  You don't want to eat that...)  Anyways, whatever you call them, they are wonderful.

No Bake Peanut Butter Cookies
2 C sugar
1/4 C unsweetened cocoa powder (or 1 handful of semi-sweet chocolate chips)
1/2 C milk
1/2 C margarine
1 tsp vanilla
pinch salt
1/2 C chunky peanut butter
3 C quick cook oats

In a saucepan over medium heat, combine sugar, cocoa, milk, and margarine.  Bring to a boil, stirring occasionally.  Boil for 1 minute.  Then, remove from heat and stir in remaining ingredients.  Drop by rounded spoonful onto waxed paper.  Allow cookies to cool at least 1 hour.  Store in an airtight container.

Review:
If you've ever had these, you know how good they are.  If you haven't, they are delightful!  And so easy to make, you probably have everything you need to make them right now.  Go and do it!!

But first, Check Out Cara's Vegan & Gluten Free Version!
Related Posts Plugin for WordPress, Blogger...